Spore prints are one of mycology’s most underrated tools. Many people encounter them as decorative artwork, pressed onto paper and sold as wall pieces. But what are spore prints in a practical sense? They are visible deposits of millions of microscopic fungal spores, released naturally from the underside of a mushroom cap onto a surface below. That deposited pattern reveals the spore colour “in mass,” which is one of the first and most telling clues in both mushroom identification and cultivation work. This guide covers everything from making your first print to understanding how it fits into a full mycological workflow.
Table of Contents
- Key takeaways
- What spore prints are and why they matter
- How to make a spore print
- Reading spore prints for identification
- Spore prints in cultivation and microscopy
- Storing prints and understanding transfer workflows
- My honest take on spore prints
- Ready to take your mycology further?
- FAQ
Key takeaways
| Point | Details |
|---|---|
| Spore prints show spore colour | The deposited pattern reveals spore colour at scale, which aids early group identification. |
| Contrasting surfaces matter | Using split black and white paper prevents spores disappearing against a matching background. |
| One clue among many | Spore colour alone cannot confirm species; combine it with cap shape, gills, smell, and habitat. |
| Prints feed cultivation workflows | Spore prints are a practical, non-destructive source for inoculants, agar transfers, and syringes. |
| Preservation extends usefulness | Stored correctly in sealed, cool, and dry conditions, a spore print remains viable for years. |
What spore prints are and why they matter
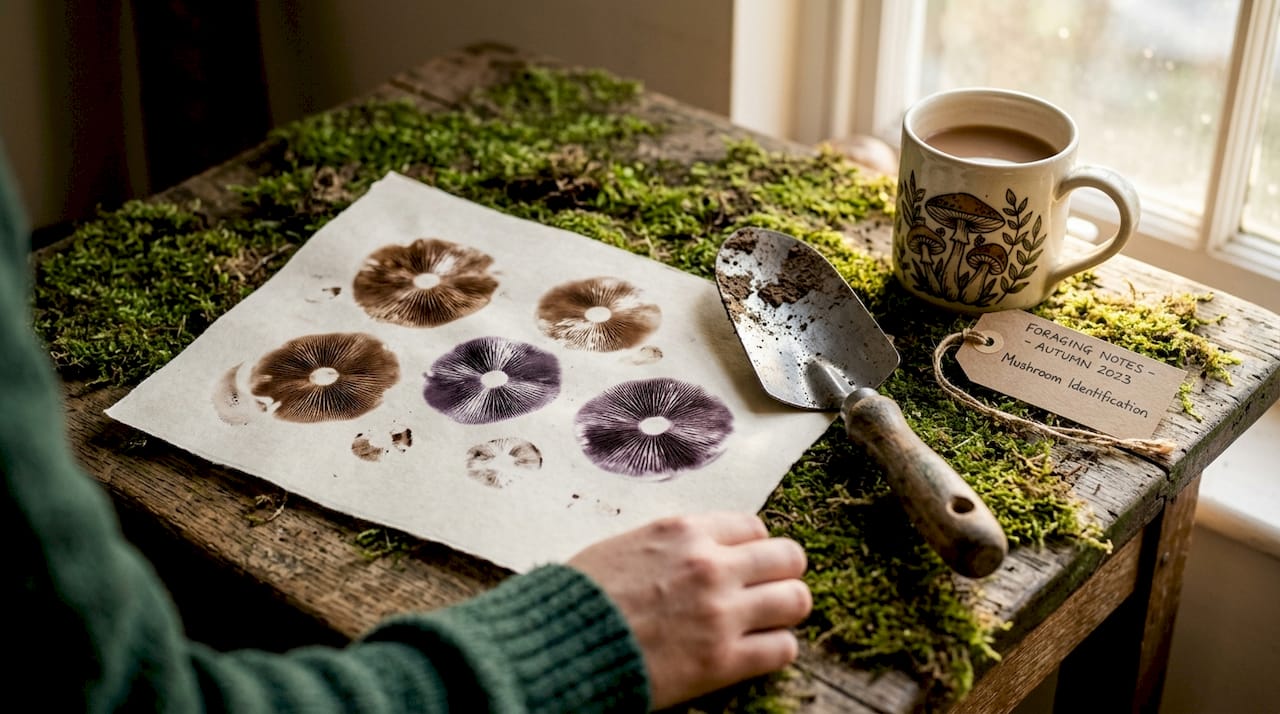
A spore print is the visible deposit of spores released from the underside of a mushroom cap onto a surface. Individual spores are far too small to see with the naked eye, but when millions accumulate together, they create a visible, coloured pattern that mirrors the gill, pore, or tooth structure that produced them.
That pattern is genuinely useful. Spore colour “in mass” is a recognised diagnostic feature in mycology, helping you narrow down which broad group a specimen belongs to before you even reach for a field guide. White spores, for example, point towards certain genera, while dark purple-brown spores are characteristic of others. The colour alone will not give you a species name, but it immediately rules out large portions of the fungal catalogue.
What makes spore prints particularly accessible is the equipment required. You need a mushroom cap, a sheet of paper or glass, and a few hours. That simplicity is the point. The print also creates a bridge to microscopy by concentrating spores in one place, ready for a slide preparation when you want to examine shape and surface ornamentation at higher magnification.
Here is what a well-made spore print can tell you:
- Spore colour at deposit scale, which differs from the colour of a single spore under a lens
- The structural pattern of the spore-bearing surface, whether gills, pores, or another arrangement
- Approximate spore density, which can indicate how mature the specimen was when collected
- An initial separation point between otherwise similar-looking species with different spore colours
Spore prints do have limits. They cannot confirm species on their own, and the colour can shift slightly depending on the paper surface, moisture, and lighting. Treat the print as one strong piece of evidence that you combine with other observations.
How to make a spore print
Getting a clean, readable print comes down to preparation and patience. Rushing either step produces a faint, smeared, or incomplete deposit that tells you very little. Follow this workflow for consistent results.
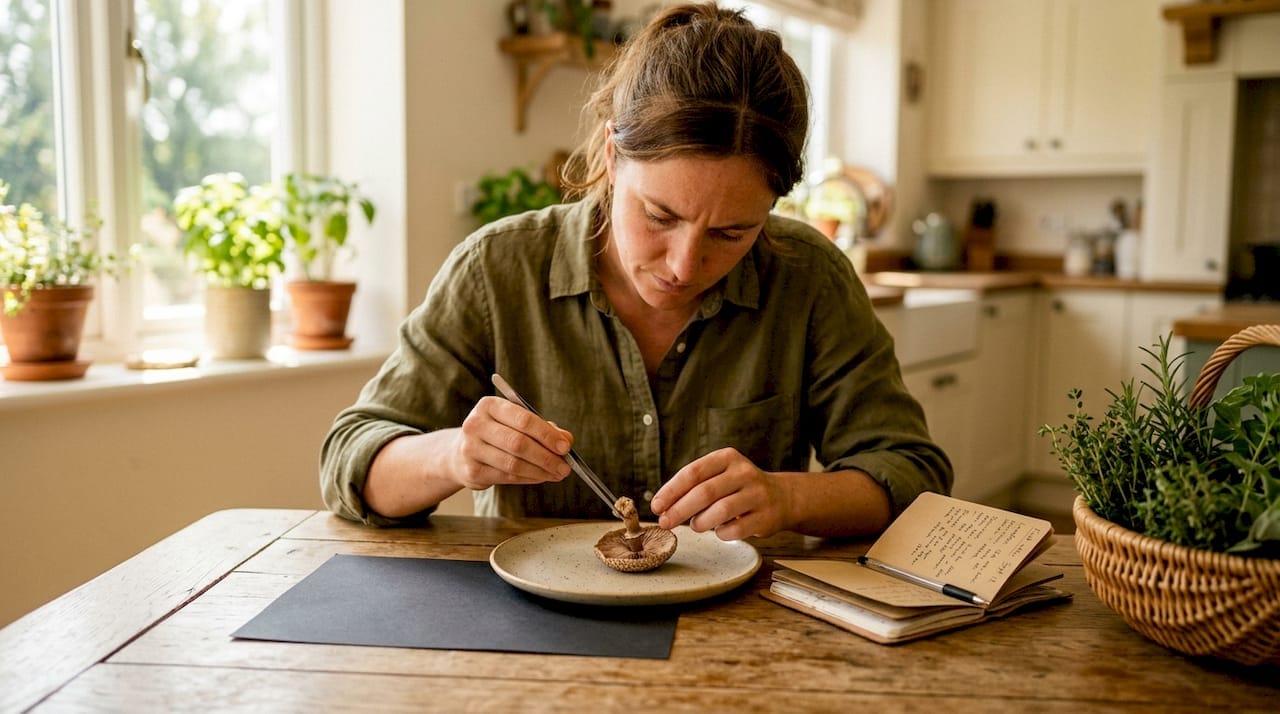
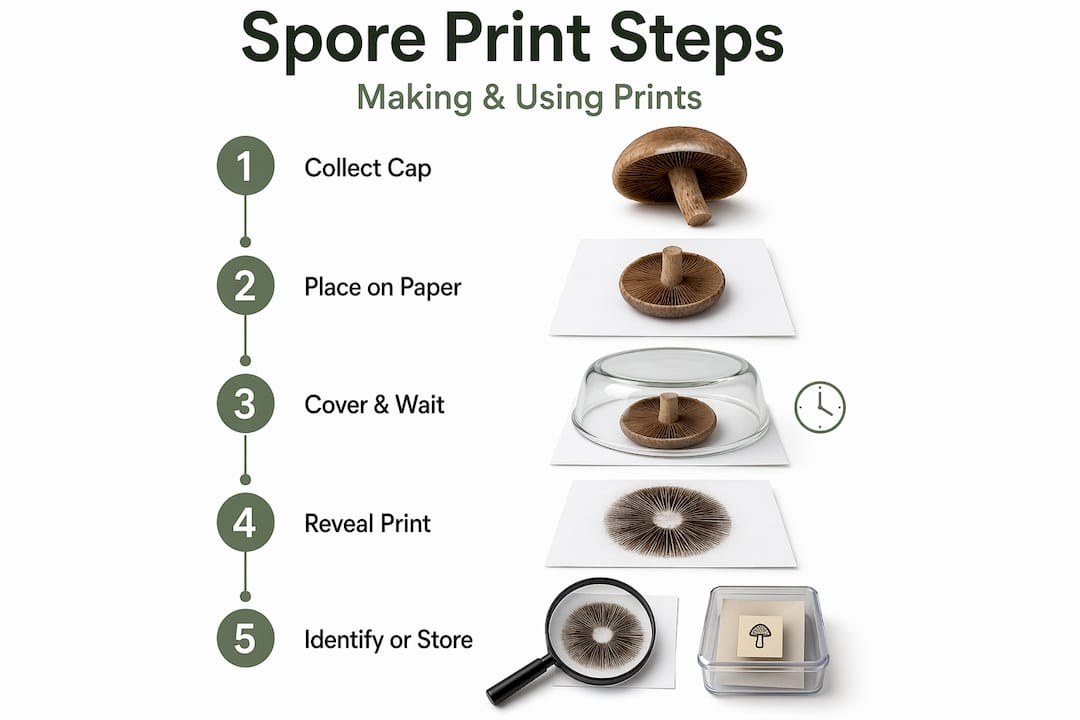
- Select a mature cap. Choose a mushroom that has fully opened. The veil, if present, should have broken to expose the gills or pore surface. Under-mature caps release very few spores and produce weak prints.
- Prepare a contrasting surface. Split black and white paper is the most practical choice. White spores vanish on white paper and dark spores disappear on black, so a divided sheet covers both possibilities without knowing the colour in advance. Glass or foil also work for certain preservation methods.
- Remove the stem. Cut or twist the stem cleanly at the base of the cap so the spore surface lies flat against the paper.
- Place the cap spore-side down. Centre it on the paper and cover the entire setup with a bowl or container. This is not just to keep the cap in place. Covering it reduces air movement, which is the single biggest cause of scattered, blurred prints.
- Wait four to twelve hours. Overnight is the most reliable window. Some very mature specimens deposit in two to three hours, but giving the process more time produces a denser, more legible pattern.
- Lift the cap carefully. Slide it sideways rather than lifting straight up to avoid smearing the outer edge of the print.
- Allow the print to dry fully before handling or storing it. A damp print smears immediately.
Pro Tip: If you are working with a species that produces white or very pale spores, place the cap on black paper or a dark glass slide first. Pale spores on white paper are almost impossible to read even when the deposit is heavy.
Most spore print patterns mirror the gill or pore arrangement exactly, which means you often get starbursts, radiating fans, or concentric circles depending on the species. These visual patterns are not just diagnostic. They are also genuinely striking, which is why spore prints have an independent following in botanical art.
Reading spore prints for identification
Spore print colour is one of the most reliable early filters in mushroom identification, but it works best when you already know what it is telling you. Here is a reference overview of common spore print colours and what they suggest.
| Spore print colour | Common genera or groups | Notes |
|---|---|---|
| White or cream | Amanita, Russula, Lactarius | Includes both edible and deadly species |
| Pink or salmon | Pluteus, Entoloma | Angular spore shapes in Entoloma visible under microscopy |
| Rusty brown | Cortinarius, Pholiota | Fibrous veils often present on cap or stem |
| Purple-brown to black | Agaricus, Psilocybe, Panaeolus | Widely varying species within this colour range |
| Yellow-brown | Boletes (many), Gymnopilus | Pore rather than gill structure typical |
| Black | Coprinus and related ink caps | Auto-digesting gills in many species |
Once you have the colour, combine it with everything else you observed in the field. Spore print colour alone cannot confirm full mushroom species. The additional features that sharpen your identification include:
- Cap shape and surface texture, whether convex, umbonate, viscid, or dry
- Gill attachment, such as free, adnate, decurrent, or sinuate
- Bruising reactions, particularly blue bruising which is significant in some groups
- Odour, which can distinguish species within the same colour category
- Habitat and substrate, whether growing from soil, wood, dung, or leaf litter
For species that sit within the same colour band but are otherwise difficult to separate, spore shapes under microscopy add another layer of precision. Ornamented spores, angular spores, and amyloid reactions observed with reagents can separate closely related species that look near-identical in the field and produce similar print colours.
Spore prints in cultivation and microscopy
Beyond identification, spore prints have a very practical role in mushroom cultivation. They are a safe, simple way to collect spores without damaging the original specimen, and they can be processed in several ways depending on what you need.
The most common cultivation applications include:
- Spore syringe preparation. Scraping spores from a dried print into sterile water creates a spore suspension ready for inoculating grain, agar, or liquid culture. This is a standard step in the spore to grain transfer workflow used by home cultivators.
- Direct agar inoculation. A small fragment of the print can be placed directly onto an agar plate for germination, allowing you to observe mycelial growth and spot contamination early. See using prints on agar for a detailed walkthrough of this process.
- Microscopy slide preparation. Spores from the print are placed onto a glass slide, sometimes with a mounting medium, and examined under high magnification to study shape, size, and surface detail.
- Strain selection and preservation. Experienced growers use multiple prints from different specimens of the same species to compare characteristics and select the most vigorous strains for future cultivation.
Pro Tip: When preparing a spore syringe from a print, work inside a still-air box or in front of a flow hood. Even a brief exposure to moving air introduces contamination that can ruin an entire grain jar several weeks later.
Using spore prints for microscopy gives you concentrated, repeatable samples that you can return to again and again from a single well-preserved print. That repeatability is one reason experienced mycologists collect and archive prints from every specimen they study, even species they can already identify visually.
Storing prints and understanding transfer workflows
A spore print you cannot return to later is a wasted opportunity. Proper spore print preservation steps are straightforward, but skipping them leads to degraded viability and contamination.
Follow this process for reliable long-term storage:
- Allow the print to dry completely at room temperature for several hours after collection. Any residual moisture promotes mould growth inside the storage container.
- Fold or place the print in a clean, sealable bag. A zip-lock freezer bag with as much air expelled as possible works well. Some mycologists add a small silica gel packet to manage humidity.
- Label the bag clearly with species name, collection date, location, and print colour. Labels fade from memory far faster than you expect.
- Store in a cool, dark place. A refrigerator at around 4°C is ideal for medium-term storage. For long-term archival, some cultivators use a freezer, although spore viability varies by species.
- Minimise opening and resealing. Every time you expose the print to air, you introduce potential contaminants. Prepare your working material from the print in a single sterile session where possible.
For spore print transfer workflows involving grain or agar, sterile technique is non-negotiable. Effective spore to grain transfer requires sterile conditions and careful timing to maintain spore viability and reduce the risk of contamination.
On the legal side, spore prints and spore syringes occupy different legal positions depending on jurisdiction and intended use. In the UK, spore prints of many species are legal to possess and study provided there is no intent to germinate controlled substances. Sporebuddies provides a clear UK legal guide on this topic. Always check current local regulations before purchasing or working with any spores, particularly those from species that contain controlled compounds.
Ready to take your mycology further?
Sporebuddies stocks everything you need to move from reading about spore prints to making them properly. Whether you are starting with your first identification project or building out a cultivation setup, the range covers you at every stage.
Browse quality spore syringes prepared under sterile conditions and ready for microscopy or grain inoculation. Explore complete grow kits for species like oyster, shiitake, and lion’s mane if you want reliable results without sourcing individual supplies. The Sporebuddies mycology equipment range also includes agar plates, microscopes, and sterilised substrates to support every step from initial print to final harvest.
The educational guides on the Sporebuddies blog cover contamination prevention, substrate preparation, and spore microscopy in plain language, whether you are just starting or refining techniques you have been using for a while.
FAQ
What is a spore print in mycology?
A spore print is the visible deposit of microscopic fungal spores released from the underside of a mushroom cap onto a surface below. The resulting pattern and colour provide diagnostic information used in identification and cultivation.
How long does making a spore print take?
Most caps need four to twelve hours to deposit a readable print, with overnight being the most reliable timeframe. Covering the cap during this period reduces air movement and produces a cleaner result.
Can a spore print identify a mushroom on its own?
No. Spore print colour is one identification clue among many and must be combined with cap shape, gill attachment, odour, habitat, and other features for an accurate identification.
How do you preserve a spore print for future use?
Allow the print to dry fully, place it in a sealed bag with a silica gel packet, label it clearly, and store it in a cool, dark location such as a refrigerator. Properly stored prints can remain viable for several years.
What is the spore print transfer workflow for cultivation?
The standard spore print transfer workflow involves scraping dried spores into sterile water to create a spore syringe, then inoculating grain jars or agar plates under sterile conditions. Sterile technique throughout the process is critical for reducing contamination.