
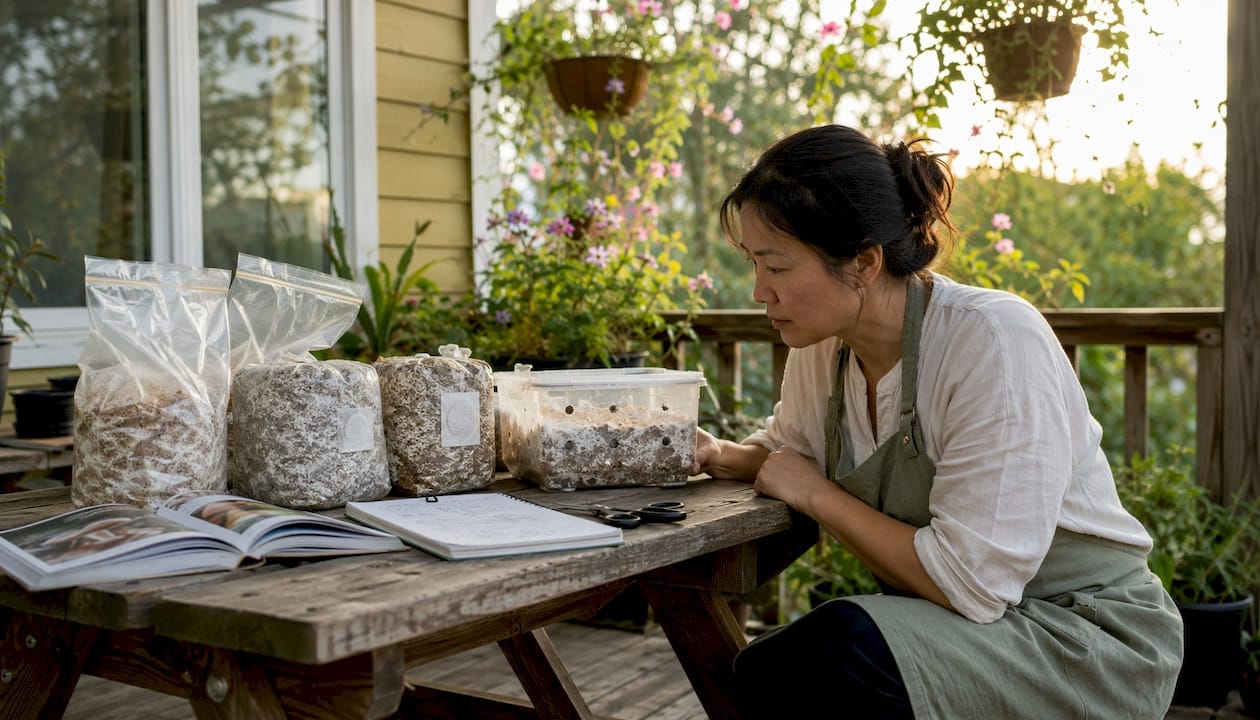
For most home growers in the UK, a ready-made grow kit or a monotub is the best place to start. Kits remove the sterilisation guesswork entirely, while monotubs offer a step up in yield once you have the basics down. Here is what you need to know before you spend a penny.
- Best first choice: A mushroom grow kit occupies roughly the footprint of a shoebox and requires no specialist equipment.
- When to move to a monotub: Once you are comfortable with sterile technique, a single monotub can produce a high yield of fresh mushrooms per flush across multiple flushes.
- When bags beat a monotub: Grow bags suit lion’s mane and shiitake better than a monotub because those species prefer a more enclosed fruiting environment with less surface exposure.
- The single skill that matters most: Clean inoculation technique, ideally using a Still Air Box (SAB), reduces contamination risk more than any container upgrade.
- Sporebuddies stocks grow kits, grow bags, and sterilised substrates suited to every stage described in this guide.
Table of Contents
- Why does container choice affect your harvest?
- What are the main types of mushroom growing containers?
- How do you choose the right container for your goals?
- What setup and contamination steps apply to every container?
- What does the research say about kits first and container farms?
- Key takeaways
- Ready to grow? Here is where to start with Sporebuddies
- Useful sources
- FAQ
Why does container choice affect your harvest?
The container you choose shapes three things directly: how well you can control humidity and fresh air exchange (FAE), how easy it is to maintain sterility, and how far you can scale without rebuilding your whole setup.
A sealable grow bag, for instance, keeps airborne contaminants out during colonisation because the only air exchange happens through a built-in filter patch. An open tray, by contrast, exposes the substrate surface continuously, which means your clean-air technique needs to be much tighter. The difference is not trivial in practice.
Contamination during inoculation is where most beginners lose their first crop. Even an expensive container will fail if spawn cleanliness and clean-air technique are inadequate. Mastering a Still Air Box or a basic laminar flow approach matters more than the container itself.
Pro Tip: Before you buy any container, ask yourself whether you have a clean, still-air space to inoculate in. If not, build a simple Still Air Box from a clear storage tote before spending money on bags or tubs.
What are the main types of mushroom growing containers?
The nine container types below cover the full range from a first-time kit to a commercial shipping-container farm. Each entry covers what it is, which species it suits, typical scale, sterilisation needs, and a brief note on UK availability.
Grow kits and blocks
A grow kit is a pre-inoculated block of substrate, usually hardwood sawdust or straw, sealed in a bag or box and ready to fruit straight out of the packaging. You cut a slit, mist with water, and wait. Grow kits are the fastest route to a first harvest for most beginners, and they fit on a windowsill.
Best for: Oyster, lion’s mane, shiitake (species-specific kits available)
Scale: Hobby
Sterilisation needed: None by the user; substrate is pre-sterilised
Pros: No equipment required; low contamination risk; instant start
Cons: Single-use; limited yield compared to DIY methods; ongoing cost per block
UK note: Widely available online and in garden centres; no specialist import needed
Grow bags (filter-patch and autoclavable)
A grow bag is a polypropylene bag fitted with a microporous filter patch that allows gas exchange while blocking contaminants. You fill it with substrate, sterilise it in a pressure cooker at 121°C, inoculate, and seal. Autoclavable grow bags filled with supplemented hardwood sawdust are the industry standard for lion’s mane and shiitake at both advanced home and commercial scale.
Best for: Lion’s mane, shiitake, king oyster
Scale: Hobby to small commercial
Sterilisation needed: Full pressure-cooker sterilisation (121°C)
Pros: Excellent contamination barrier; reusable bags if undamaged; scalable
Cons: Requires a pressure cooker; only autoclavable polypropylene survives sterilisation safely
UK note: Polypropylene grow bags are sold by UK mycology suppliers; check the grade before buying
Material note: Only specific grades of polypropylene survive pressure-cooker sterilisation. Generic “heat-resistant” plastics can develop micro-tears invisible to the eye, creating contamination entry points.
Monotubs
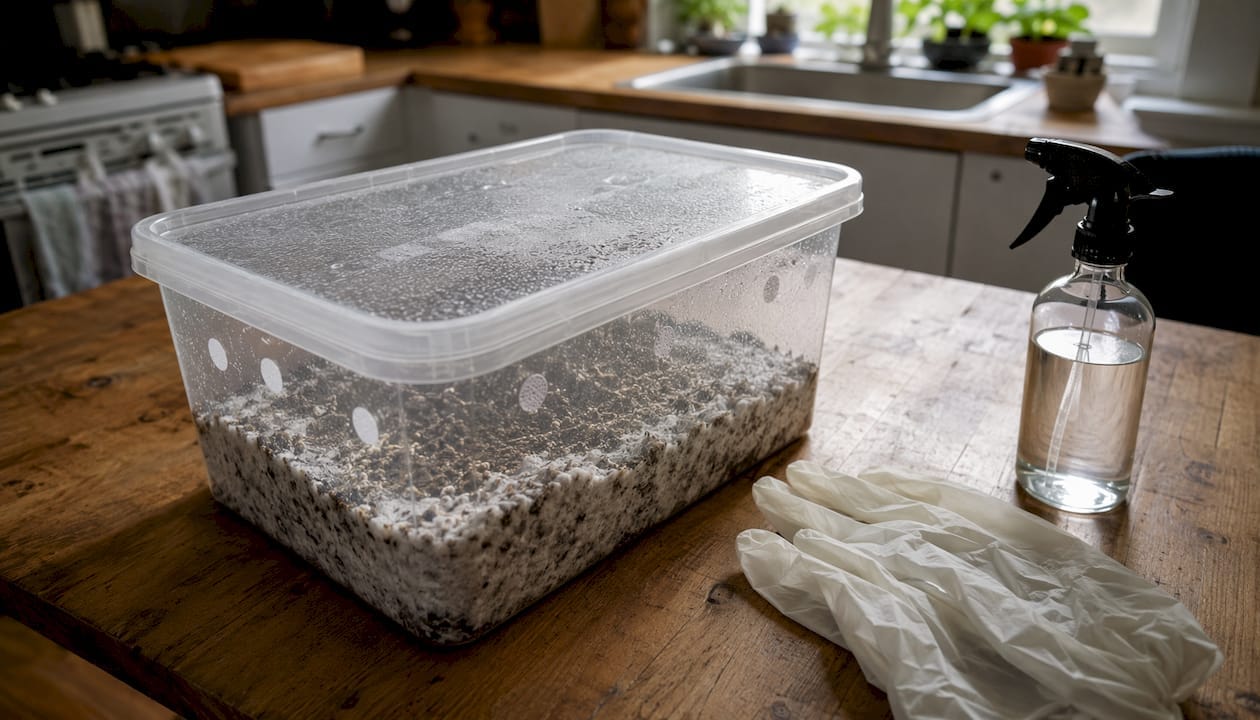
A monotub is a large, lidded plastic storage tub, typically medium to large volume, with holes drilled for FAE and stuffed with polyfill or micropore tape. It is the workhorse of home cultivation. A single monotub can produce 500–900 g of fresh mushrooms per flush, making it one of the most yield-efficient options per pound spent.
Best for: Oyster, cubensis varieties, wine caps
Scale: Hobby to small-scale
Sterilisation needed: Thorough cleaning and alcohol wipe; substrate is pasteurised or sterilised separately
Pros: High yield; reusable indefinitely; low ongoing cost
Cons: Larger footprint; FAE holes need careful sizing; not ideal for wood-loving species
UK note: Standard storage totes from Wilko, B&Q, or similar work well; no specialist sourcing required
Mason jars and glass jars
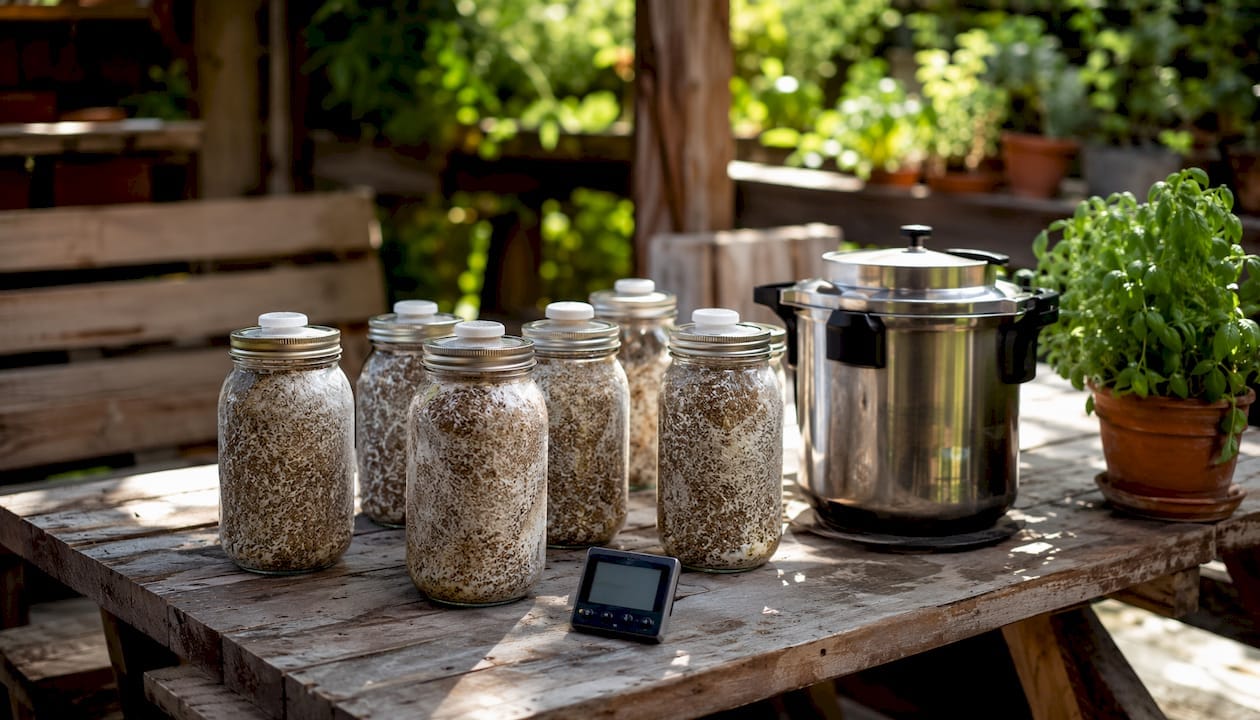
Glass mason jars (typically 500 ml or 1 litre) are the classic beginner vessel for grain spawn preparation. You fill them with rye, wheat berries, or brown rice flour and vermiculite (BRF tek), pressure-cook them, and inoculate via a self-healing injection port. Jars are excellent for learning sterile technique before moving to larger containers.
Best for: Grain spawn preparation; BRF tek for cubensis
Scale: Hobby
Sterilisation needed: Full pressure-cooker sterilisation
Pros: Cheap; visible colonisation progress through glass; widely available
Cons: Small yield per jar; breakage risk; labour-intensive at scale
UK note: Kilner jars and Ball-style mason jars are available in most UK supermarkets and hardware shops
Buckets (Bucket Tek)
Bucket Tek uses a standard small to medium size food-grade plastic bucket drilled with small holes, filled with pasteurised straw, and inoculated with oyster mushroom spawn. Because oyster mushrooms are aggressive colonisers, Bucket Tek requires only pasteurisation rather than full sterilisation, making it one of the most accessible DIY methods.
Best for: Oyster mushrooms (all varieties)
Scale: Hobby to small-scale
Sterilisation needed: Pasteurisation only (70–80°C for one hour)
Pros: Very low cost; suitable for balconies and patios; no pressure cooker needed
Cons: Limited to aggressive species; holes need covering during colonisation
UK note: Food-grade buckets are available from homebrew shops and online; straw is inexpensive from UK farm suppliers
Trays and flatbeds
Trays are shallow, open containers, often used for species that fruit in a casing layer, such as button mushrooms (Agaricus bisporus) or portobello. They are common in small commercial operations and work well in a dedicated fruiting room or grow tent.
Best for: Button, portobello, king stropharia
Scale: Small commercial
Sterilisation needed: Thorough cleaning; substrate pasteurisation
Pros: Easy to stack on racks; good for casing-layer species; scalable with shelving
Cons: Open surface increases contamination risk; requires a controlled fruiting environment
UK note: Catering trays and seed trays work; a grow tent helps manage humidity in the UK’s variable climate
Logs
A mushroom log is a hardwood log (oak, beech, or alder) inoculated with plug spawn hammered into drilled holes and sealed with wax. Logs are reliable outdoors for shiitake and other wood-loving species, but shiitake on hardwood logs typically begins producing in six to eighteen months. In the UK, timing matters: logs fruit best in spring and autumn when temperatures sit between 10°C and 18°C.
Best for: Shiitake, oyster, lion’s mane (outdoor)
Scale: Hobby to small-scale
Sterilisation needed: None; logs are naturally resistant
Pros: Long-lived (three to seven years); no ongoing substrate cost; sustainable
Cons: Very slow to first harvest; season-dependent in the UK; heavy and space-hungry
UK note: Native hardwoods work well; avoid conifer logs, which inhibit mycelium
Grow tents and greenhouses
A grow tent is a reflective, zip-up fabric enclosure, typically 60×60 cm to 120×120 cm, used to house multiple containers (bags, trays, or racks) in a single controlled environment. Paired with a small humidifier and a timer-controlled fan, a grow tent lets you run several species simultaneously with consistent FAE and humidity.
Best for: Multi-species setups; scaling from hobby to small commercial
Scale: Small commercial
Sterilisation needed: Regular wipe-down with isopropyl alcohol between cycles
Pros: Precise environmental control; scalable with racks; reusable for years
Cons: Higher upfront cost; requires a humidifier and fan; takes up floor space
UK note: Standard grow tents sold for horticulture work equally well for mushrooms
Shipping containers (commercial)
A converted shipping container fitted with HVAC, automated humidity control, and LED lighting is the top end of the scale. These container farms offer year-round production independent of outdoor conditions, but the overhead and complexity are substantial. High overhead and complex environmental control systems mean greenhouses or converted rooms often deliver better ROI for small producers.
Best for: Commercial oyster, shiitake, lion’s mane production
Scale: Commercial only
Sterilisation needed: Full sanitation protocols; professional-grade cleaning between cycles
Pros: Year-round production; full environmental control; scalable output
Cons: High capital cost; HVAC maintenance; not viable for hobby or small-scale use
UK note: Planning permission may be required; check with your local authority before installation
Container comparison at a glance
| Container | Best for | Footprint | Cost shape | Beginner-friendly | Scalability | Sterility required | Typical yield |
|---|---|---|---|---|---|---|---|
| Grow kit | Oyster, lion’s mane | Shoebox | Low (per kit) | High | Low | None | — |
| Grow bag | Lion’s mane, shiitake | Small | Low (per bag) | Medium | High | Full sterilisation | Varies by bag size |
| Monotub | Oyster, cubensis | Medium | Low (one-off) | Medium | Medium | Pasteurisation/clean | 500–900 g/flush |
| Mason jar | Grain spawn prep | Very small | Very low | High | Low | Full sterilisation | Small (spawn only) |
| Bucket | Oyster | Small | Very low | High | Medium | Pasteurisation | — |
| Tray | Button, portobello | Medium | Low–medium | Low | High (with racks) | Pasteurisation | Varies |
| Log | Shiitake, oyster | Large (outdoor) | Low (one-off) | Medium | Low | None | Seasonal |
| Grow tent | Multi-species | Medium–large | Medium | Low–medium | High | Regular wipe-down | Multiple containers |
| Shipping container | Commercial species | Very large | High | Low | Very high | Professional | Commercial volume |
How do you choose the right container for your goals?
Match your container to your species first, then to your sterility capability. That single rule eliminates most poor purchasing decisions.
Space and footprint
Ask yourself: how much dedicated space can you give to mushroom growing? A grow kit or a jar fits on a kitchen shelf. A monotub needs a shelf or a corner of a spare room. A grow tent needs floor space and a power socket for a fan and humidifier. If you are growing in a flat or a small house, start with a kit or a bucket and only upgrade when you have outgrown the space.
Sterility and equipment
Do you own a pressure cooker? If not, stick to pasteurisation-only methods (buckets, logs, kits) until you do. Grow bags and jars both require full sterilisation at 121°C, and using non-autoclavable plastics in a pressure cooker risks micro-tears that invite contamination. Only polypropylene rated for autoclave use is safe for bag sterilisation.
Yield and scaling
If your goal is a steady weekly harvest rather than a one-off experiment, the natural progression is: kits or jars first, then grow bags or a monotub, then a rack system inside a grow tent. Growers typically start with kits or jars, move to grow bags or monotubs for higher yields, then adopt racks, tents or containerised rooms for volume. Jumping straight to a shipping container skips the practical knowledge you need to manage it profitably.
What setup and contamination steps apply to every container?
Three things are non-negotiable regardless of which container you choose: a clean inoculation environment, correct substrate moisture, and a consistent incubation and fruiting regime.
- Prepare your substrate. Choose the right growth medium for your species (straw for oyster, supplemented hardwood for lion’s mane, grain for spawn). Check your substrate recipes before mixing.
- Sterilise or pasteurise. Sterilise grain and supplemented hardwood at 121°C for 90–120 minutes. Pasteurise straw at 70–80°C for one hour. Let the substrate cool fully before inoculating.
- Inoculate in clean air. Use a Still Air Box or a flow hood. Wipe all surfaces with 70% isopropyl alcohol. Work quickly and confidently.
- Incubate. Keep the container in the dark at the correct temperature until the substrate is fully colonised (white mycelium throughout).
- Initiate fruiting. Introduce fresh air exchange, raise humidity, and drop temperature slightly to trigger pinning.
Parameter ranges by container type
| Container | Incubation temp | Fruiting humidity | FAE guidance |
|---|---|---|---|
| Grow kit | 18°C | high humidity | Mist twice daily; no fan needed |
| Grow bag | 20°C | high humidity | Filter patch handles passive FAE |
| Monotub | 20°C | 80–90% | Polyfill holes; fan on timer |
| Bucket | 18°C | 80–90% | Drilled holes; no fan needed |
| Tray | 16°C | high humidity | Fruiting room fan on low |
| Log (outdoor) | Ambient (10–18°C) | Natural rainfall | No intervention needed |
Contamination checklist
Catch problems early by checking your containers every day during colonisation.
- Trichoderma: Blue-green patches, often starting at the edges. Remove the container from your growing space immediately.
- Bacterial wet rot: Slimy, wet patches with a sour or unpleasant smell. Usually caused by excess moisture or under-sterilised substrate.
- Cobweb mould: Fast-spreading grey wisps. Unlike mycelium, cobweb mould lies flat and does not have a rope-like structure. A light mist of water sometimes suppresses it at early stages.
For detailed troubleshooting, the contamination FAQ at Sporebuddies covers the most common failure points with practical fixes.
What does the research say about kits first and container farms?
The evidence consistently supports a kits-first pathway for beginners. Starting with a ready-made kit builds the tactile knowledge — how mycelium looks, how substrate moisture feels, how fruiting conditions change day to day — that makes every subsequent DIY attempt more likely to succeed. Beginners who start with kits build essential tactile knowledge that increases later success, and the kit-first route can be faster and cheaper overall when you account for failed DIY batches.
“Shipping-container farms are powerful for commercial producers but typically introduce HVAC, humidity and automated FAE complexity that is unnecessary for home growers.” The same principle applies to any container that demands more environmental management than your skill level currently supports.
Sporebuddies’ product range maps directly onto the recommended starter routes. Grow kits cover the first-harvest stage. Grow bags and sterilised mushroom substrate cover the intermediate DIY stage. Mycology equipment, including monotubs and incubation supplies, covers the step up to small-scale production.
For growers considering a small commercial operation, the practical recommendation is to run a rack-and-tent setup through at least three full production cycles before committing to a containerised farm. That experience will tell you whether your protocols are consistent enough to justify the capital outlay.
Pro Tip: If you want to test commercial-scale volumes without the overhead, fill a grow tent with four to six grow bags on wire shelving. You will learn more in one cycle than in months of reading about container farms.
Key takeaways
Grow kits are the fastest, lowest-risk entry point for UK home growers; monotubs and grow bags are the natural next step once sterile technique is solid.
| Point | Details |
|---|---|
| Start with a kit | Grow kits require no equipment, fit on a windowsill, and build the tactile knowledge you need for DIY methods. |
| Monotubs for volume | A single monotub yields 500–900 g per flush, making it the best value-for-money DIY container for home growers. |
| Sterility beats equipment | Mastering Still Air Box technique reduces contamination risk more than upgrading to a more expensive container. |
| Logs suit outdoor UK growing | Shiitake logs fruit in six to eighteen months and are season-dependent; plan around UK spring and autumn temperatures. |
| Sporebuddies for starter supplies | Sporebuddies stocks grow kits, substrates, and mycology equipment matched to every stage from first kit to small-scale production. |
Ready to grow? Here is where to start with Sporebuddies
Sporebuddies gives UK home growers a single place to source everything covered in this guide, without the need to piece together supplies from multiple retailers. Whether you want a ready-to-fruit grow kit for your first harvest, sterilised substrates for a grow bag run, or a full grow tent kit for a multi-rack setup, the product range covers every stage of the progression described above. The beginner guides and contamination resources on the site mean you are not left to figure things out alone. Browse the mushroom spores and substrate categories to put together your first or next setup today.
Useful sources
Sporebuddies internal resources
- Mushroom grow kit guide — helps you match a kit to your species and skill level; a good first read before buying.
- Substrate recipes and performance notes — practical mixing ratios and substrate comparisons for grow bags, monotubs, and trays.
- UK grow kit buyer’s guide — UK-focused advice on kit selection, including seasonal considerations for British growers.
- Contamination FAQ — covers trichoderma, bacterial wet rot, and cobweb mould with step-by-step fixes.
External sources used in this article
- MyCeliumNest beginner guide — detailed walkthrough of the kits-first pathway; particularly useful for UK growers new to mycology.
- Mushroom Growing Tips — covers grow bag sterilisation, monotub yields, and Bucket Tek in practical detail.
- IFAS Gardening Solutions — growing mushrooms at home — reliable reference for log cultivation timelines and species-to-substrate matching.
FAQ
What are the easiest mushrooms to grow for beginners?
Oyster mushrooms are the most forgiving choice for beginners because they colonise quickly, tolerate a wider temperature range, and fruit reliably on pasteurised straw without a pressure cooker. A simple bucket or a ready-made grow kit is all you need to get started.
What are the different types of mushroom grow kits?
Grow kits generally fall into three categories: spray-and-grow blocks (pre-inoculated substrate in a box), log kits (inoculated hardwood dowels or pre-drilled logs), and all-in-one bag kits (substrate and spawn in a single autoclavable bag). Each suits different species and skill levels, and Sporebuddies stocks options across all three formats.
What are the common problems with mushroom boxes and grow kits?
The most frequent issues are contamination (blue-green trichoderma, slimy bacterial patches, or grey cobweb mould), insufficient humidity, and poor FAE. Misting twice daily and keeping the kit away from direct sunlight and draughts resolves most humidity and FAE problems; contamination usually signals that the substrate was compromised before fruiting began.
What is the best outdoor mushroom growing kit for UK gardens?
A hardwood log inoculated with shiitake or oyster plug spawn suits UK outdoor conditions well, fruiting naturally in spring and autumn when temperatures sit between 10°C and 18°C. Shiitake logs take six to eighteen months to produce their first flush, so patience is required, but they continue fruiting for several years with minimal maintenance.
Do I need a pressure cooker to grow mushrooms at home?
Not for every method. Oyster mushrooms grown in buckets or on straw only need pasteurisation at 70–80°C, which a large stockpot handles easily. A pressure cooker becomes necessary when you move to grain spawn, supplemented hardwood bags, or any substrate that requires full sterilisation at 121°C to prevent contamination.