
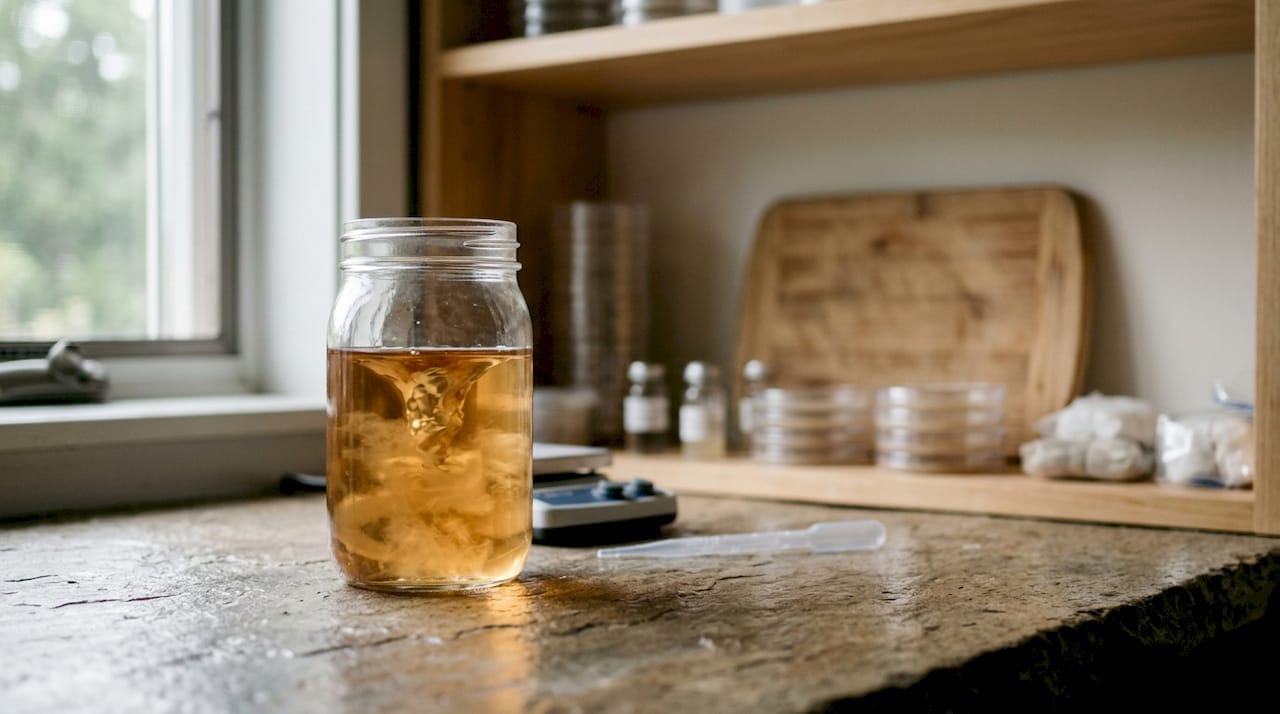
Liquid culture is the single most practical upgrade a beginner home grower can make after their first successful kit or spore inoculation. It gives you faster colonisation, more predictable results, and the ability to inoculate many jars from a single small syringe — all of which matter enormously when you are still learning what healthy mycelium looks like and why batches fail.
Here is what you will actually notice as a beginner:
- Faster colonisation: live mycelium hits grain running, cutting days off the lag phase you get with spores
- More predictable outcomes: you start with a known, verified culture rather than hoping spores germinate evenly
- Efficiency: 1–3 mL of liquid culture (LC) inoculates a standard quart jar; a 10 mL syringe covers multiple jars
- Scalability: one small LC jar can be expanded into many more, reducing the cost of repeated spore purchases
- Simpler inoculation: once your LC is verified and healthy, grain inoculation can be done in open air with basic precautions
- Easier troubleshooting: consistent starting material means contamination is easier to trace and rule out
Sporebuddies stocks verified liquid culture syringes and the supporting equipment UK growers need to get started without sourcing from multiple suppliers.
Key takeaways
Liquid culture is the most practical next step for a beginner who has completed one successful grow and wants faster, more repeatable results with less guesswork at every inoculation.
| Point | Details |
|---|---|
| Speed advantage | LC skips spore germination; colonisation begins immediately after inoculation. |
| Inoculation volume | Use 1–3 mL per quart jar; 1–2 mL per pound of grain is a reliable conservative guideline. |
| Contamination rule | Discard any LC that smells sour, turns cloudy with colour, or shows coloured patches. |
| Storage | Refrigerate at 2–4°C for up to 4–6 weeks; label jars with species and date. |
| Sporebuddies | Stocks verified UK liquid culture syringes, sterile tools, and expander kits for beginners. |
Table of Contents
- What is liquid culture, exactly?
- What are the real liquid culture benefits for beginners?
- What are the downsides and contamination risks?
- How to use liquid culture: a simple beginner workflow
- How long does liquid culture last, and how should you store it?
- Spores versus liquid culture: which should you use?
- How do you spot contamination in liquid culture?
- Getting started in the UK with Sporebuddies
- Sources
- FAQ
What is liquid culture, exactly?
Liquid culture is mycelium suspended in a sterile nutrient solution, typically a light broth of malt extract or a simple sugar such as honey water. Unlike a spore syringe, which contains dormant spores that still need to germinate, LC contains already-active mycelium ready to colonise grain the moment it is introduced.
In a typical beginner workflow, LC sits between agar work and grain inoculation:
- Spores or agar — your genetic starting point
- Liquid culture jar / LC starter — where mycelium grows and multiplies in suspension
- Grain jars or bags — inoculated using a liquid culture syringe drawn from the LC jar
- Bulk substrate — the final fruiting stage
You do not need to work through every stage to benefit from LC. Many beginners buy a pre-made, verified liquid culture syringe from a trusted UK supplier and go straight to grain inoculation, skipping agar entirely. The liquid culture jar becomes relevant once you want to expand a syringe into a larger volume or maintain a culture long-term.
The equipment list is short: a liquid culture syringe (or LC jar), sterile syringes and needles for transfer, and a clean workspace. A still air box adds meaningful protection when you move into making or expanding your own LC.
What are the real liquid culture benefits for beginners?
The advantages of liquid culture are not just theoretical. They show up in your first few grows in ways that make the learning curve noticeably less steep.
Faster colonisation is the most immediate benefit. Spores need time to germinate before mycelium begins spreading through grain. LC skips that step entirely. Incubation typically takes 10–20 days at around 18–20°C for a healthy LC to reach usable density, and once you inoculate grain with that active culture, colonisation begins almost immediately. For a beginner who has watched a grain jar sit apparently dormant for a week after spore inoculation, this difference is noticeable.
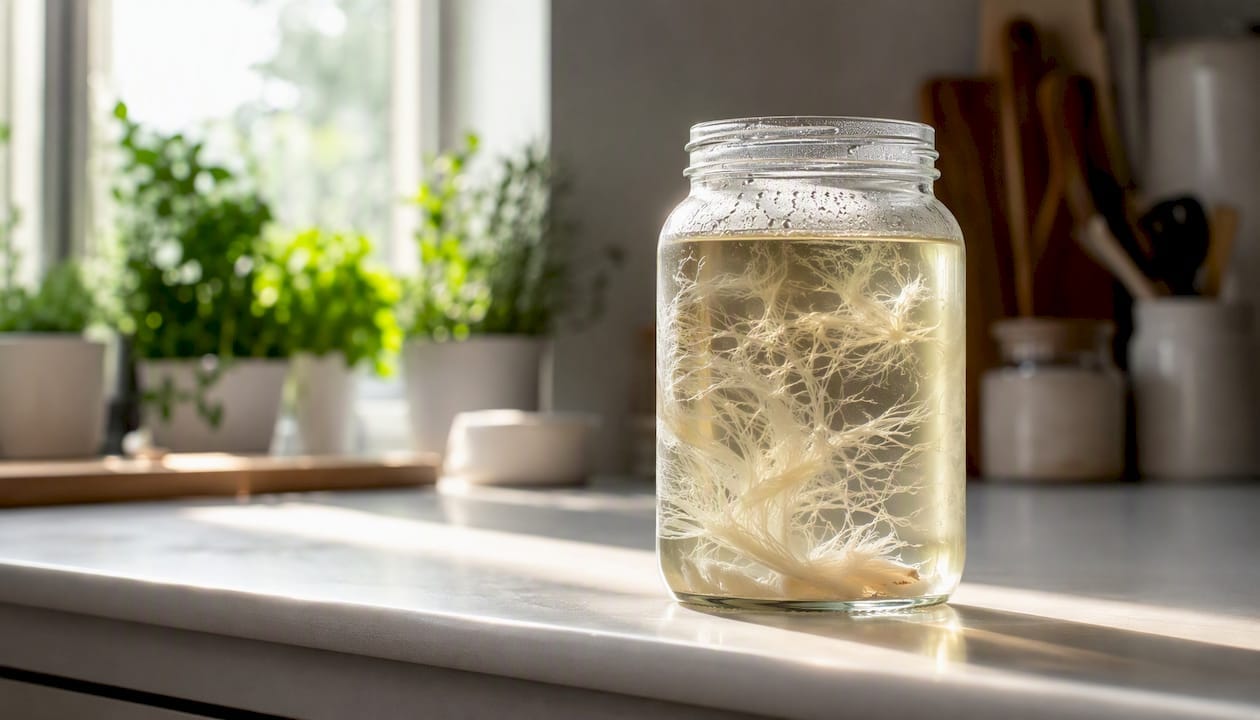
Predictability is the second major advantage. When you inoculate from a verified LC, you know what healthy growth looks like before it even touches your grain. Wispy white mycelial clouds in a clear liquid are a reliable sign of a clean, vigorous culture. That visual check is something spore syringes simply cannot offer.
Efficiency and scalability work together. Practical inoculation volumes are small: roughly 1–3 mL per quart jar, which means a single 10 mL syringe covers several jars. Once you are comfortable expanding LC into fresh jars, one starter syringe can supply an entire season’s worth of grain inoculations.
Cost-effectiveness follows naturally. Spore syringes are a recurring purchase; a well-maintained LC stock is not. After your initial investment in a verified liquid culture syringe from Sporebuddies and a basic LC jar, your ongoing costs drop significantly.
Simpler open-air inoculation is a practical win that surprises many beginners. Creating LC requires strict aseptic conditions, but inoculating grain with a verified, healthy LC can be done carefully in open air. That removes the pressure of needing a laminar flow hood for every grain jar you prepare.
Pro Tip: Before you attempt to make your own LC, buy one verified syringe and use it to inoculate a single test jar. Watch how healthy mycelium behaves in grain before you invest time in making LC from scratch.
Sporebuddies offers a range of ready-to-use gourmet and functional mushroom liquid cultures, including lion’s mane and chestnut varieties, so you can start with a verified culture rather than guessing at your own preparation.
What are the downsides and contamination risks?
Liquid culture is not without its pitfalls, and being honest about them will save you jars of grain and a lot of frustration.
The most serious risk is contamination spreading from LC to grain. A contaminated LC syringe does not just ruin one jar; it can ruin every jar you inoculate from it before you notice the problem. This is the inverse of LC’s scalability advantage: the same efficiency that lets one syringe cover many jars means a bad syringe can damage many jars.
Common beginner mistakes when making LC include inadequate sterilisation, working in an unsuitable environment, and using a broth that is too rich in sugar. A high-sugar medium is harder to sterilise properly and can mask early contamination signs. These are not advanced problems; they are the predictable errors that catch most beginners who attempt LC creation without preparation.
Other realistic downsides include:
- Extra equipment: you need a pressure cooker for sterilisation, a still air box or flow hood for LC creation, and sterile transfer tools
- Learning curve: reading LC health takes practice; early contamination is easy to miss if you do not know what to look for
- Shelf-life limits: LC does not last indefinitely, even refrigerated; vigour declines over months
- Species variation: some species are less suited to LC propagation and perform better from agar or spore work
Liquid culture offers more predictable outcomes than spore syringes, but maintaining it requires stricter sterile technique. If you are not yet comfortable with basic aseptic practice, buying a verified LC syringe from a reliable UK supplier is a safer starting point than making your own.
How to use liquid culture: a simple beginner workflow
Getting the process right from the start prevents the most common failures. The steps below assume you have a verified LC syringe and sterilised grain jars ready.
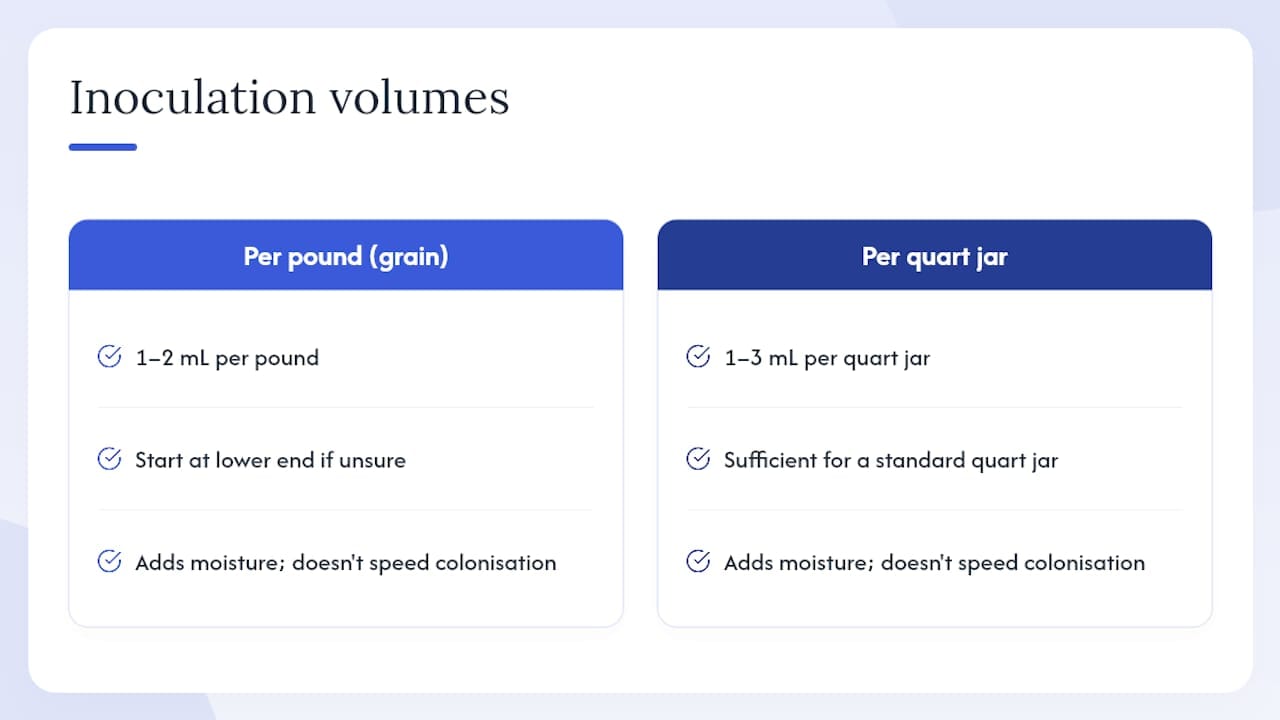
Inoculation volumes
A practical guideline is 1–2 mL of LC per pound of grain; start at the lower end if you are unsure. For a standard quart jar, 1–3 mL is sufficient. Using more than necessary adds moisture to the grain and does not speed colonisation meaningfully.
Agitation and stirring
Gentle daily stirring or shaking prevents mycelium from clumping into dense masses that block the syringe needle and reduce the culture’s usable life. A gentle swirl or inversion once a day is enough for most home setups. A magnetic stir plate is worth the investment if you plan to maintain LC long-term, as it keeps the culture uniform without repeated manual handling.
Step-by-step inoculation routine
- Flame-sterilise your needle until it glows, then let it cool for 10–15 seconds
- Wipe the injection port of your grain jar with an isopropyl alcohol swab
- Draw the required volume of LC into your sterile syringe (1–3 mL per quart jar)
- Insert the needle through the injection port and inject slowly
- Withdraw the needle, recap immediately, and give the jar a gentle shake to distribute the LC
- Label the jar with the species, LC source, and date
- Incubate at the appropriate temperature for your species (typically 21–24°C for most gourmet varieties)
Open-air inoculation
Once your LC is verified as clean and vigorous, grain inoculation in open air is a reasonable approach for many home growers. Minimise air movement, work quickly, and avoid talking or breathing directly over open ports. This is not a substitute for aseptic technique when making or expanding LC itself; that step still requires a still air box at minimum.
Pro Tip: Inoculate one test jar first and wait 5–7 days before using the same LC syringe on the rest of your jars. If the test jar shows clean, fast colonisation, proceed with confidence.
You can find sterile syringes and needles and a full range of culture and inoculation tools at Sporebuddies.
How long does liquid culture last, and how should you store it?
Stored correctly, LC remains viable for several weeks to a few months. Vigour declines gradually, so cultures used within the first month of preparation tend to colonise faster and more evenly than older stock.
Key storage practices:
- Refrigerate at 2–4°C for short-term storage (up to 4–6 weeks); this slows metabolism without killing the mycelium
- Avoid freezing standard LC unless you are using a specialist cryopreservation method; freezing without cryoprotectant damages mycelial cells
- Minimise headspace in your LC jar to reduce the oxygen available to potential contaminants
- Use sterile self-healing injection ports or luer-lock caps to prevent contamination during repeated syringe draws
- Agitate gently before use after refrigerated storage to redistribute settled mycelium and check for visual signs of contamination
When a culture begins to look less vigorous (slower colonisation, reduced mycelial density), expand it into a fresh sterile LC jar rather than letting it age further. A healthy expansion resets the clock.
Pro Tip: Label every LC jar with the species, the date it was made or received, and the date you last drew from it. Keep one small ‘master’ jar in the fridge untouched, and use a working jar for day-to-day inoculations. If the working jar becomes suspect, your master jar is still clean.
The LC expander kit from Sporebuddies is a practical option for beginners who want to scale a starter syringe into a larger volume without sourcing individual components separately.
Spores versus liquid culture: which should you use?
The honest answer is that most beginners should start with spores or a grow kit, then move to LC once they are comfortable with basic sterile handling. Here is how the two compare in practical terms:
- Speed to colonisation: LC wins clearly; active mycelium begins colonising grain immediately, while spores need germination time first
- Ease for beginners: spore syringes are simpler to use safely; LC creation requires more sterile discipline, though using a pre-made LC syringe is comparable in difficulty
- Contamination risk: spore syringes carry lower risk at the inoculation stage; LC carries higher risk if the culture itself is contaminated, since one bad syringe can affect many jars
- Cost and scalability: LC is more cost-effective at scale; spore syringes are cheaper for occasional single-jar grows
- Storage: spore syringes store well refrigerated for months to years; LC has a shorter viable window
- Equipment required: spore syringes need only a sterile needle and injection port; LC creation needs a still air box, pressure cooker, and sterile media
LC generally gives more predictable outcomes and better scaling options than spore syringes, but creating and maintaining it requires stricter aseptic technique. For most beginners, the practical path is: start with a mushroom grow kit or spore syringe to learn the basics, then add LC once you have seen healthy colonisation and understand what contamination looks like.
When you are ready to make that move, Sporebuddies stocks both spore syringes and liquid culture syringes, so you can progress within the same supplier without switching sources.
How do you spot contamination in liquid culture?
Catching contamination early in your LC jar is the difference between discarding one syringe and losing an entire batch of grain jars. The signs are reliable once you know what to look for.
Visual cues
- Healthy LC appears as a clear or very lightly tinted liquid with wispy white mycelial clouds or strands floating throughout
- Discolouration — yellow, green, black, pink, or brown tints in the liquid — indicates bacterial or mould contamination
- Unexpected cloudiness that is uniform and opaque (rather than the wispy, structured look of mycelium) suggests bacterial growth
- Coloured patches or spots on the jar wall or on the surface of the liquid are a clear discard signal
- Slimy or gelatinous texture when drawing into a syringe suggests bacterial contamination
Smell cues
Healthy mycelium in LC has a faint, neutral to earthy scent. A sour, sharp, or foul smell on opening the jar is a reliable contamination indicator. Do not attempt to salvage a culture that smells wrong.
What to do immediately
- Seal the suspect jar in a plastic bag without opening it further
- Dispose of it in your general waste bin, away from your growing area
- Wipe down your entire work surface with isopropyl alcohol
- Check any remaining LC jars from the same batch for the same signs
- If you have a master jar stored separately, draw a small test volume and inspect it before proceeding
Acting quickly at step one prevents spores from contaminating organisms spreading to your clean cultures or grain jars. For more guidance on contamination prevention, the Sporebuddies contamination FAQ covers common causes and practical responses.
Getting started in the UK with Sporebuddies
Sporebuddies is a UK-based supplier of verified liquid culture syringes, sterile inoculation tools, and mycology equipment, which means you can build your entire starter setup from one source without waiting on international shipping or navigating import uncertainty.
A sensible beginner shopping list looks like this:
- Sterile syringes and needles for safe transfer
- A liquid culture expander kit if you plan to scale beyond one or two jars
- Basic mycology equipment including a still air box and alcohol swabs
Start with one verified LC syringe, inoculate two test jars, and observe the results before scaling up. Browse the full range at Sporebuddies and pick the species that suits your goals.
Sources
- Liquid Culture: Everything You Need to Know | DoubleBlind Mag
- Liquid Culture for Mycelium – how to make and use
- Liquid Mushroom Culture: A Practical Grower’s Guide
FAQ
What are the biggest liquid culture mistakes beginners make?
The most common errors are inadequate sterilisation of the LC jar, working in an environment with too much airflow, and using a broth with too high a sugar concentration. All three increase contamination risk significantly.
How often should you stir liquid culture?
A gentle daily swirl or inversion is sufficient for most home setups. If you use a magnetic stir plate, continuous low-speed agitation keeps the culture uniform without manual handling.
How much liquid culture do you need per jar?
Use 1–3 mL per quart jar; a practical guideline for grain bags is 1–2 mL per pound of grain. Starting at the lower end reduces excess moisture and is the safer default for beginners.
Is liquid culture better than spores for a beginner?
LC gives faster colonisation and more predictable results, but using a pre-made spore syringe is simpler if you have not yet practised aseptic technique. The best path for most beginners is to start with spores or a grow kit, then move to LC once you are comfortable with sterile handling.
Where can beginners buy liquid culture in the UK?
Sporebuddies stocks verified liquid culture syringes for gourmet and functional mushroom species, along with the sterile tools and equipment needed to use them safely. All orders are dispatched within the UK.