
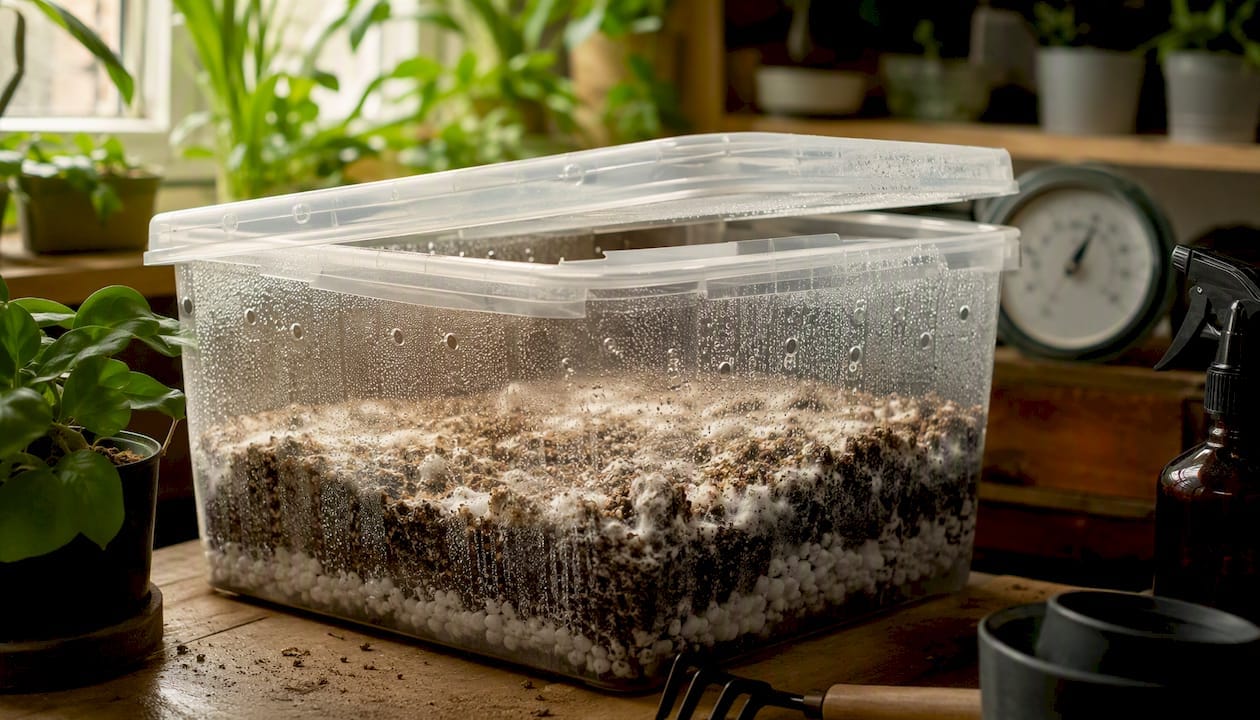
A fruiting chamber is a controlled microclimate that gives colonised substrate the humidity, fresh-air exchange, temperature and light it needs to form mushrooms. Think of it as a halfway house between a sterile grow bag and the open air: enclosed enough to hold moisture, ventilated enough to stop carbon dioxide building up, and bright enough (in a low, indirect way) to tell your mycelium which way is up.
Do you actually need one? Not always. Plenty of beginner kits arrive with humidity-retaining bags that do this job on their own for a single grow. But once you move to bulk substrate, multiple flushes, or species that sulk in dry air, a proper chamber becomes worth the effort. The main variables you’re managing are humidity at high levels, fresh-air exchange, temperature, and light cycle, and the simplest version of all this is a plastic tub with holes in it, a bed of perlite, and a bit of patience. A monotub is the classic starting design, and suppliers like Sporebuddies sell ready-made monotubs alongside the hygrometers and perlite you’ll need to run one properly.
Key Takeaways
A reliable fruiting chamber balances high humidity with sufficient fresh-air exchanges, and beginners succeed fastest by starting with a simple passive design.
| Point | Details |
|---|---|
| Pick a design first | Choose a monotub for bulk grows or an SGFC for single cakes before buying anything else. |
| Gather core materials | A drilled tub, perlite, a hygrometer and thermometer cover most beginner builds. |
| Set your numeric targets | Aim for 80–95% RH, 4–6 air exchanges hourly, and 50–70°F throughout fruiting. |
| Inspect daily, not weekly | Five minutes of checking each day catches contamination before it spreads. |
| Consider a kit-ready route | Sporebuddies supplies monotubs, substrate and hygrometers for growers who’d rather skip the DIY stage. |
Table of Contents
- How a fruiting chamber works: core environmental targets
- Which fruiting chamber design suits a beginner?
- How do you build a monotub fruiting chamber?
- Building a shotgun chamber or a Martha-style greenhouse
- What does daily chamber maintenance actually look like?
- Which fruiting chamber suits which mushroom species?
- How do you spot and fix contamination early?
- Do beginners always need a chamber, or is a kit bag enough?
- What equipment does an experienced grower actually recommend?
- If you want kit-ready equipment: what Sporebuddies offers
- Sources
- FAQ
How a fruiting chamber works: core environmental targets
Mushrooms don’t grow so much as they inflate rapidly with water, and that’s precisely why humidity sits at the centre of chamber design. Drop the relative humidity too low and developing pins dry out and abort before they open. Push it too high with no airflow and you invite bacterial blooms and wet, slimy substrate.
The numbers that matter are fairly consistent across most cultivated species. Aim for 80 to 95% relative humidity, 4 to 6 air exchanges per hour, a temperature range of 50 to 70 degrees Fahrenheit, and approximately 12 hours of low-level ambient light each day. Fresh-air exchange matters just as much as humidity. Fungi respire, meaning they take in oxygen and release carbon dioxide, and if that CO2 isn’t cleared out regularly, fruit bodies grow long, thin, and leggy as they stretch upward searching for better air. Light, meanwhile, isn’t food for mushrooms the way it is for plants. It’s a directional signal. Indirect light for roughly 12 hours a day helps fruit bodies orient themselves properly, while direct sunlight can dry out or scorch developing caps.
Here’s how those targets break down in a format you can pin above your grow area:
| Environmental factor | Target range | Why it matters |
|---|---|---|
| Relative humidity | 80–95% | Prevents pins drying out mid-formation |
| Fresh-air exchange | 4–6 exchanges/hour | Clears CO2 to stop leggy, malformed fruit |
| Temperature | 50–70°F | Keeps metabolic rate stable for most species |
| Light cycle | ~12 hours, indirect | Signals fruiting direction, not food source |
Pro Tip: Buy a cheap digital hygrometer with a thermometer built in before you spend money on anything else. You cannot manage what you can’t measure, and eyeballing humidity is a beginner mistake that costs entire flushes.
To keep tabs on these four variables day to day, most growers rely on a short kit of monitoring tools:
- A digital hygrometer placed at substrate height, not on the lid, for an accurate humidity reading.
- A stick-on or probe thermometer to catch temperature swings from nearby windows or radiators.
- A simple kitchen timer or plug-in timer if you’re running a fan or humidifier on a schedule.
- A notebook or phone note to log daily readings, so patterns in stalling or contamination become visible over time.
Balancing high humidity against constant gas exchange is the entire craft of chamber design, and getting it wrong in either direction is the single most common cause of failed flushes.
Which fruiting chamber design suits a beginner?
Not every chamber looks the same, and the right one depends on how much substrate you’re running, how much daily fuss you’re willing to tolerate, and which species you’ve chosen. Five designs dominate home cultivation, each with a distinct trade-off.
Monotub. A large opaque plastic tote, typically 18 to 30 litres, with drilled holes and a perlite reservoir beneath the substrate. Monotubs are widely regarded as the low-maintenance, higher-yield option for bulk grows, and they’re forgiving enough that a beginner can largely leave one alone bar a daily fan and glance. The trade-off is size: a monotub is built for bulk substrate, not a handful of jars.
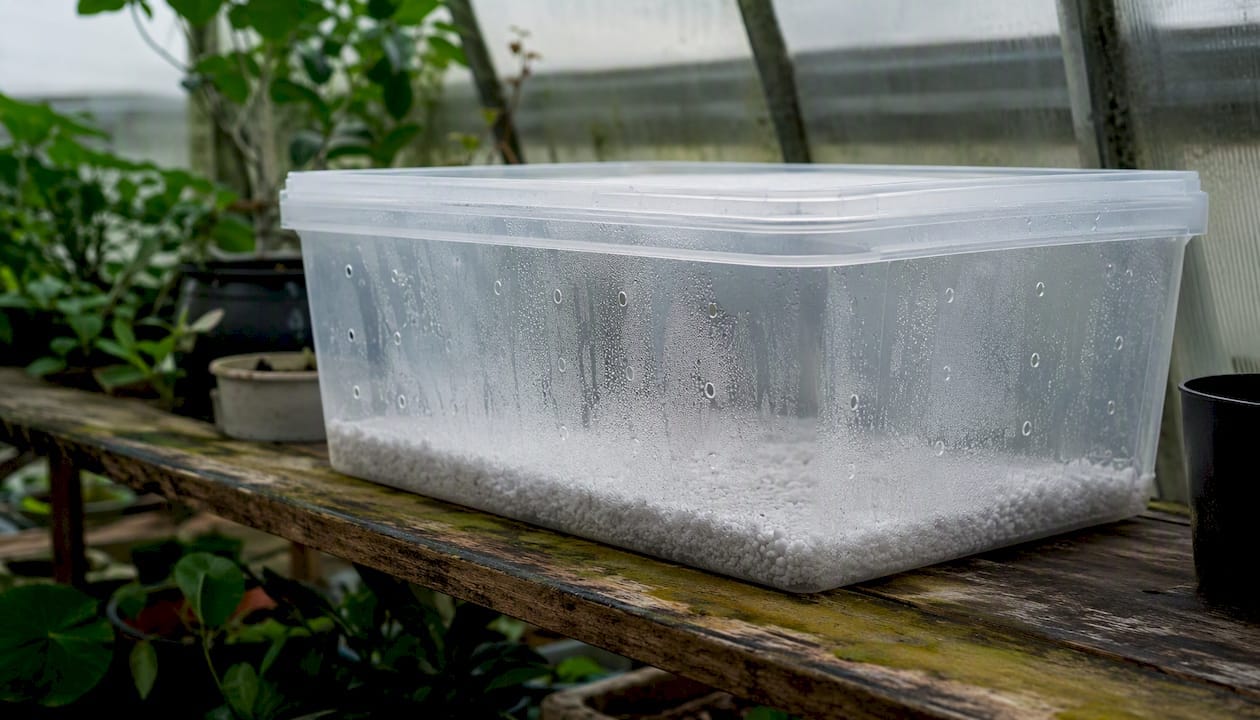
Shotgun fruiting chamber (SGFC). A smaller clear tub riddled with dozens of small holes, paired with a perlite bed for passive humidity. It suits single cakes or small batches grown using PF Tek methods, and because there’s no fan or humidifier involved, there’s very little to break.
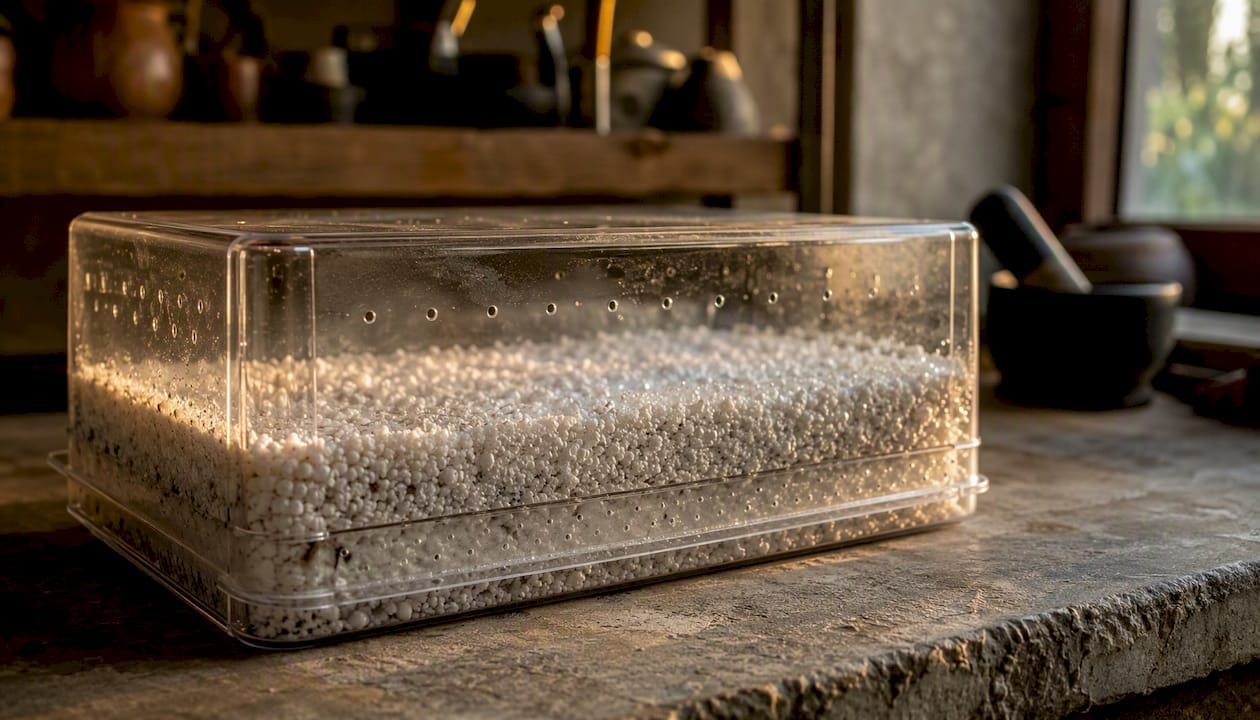
Martha-style mini greenhouse. Essentially a small greenhouse or shelf unit with a humidifier, often on a humidistat, capable of running several trays or tubs at once. It scales well for growers running multiple species or repeated batches, but the added electronics mean more points of failure and a higher upfront cost.
Grow tent. A fully enclosed fabric tent with reflective lining, usually fitted with a humidifier, small fan, and sometimes grow lights. It’s the closest thing to a weatherproof, contained chamber, and it suits growers who want everything in one footprint rather than several loose tubs.
Buckets. Drilled five-gallon buckets, often used for smaller fruiting setups or as an incubation stopgap. Cheap and easy to source, but limited in scale and prone to drying out faster than a tub with a proper perlite bed.
For cost, ease of use, and contamination risk, here’s how they typically rank for a beginner:
- Cheapest and simplest to build: SGFC and buckets.
- Best yield-to-effort ratio for bulk grows: monotub.
- Best for running several batches at once: Martha-style or grow tent.
- Highest contamination risk if built poorly: buckets, due to limited airflow control.
A typical beginner setup running their first bulk substrate does well starting with a single monotub, and adding an SGFC alongside it if they want to practise PF Tek cakes at the same time.
How do you build a monotub fruiting chamber?
Building your own monotub takes an evening, costs relatively little, and teaches you more about airflow than any amount of reading will. Here’s the checklist and the sequence.
Materials checklist:
- One opaque storage tote, roughly 18 to 30 litres (a 32 to 40 quart tub is a common size).
- A drill with a 1/4 inch bit for perlite bed holes and a 1/2 inch bit for side wall holes.
- Perlite, coarse grade, enough to fill a 1 to 2 inch layer in the base.
- Polyfill (the stuffing used in cushions) to plug larger holes if you want extra filtration.
- A digital hygrometer and thermometer.
- Water in a spray bottle for hydrating the perlite bed.
- Colonised bulk substrate ready to fruit.
Step-by-step build:
- Drill rows of 1/2 inch holes around all four sides of the tub, spaced roughly 3 to 4 inches apart, starting a couple of inches above where the substrate line will sit.
- Drill a denser row of smaller holes near the lid for additional gas exchange, plugging a few with polyfill if you want to slow airflow slightly.
- Rinse the perlite thoroughly, then soak it for an hour before draining it until it’s damp but not dripping.
- Spread a 1 to 2 inch layer of the damp perlite across the base of the tub as a humidity reservoir.
- Place your colonised substrate on top of the perlite, breaking it into chunks if it’s a bulk block, to expose more surface area for pinning.
- Mist the tub walls lightly, close the lid, and set it somewhere with stable temperature and out of direct sunlight.
For the first two weeks, mist the inside walls once or twice a day and fan the lid open for 30 seconds each time to refresh the air. Once pins appear, ease off the misting frequency since dense pin clusters generate their own humidity through transpiration, and overdoing it at this stage causes the wet-spot infections covered further down.
| Build stage | What to check |
|---|---|
| First few days | Substrate settling in, no misting needed yet |
| Days 3–7 | Light misting once daily, watch for early pin formation |
| About a week to two weeks | Reduce misting as pins cluster, increase fanning frequency |
| After two weeks | First flush ready, monitor cap maturity daily |
Pro Tip: Resist the urge to automate your first build. A hand mister and your own eyes teach you to read a chamber’s mood far faster than a humidistat does, and mistakes are cheaper to fix when you’re the one making them.
Building a shotgun chamber or a Martha-style greenhouse
If a full monotub feels like overkill for your first grow, or you want to scale up to something closer to a grow room, these two builds sit at opposite ends of the effort scale.
Shotgun fruiting chamber (SGFC):
Materials needed: a clear plastic tub (10 to 20 litres), a drill with a small bit (around 1/4 inch), perlite, and a spray bottle. Budget a low amount if you’re buying the tub new, less if you repurpose one you already own.
- Drill dozens of small holes across every surface of the tub, including the lid, spaced an inch or so apart. The perlite-and-many-holes design gives passive gas exchange without a fan, which is why it’s the standard for PF Tek cakes.
- Add a shallow perlite bed across the base, dampened but not waterlogged.
- Place your colonised cakes or jars on a raised tray or upturned cup above the perlite line, so they don’t sit directly in standing moisture.
- Mist the inside walls lightly once a day and let the many small holes do the rest of the work.
Martha-style mini greenhouse:
Materials needed: a small greenhouse shelf unit or wire shelving wrapped in plastic sheeting, a humidifier, a humidistat, and a small computer fan for circulation. This build runs closer to £40 to £80 depending on the humidifier you choose and whether you already own the shelving.
- Wrap the shelving in clear plastic sheeting, leaving a zip or velcro opening for access.
- Mount the humidifier at the base with its output directed upward through the shelves.
- Wire the humidistat to cycle the humidifier automatically once humidity drops below your target.
- Fit a small fan on a timer for a few minutes of circulation several times a day to prevent stagnant air pockets.
Favour the SGFC when you’re running single cakes and want to master transfers and pinning without spending on electronics. Favour the Martha when you’re running multiple trays or species at once and want something closer to a hands-off, near-automated setup. Beginners typically do better mastering sterile technique and simple passive designs before adding automation, since a misconfigured humidistat can ruin a grow faster than a missed misting.
What does daily chamber maintenance actually look like?
Once your chamber is built and seeded, the real work is a short daily routine rather than a one-off setup job. Most growers spend five to ten minutes a day on inspection and adjustment, and that consistency matters more than any single piece of kit.
Your daily checklist should cover:
- A visual scan for pin formation, discolouration, or standing water pooling on the substrate surface.
- Misting the walls (not the substrate directly) if the hygrometer reads below your target range.
- Fanning the lid open for 20 to 30 seconds to exchange stale air, more often once pins have formed.
- Wiping down condensation on the lid if it’s dripping directly onto developing mushrooms.
On equipment, you don’t need much to start: a hygrometer, a thermometer, a spray bottle, and a small clip fan cover the basics. As you scale to a Martha-style setup or multiple monotubs running in parallel, a small ultrasonic humidifier paired with a humidistat takes the guesswork out of maintaining humidity across a bigger footprint. Stick to hand misting and manual fanning for your first one or two grows, then consider automation once you understand what “normal” looks like inside your specific chamber.
Pro Tip: Over-misting is the most common beginner error, and it’s almost always driven by anxiety rather than a genuine reading problem. Trust the hygrometer over your instinct, and only mist when the number tells you to.
Which fruiting chamber suits which mushroom species?
Different species tolerate different levels of humidity, airflow, and temperature, and matching your chamber to your chosen species saves a lot of frustration. Psilocybe cubensis is relatively forgiving with lower fresh-air exchange, while oyster mushrooms demand considerably more airflow to avoid growing long, pale, and malformed.
- Psilocybe cubensis: Does well in a standard monotub or SGFC with moderate FAE, tolerating the lower end of the 4 to 6 exchange-per-hour range comfortably.
- Oyster mushrooms: Need higher airflow than most species, so a monotub with extra ventilation holes or a grow tent with active fanning suits them better than a sealed SGFC.
- Lion’s mane: Prefers slightly cooler temperatures and steady humidity; a Martha-style chamber with a humidistat gives the consistency this species rewards.
- Shiitake: Often fruits on logs or blocks outside a sealed chamber entirely, needing good airflow and a temperature drop to trigger pinning rather than the steady warmth other species prefer.
Pro Tip: If you’re growing a species not listed above, check its specific FAE and temperature needs before assuming your monotub settings will transfer directly. Some gourmet varieties, particularly those used to cooler climates, need setups well outside the standard beginner range.
How do you spot and fix contamination early?
Contamination is the single biggest reason beginner grows fail, and catching it early is almost always the difference between losing one bag and losing an entire batch. Learn to check daily rather than waiting for a problem to become obvious.
Watch for these warning signs:
- Green, black, or fuzzy grey patches on the substrate surface, almost always indicating mould rather than healthy mycelium.
- A sour, foul, or ammonia-like odour coming from the tub, which usually points to bacterial contamination rather than fungal.
- Wet, slimy patches on the substrate surface, often called wet spot, which spreads quickly if humidity is too high with insufficient airflow.
- Stalled pinning, where small pins form but never develop further, often linked to poor fresh-air exchange or a temperature that’s drifted outside range.
Immediate action matters more than panic. Isolate the affected container away from other grows straight away, since airborne spores from mould spread fast in an enclosed space. Increase fresh-air exchange immediately if you suspect a stagnant, over-humid environment is the root cause, since a stagnant chamber with too little airflow is a common trigger for bacterial infection even when humidity looks correct on paper.
A fruiting chamber’s entire purpose is balancing high humidity against constant gas exchange. Get that balance wrong in either direction and you invite exactly the bacterial and fungal problems that end a grow early.
For prevention, build these habits into your routine:
- Wipe down the inside of your chamber with a diluted alcohol solution between grows.
- Avoid touching substrate with bare hands; use gloves or wash thoroughly first.
- Keep the chamber away from soil, compost, or houseplants, which carry competing spores.
- Increase fanning frequency at the first sign of condensation build up rather than waiting for a smell to develop.
Small green spots caught within the first day or two can sometimes be cut out with a sterile blade, provided the surrounding substrate still looks and smells healthy. But once mould has spread across more than a small patch, or the substrate smells distinctly sour, it’s safer to discard the whole batch rather than risk cross-contaminating other grows in the same room. For a deeper walkthrough of prevention routines, Sporebuddies’ contamination troubleshooting guide covers cleaning protocols in more detail.
Do beginners always need a chamber, or is a kit bag enough?
Not every grow justifies building a chamber from scratch. Many beginner mushroom kits ship with humidity-retaining bags that create a sufficient micro-environment for the entire grow cycle, particularly for single-flush kits aimed at first-time growers.
Use this checklist to decide whether you need to build something more robust:
- How dry is your growing environment? Centrally heated homes or air-conditioned rooms often need extra humidity support beyond what a kit bag provides.
- How sensitive is your chosen species? Forgiving species like oyster mushrooms often fruit well straight from a bag, while pickier gourmet varieties may need tighter control.
- How many flushes do you want? A bag typically supports one to two flushes well; beyond that, a proper chamber with reservoir humidity tends to hold up better across three or more.
- What scale are you working at? A single kit doesn’t need a monotub, but three or four kits running together often benefit from one shared chamber.
On cost, a basic SGFC costs very little to build from a tub you may already own, while a monotub with perlite and a hygrometer typically runs a modest one-off cost that pays for itself across several bulk grows. If you’re planning more than one grow a year, a chamber is generally the better long-term investment; if you’re testing the water with a single kit, save the effort and let the bag do its job first.
What equipment does an experienced grower actually recommend?
After building several designs, most experienced growers settle on a short list of equipment that earns its place, rather than a shelf full of gadgets that rarely get used. The essentials are measurable, not decorative.
Your minimum viable checklist:
- A digital hygrometer with a probe, positioned at substrate height rather than the lid.
- A stick-on or digital thermometer to catch drift from nearby heat sources.
- Coarse perlite for the humidity reservoir, ideally rinsed before use to remove dust.
- A drill with 1/4 inch and 1/2 inch bits for hole spacing.
- A basic spray bottle for manual misting during the first few grows.
Sporebuddies stocks the practical side of this list directly, including ready-made monotubs and grow tents for growers who’d rather skip the drilling, along with hygrometers and pre-sterilised substrate for those building a monotub from scratch. None of it replaces good technique, but it removes a few of the variables that trip beginners up in week one.
Frequent inspection and small manual fixes consistently outperform expensive equipment for a small home grow. Observation, not automation, is the skill worth developing first.
Pro Tip: If you’re only running one or two grows a year, a hygrometer, a drilled tub, and perlite will get you a reliable first flush. Save the humidistat and fan setup for when you’re running several chambers at once.
If you want kit-ready equipment: what Sporebuddies offers
Building your own chamber teaches you the fundamentals, but not every grower wants to spend an evening with a drill and a tub of perlite. Sporebuddies stocks the equipment that shortens that path considerably. Its monotub and accessory range covers pre-drilled tubs and grow tents for growers who’d rather set up in minutes than an evening, and its substrate category offers pre-sterilised bulk substrate for anyone who wants to skip sterilising their own. For readers starting from spores rather than a kit, the spore syringe range is the natural next step once your chamber and substrate are ready to go.
If you’re still deciding between a kit bag and a full build, the grow kits FAQ walks through which situations call for which. Browse the relevant category, check what fits your scale, and pick up the hygrometer and substrate together so your first flush isn’t waiting on a missing piece.
Sources
A handful of sources cover the mechanics of chamber design in more depth than a single article can, alongside internal guidance for readers ready to go deeper on specific variables.
- Mushroom fruiting chamber: Martha-style guide
- Mushroom fruiting chambers: everything you need to know
- Build a fruiting chamber — Mushroom Growing Tips
- What is a mushroom fruiting chamber?
- DIY mushroom fruiting chamber build plans
FAQ
Do you mist when transferring to the fruiting chamber?
Light misting of the chamber walls just before placing colonised substrate helps establish humidity, but avoid misting the substrate directly during transfer, since that raises contamination risk right when it’s most exposed.
How do you use a mushroom fruiting chamber day to day?
Check humidity and temperature readings each morning, mist the walls if the reading falls below your target range, fan the lid briefly to refresh air, and watch for pin development or early contamination signs.
Is mycelium or the fruiting body more important to monitor?
Both matter at different stages: healthy, even mycelium colonisation before fruiting predicts a strong flush, while the fruiting body’s shape and colour during growth tell you whether your chamber’s humidity and airflow are correctly balanced.
Is there a fully automated fruiting chamber available?
Martha-style chambers with a humidistat and timer-controlled fan come close to full automation, and Sporebuddies’ grow tent range includes options built with this level of control in mind, though most beginners still benefit from manual monitoring during their first grow.