Growing mushrooms at home is one of the most satisfying hobbies you can take up in the UK, but it trips up more beginners than you might expect. Contamination, confused processes, and mismatched substrates are the most common reasons people abandon their first few attempts. Many UK home growers struggle with sterile technique and matching the right process to each mushroom species. This guide walks you through everything step by step, from choosing your first legal strain to diagnosing problems and harvesting consistently. Whether you are brand new to mycology or looking to sharpen your technique, you will find clear, actionable guidance here.
Table of Contents
- What you need for mycology cultivation at home
- Preparing your substrate and ensuring sterility
- The cultivation process: inoculation, incubation, and fruiting
- Troubleshooting and preventing contamination
- A grower’s perspective: learning from every attempt
- Start your mycology journey with trusted UK resources
- Frequently asked questions
Key Takeaways
| Point | Details |
|---|---|
| Start with easy strains | Oyster mushrooms are ideal for beginners thanks to quick growth and forgiving nature. |
| Prioritise clean substrate | Correct pasteurisation or sterilisation is the most reliable way to avoid contamination. |
| Control your environment | Steady humidity, correct temperature, and ventilation are critical at every stage. |
| Embrace mistakes | Every batch—failure or success—helps you refine your process and skills. |
What you need for mycology cultivation at home
Now that you know why a structured approach makes all the difference, let’s look at precisely what you’ll need to get started.
In the UK, the most popular legal species for home cultivation are Oyster, Lion’s Mane, and Shiitake. Each has its own preferred substrate, growth speed, and difficulty level. Choosing the right species for your setup is the first decision that will shape everything else. Recommended legal strains like these each have specific timeframes and substrate preferences that directly affect your success rate.
| Species | Preferred substrate | Time to harvest | Difficulty |
|---|---|---|---|
| Oyster | Straw, cardboard | 3–5 weeks | Beginner |
| Lion’s Mane | Hardwood sawdust | 6–8 weeks | Intermediate |
| Shiitake | Hardwood logs or blocks | 8–16 weeks | Intermediate |
Beyond your chosen species, you will need a core set of tools and materials before you begin. Skipping any of these is a common cause of early failure.
Essential items to source before starting:
- Substrate (straw, sawdust, or supplemented hardwood)
- Grain spawn or plug spawn for inoculation
- Pressure cooker or large pot for sterilisation or pasteurisation
- Polypropylene grow bags or glass jars with filter lids
- Isopropyl alcohol (70%) and gloves for sanitation
- Hygrometer and thermometer to monitor your growing environment
- Spray bottle for misting during fruiting
- Still air box or flow hood for sterile work
For guidance on building the right foundation for your substrate, our substrate recipes page covers a range of mixes suited to different species and skill levels.
Pro Tip: Start with Oyster mushrooms. They colonise fast, tolerate imperfect conditions better than most species, and reward beginners with visible results quickly. This builds confidence and teaches you the fundamentals before you move on to more demanding strains.
Preparing your substrate and ensuring sterility
With all your tools and supplies on hand, it’s time to dive into substrate preparation, the backbone of contamination-free mycology.
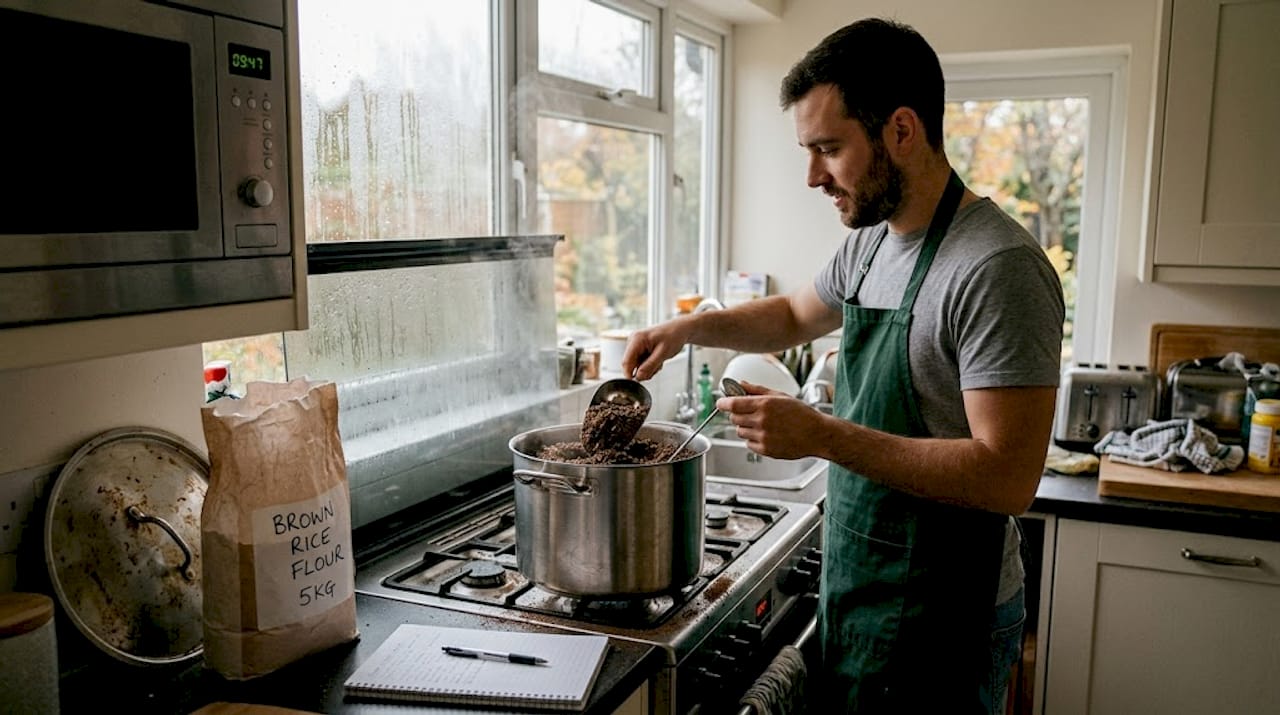
The method you use to prepare your substrate depends on what you are growing and which substrate you have chosen. Straw is pasteurised rather than sterilised because its structure and microbial balance actually benefit from a lighter heat treatment. Sawdust and grain, on the other hand, need full sterilisation to eliminate all competing organisms. Getting this wrong is one of the most common reasons colonisation fails.
Step-by-step substrate preparation:
- Weigh and hydrate your substrate to the correct field capacity (roughly 60–65% moisture content, where a squeezed handful releases only a few drops).
- For straw: submerge in hot water and pasteurise at 65–82°C for 1–2 hours, then drain thoroughly.
- For sawdust or grain: load into polypropylene bags or jars, then sterilise at 121°C and 15 PSI for at least 2.5 hours in a pressure cooker.
- Remove from heat and allow to cool in a clean, undisturbed area away from air vents and foot traffic.
- Do not inoculate until the substrate has fully cooled to room temperature.
| Substrate | Method | Temperature | Duration |
|---|---|---|---|
| Straw | Pasteurisation | 65–82°C | 1–2 hours |
| Sawdust | Sterilisation | 121°C / 15 PSI | 2.5+ hours |
| Grain | Sterilisation | 121°C / 15 PSI | 2.5–3 hours |
Safety note: Pressure cookers and large pots of boiling water carry a real risk of burns. Always use heat-resistant gloves when handling hot equipment, never open a pressure cooker before pressure has fully dropped, and keep children and pets well away from your work area.
For a deeper look at mixing and layering substrates for maximum yields, the bulk substrate guide is worth reading alongside this section. If you want to understand how substrate choices affect contamination prevention, that resource covers the science clearly.
Pro Tip: Allow your substrate to cool for a full 12–24 hours before adding spawn. Inoculating warm substrate is one of the most reliable ways to kill your mycelium before it even gets started.
The cultivation process: inoculation, incubation, and fruiting
Once your substrate is sterile and cooled, the cultivation process begins. Let’s break down each work stage for reliable results.
Each stage of cultivation has its own environmental requirements. Understanding what your mycelium needs at each point is what separates consistent growers from those who get lucky once and then struggle to repeat it.
Key cultivation stages:
- Inoculation: In a still air box or near a flow hood, add 10–20% grain spawn to your cooled substrate. Mix thoroughly, seal your bags, and label with the date and species.
- Incubation: Move your inoculated bags or jars to a dark space held at 21–27°C. This is when mycelium begins spreading through the substrate.
- Colonisation: Over 1–3 weeks, the substrate will turn white as mycelium colonises it fully. Do not disturb or open bags during this stage.
- Fruiting initiation: Once fully colonised, introduce fresh air, indirect light, and higher humidity (85–95%) to trigger pinning. A small temperature drop of 2–5°C can also help.
- Harvest: Pick mushrooms just before the caps fully flatten or the veil beneath breaks. Twist gently at the base rather than cutting to avoid leaving tissue that could rot.
Signs of success at each stage:
- Inoculation: White mycelium begins appearing within 3–7 days
- Incubation: Substrate turns consistently white with no patches of colour
- Fruiting: Small pins (primordia) form across the surface of the block or bag
- Harvest: Caps are rounded, firm, and have not yet released spores
For a full breakdown of safe practices at each stage, our mushroom safety tips page covers handling, hygiene, and responsible growing in the UK context.
Pro Tip: Mist the inside walls of your fruiting chamber rather than directly onto the mushrooms. Misting caps directly can cause spotting and cracking. Ventilate 2–4 times daily to prevent CO2 build-up, which causes long, thin, poor-quality stems.
Troubleshooting and preventing contamination
Even the most careful grower faces issues. Here’s how to spot problems early and course-correct efficiently.
Contamination is the most demoralising part of home cultivation, especially when you have invested time and effort into a batch. The good news is that most contaminants are identifiable, and many environmental problems are fixable once you know what to look for.
Common contaminants and how to respond:
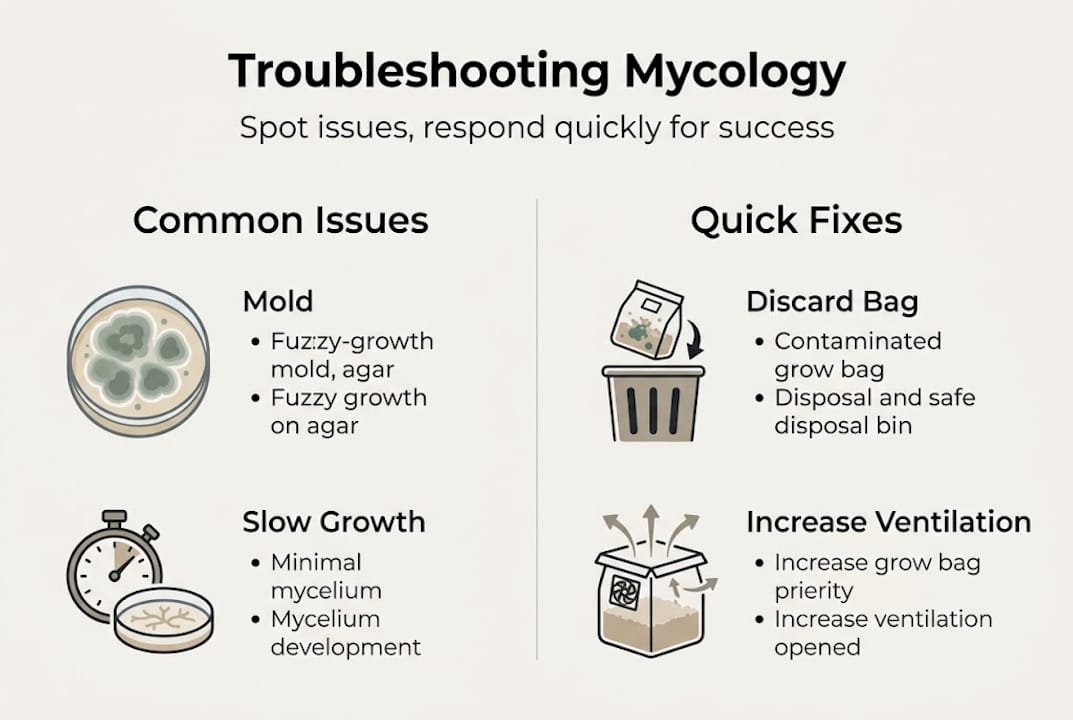
- Trichoderma (green mould): The most aggressive and common contaminant. Trichoderma appears green and spreads rapidly. Remove and seal the affected bag immediately, do not open it indoors, and discard outside. There is no saving a Trichoderma-contaminated bag.
- Cobweb mould (grey, wispy growth): Often mistaken for mycelium. It is thinner and less structured. Increase fresh air exchange and apply a light mist of diluted hydrogen peroxide (3%) directly to the affected area. Many growers recover from this one.
- Bacterial blotch (wet, slimy patches with an unpleasant odour): Usually caused by over-misting or poor drainage. Reduce moisture, improve airflow, and discard if it spreads beyond a small area.
Environmental imbalances cause just as many problems as contamination. Over-misting leads to pooling water and bacterial growth. Under-misting causes cracked caps and stalled pins. High CO2 from inadequate ventilation produces long, spindly stems. Low temperatures slow colonisation to a crawl and can make it look like nothing is happening.
A note for new growers: Contamination in your first few batches is not a sign of failure. It is a sign that you are learning. Every contaminated bag teaches you something about your environment, your technique, or your timing. The growers who improve fastest are the ones who treat each batch as data rather than a disappointment.
Keeping a log of each batch, including substrate type, inoculation date, temperature readings, and any issues, helps you identify patterns over time. Our guide on common contaminants includes photographs and identification tips that are genuinely useful when you are standing in front of a suspicious bag.
Pro Tip: Maintain a simple logbook for every batch. Note the date, species, substrate, temperatures, and any anomalies. After three or four batches, patterns become obvious and improvements happen much faster.
A grower’s perspective: learning from every attempt
With troubleshooting tips in tow, it’s worth reflecting on what many guidebooks miss: the invaluable lessons only experience provides.
Here is something most guides will not tell you directly. Your first contaminated batch is not a failure. It is tuition. Contamination is inevitable for beginners, and the growers who log their causes and learn from them are the ones who build real skill over time.
There is a temptation to jump straight to advanced strains or complex substrates because the results look impressive online. Resist it. Spending two or three cycles on Oyster mushrooms before moving to Lion’s Mane or Shiitake is not wasted time. It is where your sterile technique actually gets built. The habits you form in those early batches, how you handle spawn, how you manage your environment, how you read your substrate, carry forward into every more complex grow you attempt.
Documenting each batch honestly, including the failures, is what separates hobbyists who plateau from those who keep improving. If you are planning to eventually work with more specialised legal strains, understanding the legal overview for home growers in the UK is also worth your time before you expand your collection.
Progress in mycology is incremental. Each batch teaches you something the last one could not.
Start your mycology journey with trusted UK resources
By now, you are ready for a smooth, supported start. Here’s where to find reliable supplies, expert advice, and legal clarity.
At Spore Buddies, we stock everything a UK home grower needs to get started confidently and legally. From beginner-friendly oyster grow kits that take the guesswork out of your first harvest, to a full range of bulk mycology supplies for growers ready to scale up, we have options for every stage of the journey. If you are unsure which kit suits your space and goals, our grow kit FAQ answers the most common questions clearly. All products are sourced for quality and reliability, so you spend less time troubleshooting and more time growing.
Frequently asked questions
Which mushroom is easiest for beginners to cultivate at home?
Oyster mushrooms are the most forgiving and fastest-growing legal choice for UK beginners, typically ready to harvest in just 3–5 weeks on straw.
Why is sterilisation important in mycology cultivation?
Sterilisation removes all competing organisms from grain and sawdust substrates, giving your mycelium a clean environment to colonise without fighting off bacteria or mould.
How can I recognise and fix mushroom contamination?
Green growth means Trichoderma and the bag should be discarded immediately; grey cobweb mould can often be treated with diluted hydrogen peroxide and improved airflow, and keeping a batch log helps prevent repeat issues.
How should I adjust humidity and ventilation for successful fruiting?
Maintain 85–95% relative humidity and ventilate with fresh air 2–4 times daily during fruiting to encourage healthy pins and avoid poor-quality, elongated stems.