
Harvesting mushroom spores is the precise process of collecting spores from mature mushroom caps under sterile conditions to produce clean, viable samples for cultivation or research. The technique, formally known as spore collection or fungal spore harvest, sits at the heart of every successful home cultivation cycle. Get the timing wrong and you lose spore density. Skip the sterile protocols and contamination destroys your sample. This guide walks you through every stage of the harvesting mushroom spores process, from choosing the right tools to archiving prints that stay viable for years.
What tools and materials do you need for mushroom spore harvesting?
The right materials make the difference between a clean spore print and a contaminated mess. Every item on your list serves a specific purpose, and substituting carelessly introduces risk.
Core equipment:
- Aluminium foil or sterile paper (foil is preferred for long-term storage)
- A clean glass, bowl, or container to cover the cap
- Sterile scalpel or knife for cap preparation
- Sterile gloves and a face mask
- A still air box or laminar flow hood for a clean working environment
- Desiccant packets to control moisture after collection
- Mylar bags and a vacuum sealer for archiving
- Sealable glass jars or airtight containers for short-term storage
Plastic bags trap moisture and accelerate mushroom decay. That moisture is the enemy of a clean spore print. Aluminium foil outperforms both plastic and wax paper because it folds flat, seals tightly, and does not absorb humidity from the surrounding air.
Temperature matters too. Spore prints stored at room temperature remain viable for 2–5 years. Refrigerator storage at approximately 4°C extends that window considerably, which is why a dedicated fridge shelf is worth setting aside for your spore library.
Pro Tip: Label every piece of foil before you place the cap on it. Writing on foil after the print is made risks disturbing the deposit.
| Storage method | Approximate viability |
|---|---|
| Room temperature print | 2–5 years |
| Refrigerated print (foil, desiccant) | 10–20 years |
| Spore syringe (refrigerated) | 6–12 months |
How do you harvest mushroom spores using spore prints and swab methods?
The spore printing method is the most reliable technique for home cultivators. The swab method is a useful secondary approach when you need to collect spores from a cap that cannot be removed cleanly.
Spore printing: step by step
- Choose the right mushroom. Harvest at or just before veil tear, the moment the thin membrane beneath the cap begins to split. Optimal harvest timing is at veil tear, giving you maximum spore density with minimal contamination risk. Overripe caps with flat profiles and browning edges drop fewer spores and carry more bacteria.
- Prepare your workspace. Wipe down your surface with isopropyl alcohol. Put on sterile gloves and your mask. If you have a still air box, use it. A clean, draught-free room works as a minimum.
- Remove the stem. Use a sterile scalpel to cut the stem flush with the cap. Handle the cap by its edges only.
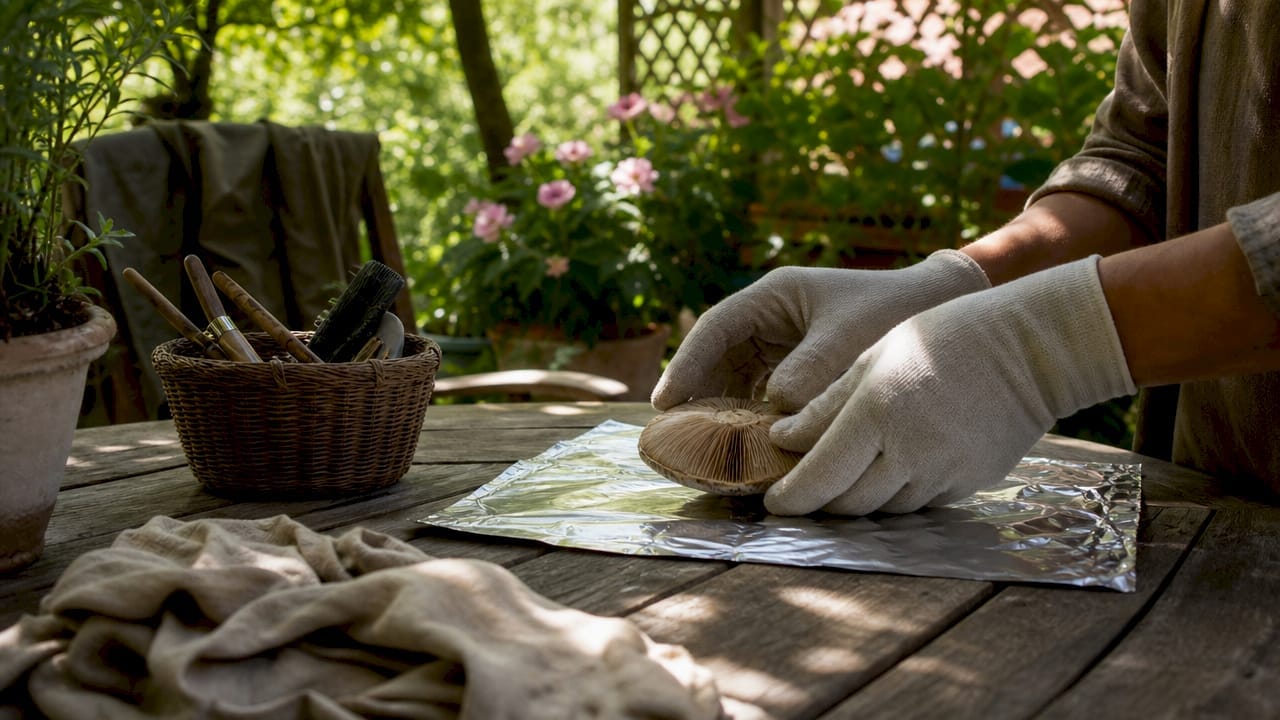
- Place the cap gill-side down. Set it directly onto a sheet of aluminium foil. Cover it immediately with a glass or bowl to trap humidity around the cap without letting outside air in.
- Wait. Most spores drop within 4–6 hours, though leaving the cap for up to 24 hours produces a denser print. Do not disturb the cover during this period.
- Lift and dry. Remove the glass carefully. Lift the cap straight up to avoid smearing the print. Allow the print to air-dry for 30–60 minutes before folding the foil.
Spore swabbing technique
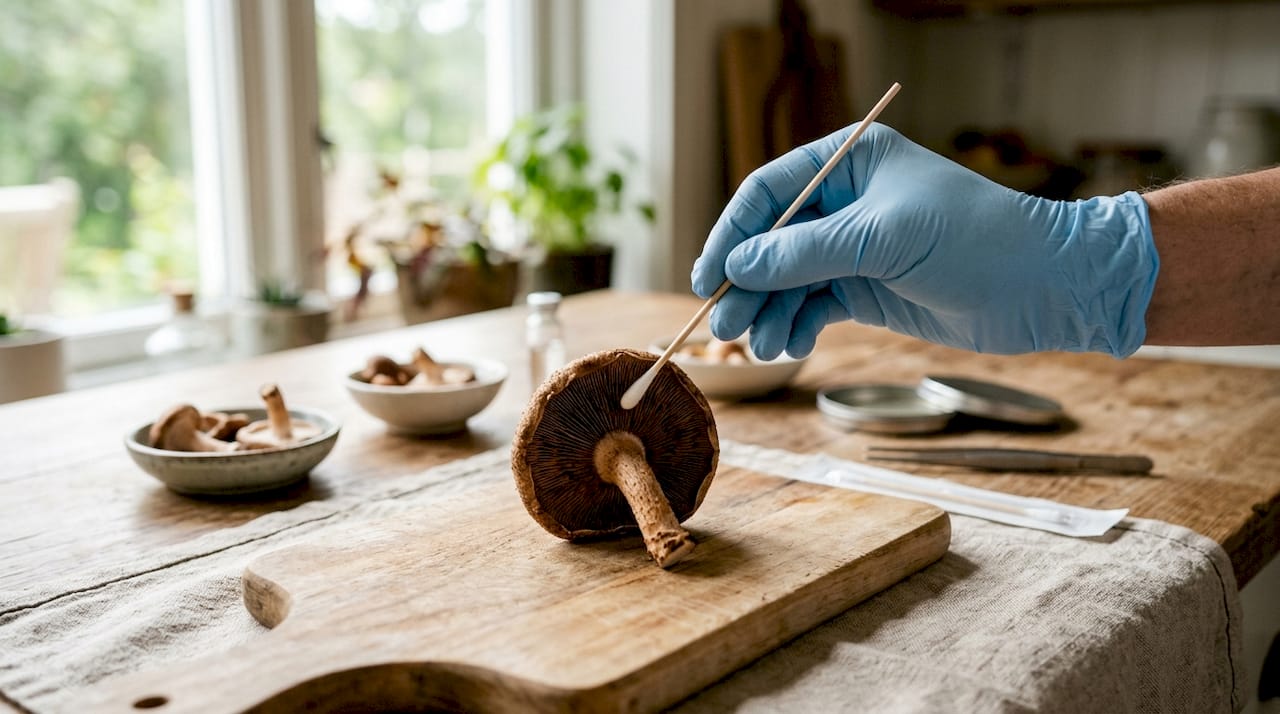
The swab method suits situations where you want to collect spores directly from the gills without making a full print. Take a sterile cotton swab, open the packaging inside your still air box, and gently roll the tip across the gill surface of a mature cap. Seal the swab immediately in a sterile tube. Swabs work well for creating spore syringes later, though they typically yield a smaller spore count than a full print.
Pro Tip: If your cap is releasing spores but the print looks faint, the ambient humidity may be too low. Place a small damp paper towel inside the cover, not touching the cap, to raise local humidity slightly.
Common mistakes to avoid:
- Moving the cover during the drop period (causes smearing)
- Using a cap that is past peak maturity
- Skipping gloves and allowing skin contact with the print surface
- Leaving the print exposed to open air before folding
What are the key contamination risks during spore harvesting?
Contamination is the single biggest threat to a successful fungal spore harvest. Knowing where it comes from lets you block it at the source.
Primary contamination sources:
- Airborne bacteria and wild fungal spores settling on the print
- Moisture buildup beneath the cover, creating conditions for bacterial blotch
- Skin oils and bacteria transferred by bare hands
- Substrate contamination carried on the mushroom cap itself
Excess moisture on spore prints encourages bacterial blotch, a condition that ruins the print and makes the spores unusable. The fruiting environment needs high humidity (85–95%) to produce mushrooms, but the moment you begin collecting spores, moisture becomes a liability. Dry your prints thoroughly before sealing them.
“Environmental control during and after spore collection is key. Maintaining proper humidity during fruiting yet ensuring spore prints stay dry prevents bacterial contamination.” — NCAT Mushroom Cultivation guidance
Personal hygiene is non-negotiable. Wash your hands before putting on gloves. Change gloves if you touch anything outside the sterile zone. A face mask stops respiratory droplets from landing on the print surface.
Visual contamination cues are clear once you know what to look for. Green, black, or pink spots on a spore print indicate bacterial or mould contamination. Discard any print showing these colours. White fluffy patches may be early mycelium primordia, which are still viable but need to be used quickly before they degrade.
You can read more about keeping your grow environment clean in this guide on preventing mould in mushrooms, which covers storage and contamination prevention in detail.
How should you store harvested spores for long-term preservation?
Proper storage is where most home cultivators lose ground. A perfect spore print stored carelessly becomes worthless within months.
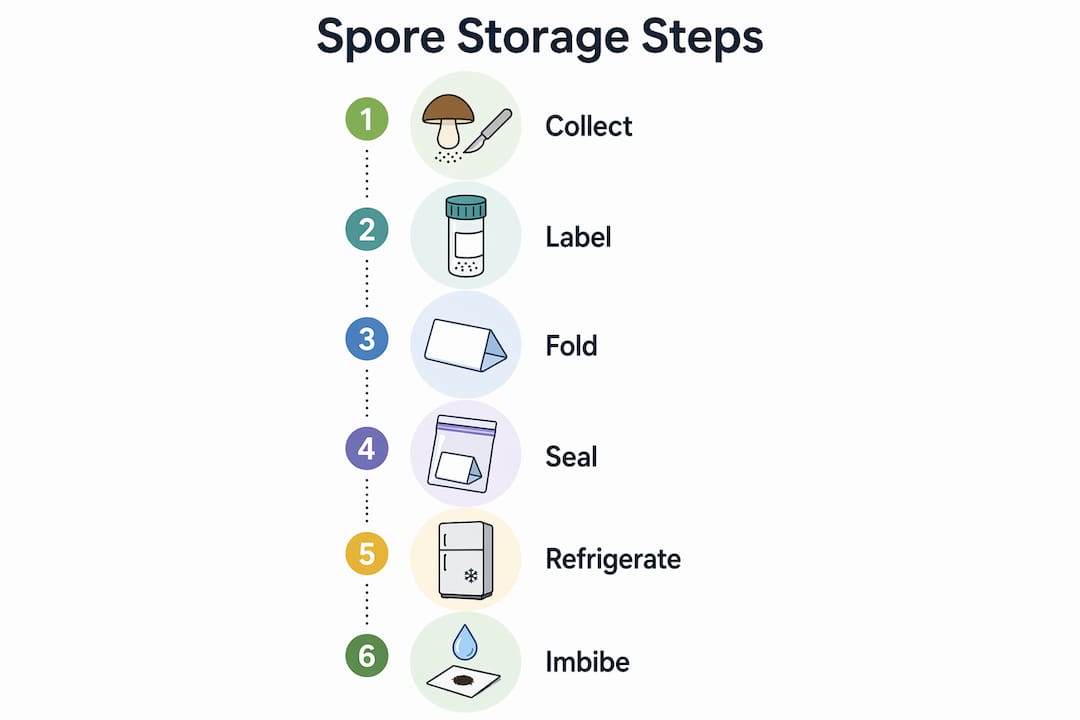
The gold standard for long-term archiving combines three layers of protection. First, fold the foil print into a neat packet. Second, place it inside a Mylar bag with a desiccant packet and an oxygen absorber. Third, vacuum-seal the Mylar bag before placing it in the refrigerator at approximately 4°C. This method yields the longest viability window available to home cultivators.
Spore prints stored this way maintain viability for 10–20 years. Spore syringes, by contrast, last only 6–12 months even under refrigeration. That gap explains why experienced cultivators prioritise print archiving over syringe storage for genetics they want to keep long-term.
Pro Tip: Create a simple catalogue for your spore library. Note the species, strain name, collection date, and storage location on a small card inside each Mylar bag. Losing track of what you have stored defeats the purpose of archiving.
When you are ready to use a stored print for cultivation, rehydration matters. Spores require a 24-hour imbibition period in sterile water to reactivate dormant cells before inoculation. This rehydration step significantly improves germination speed and inoculation success rates. Skipping it produces slower, patchier colonisation.
For cultivators building a serious spore library, the Sporebuddies guide on spore viability in cultivation covers the biological factors that affect how long your prints stay usable.
Key takeaways
The most effective harvesting mushroom spores process combines precise timing at veil tear, strict sterile technique, and vacuum-sealed cold storage to preserve spore viability for up to 20 years.
| Point | Details |
|---|---|
| Harvest at veil tear | Collect spores at or just before the veil splits for maximum density and minimum contamination. |
| Use aluminium foil | Foil outperforms plastic and wax paper by controlling moisture and sealing flat for archiving. |
| Allow 4–6 hours for the drop | Most spores fall within this window; up to 24 hours produces a denser print. |
| Vacuum-seal with desiccants | Mylar bags, oxygen absorbers, and refrigeration at 4°C extend viability to 10–20 years. |
| Rehydrate before inoculation | A 24-hour soak in sterile water reactivates dormant spores and improves germination speed. |
Quality spores and supplies for your harvesting setup
Building a reliable spore collection starts with quality genetics. Sporebuddies stocks a wide range of mushroom spore syringes and prints suited to UK home cultivators, from popular strains like Golden Teacher and B+ through to oyster and lion’s mane varieties. Every product is prepared for research and cultivation use. The shop also carries mycology equipment and supplies including agar plates, sterilised substrates, and microscopy tools to support a fully sterile harvesting workflow. If you are building your first spore library or expanding an existing one, Sporebuddies is a practical starting point for UK growers.
FAQ
When is the best time to harvest mushroom spores?
Harvest at or just before veil tear, when the membrane beneath the cap begins to split. This timing gives you the highest spore density with the lowest contamination risk.
How long does a spore print take to complete?
Most spores drop within 4–6 hours. Leaving the cap covered for up to 24 hours produces a denser print, but the core deposit forms in the first few hours.
How do I know if my spore print is contaminated?
Green, black, or pink patches on the print surface indicate bacterial or mould contamination. Discard any print showing these colours and do not use it for cultivation.
How long do spore prints stay viable in storage?
Properly archived prints on aluminium foil, vacuum-sealed in Mylar bags with desiccants at approximately 4°C, remain viable for 10–20 years. Spore syringes last only 6–12 months under the same conditions.
Do I need a sterile environment to make a spore print?
A still air box or laminar flow hood gives the best results, but a clean, draught-free room with isopropyl-wiped surfaces and sterile gloves is workable for most home cultivators. The key is minimising airborne contamination during the drop period.