Agar plates in mushroom growing are sterile, nutrient-rich jelly mediums that allow you to cultivate, isolate, and preserve mushroom mycelium with a level of precision that no other method matches. Poured into standard 90mm petri dishes, they give you a visible window into the health of your culture before you ever commit it to grain spawn. Whether you are working with oyster, shiitake, or lion’s mane, understanding agar work transforms your results from hit-and-miss to consistently clean. This guide covers everything from preparing Malt Extract Agar to isolating vigorous genetics and managing contamination at home.
How to use agar plates in mushroom growing
Agar is a polysaccharide derived from red algae. When dissolved in water with added nutrients and allowed to cool, it sets into a firm, translucent gel that supports mycelium growth. The most widely used formulation is Malt Extract Agar, or MEA, which feeds mycelium with simple sugars while remaining clear enough to reveal contamination early. Petri dishes are the standard vessel because their shallow, wide shape gives mycelium room to spread and makes visual inspection straightforward.
The role agar plays in mushroom cultivation techniques goes well beyond simple germination. Agar work enables cloning, long-term strain preservation, rescuing contaminated cultures, and verifying clean spawn before grain inoculation. That last point alone justifies the effort. Sending a contaminated culture into your grain jars wastes substrate, time, and money. Agar lets you confirm cleanliness first.
You will need a few core items to get started: a pressure cooker, a media bottle or flask, petri dishes, a still air box or laminar flow hood, and a scalpel or inoculation loop. None of these require a professional laboratory. Many home growers in the UK run successful agar programmes from a spare bedroom or kitchen.
Preparing the ideal agar medium for mushroom growing
Getting your agar medium right from the start prevents the majority of problems that new growers encounter. The recipe is straightforward, but precision matters.
The standard MEA recipe
The 4% MEA recipe uses 20g light malt extract, 20g agar powder, and 1 litre of distilled water, yielding approximately 25 petri dishes per batch. Tap water introduces minerals and chlorine that can inhibit mycelium growth, so distilled water is non-negotiable. Light malt extract, available from homebrew suppliers, provides the right balance of sugars without darkening the agar and obscuring contamination.
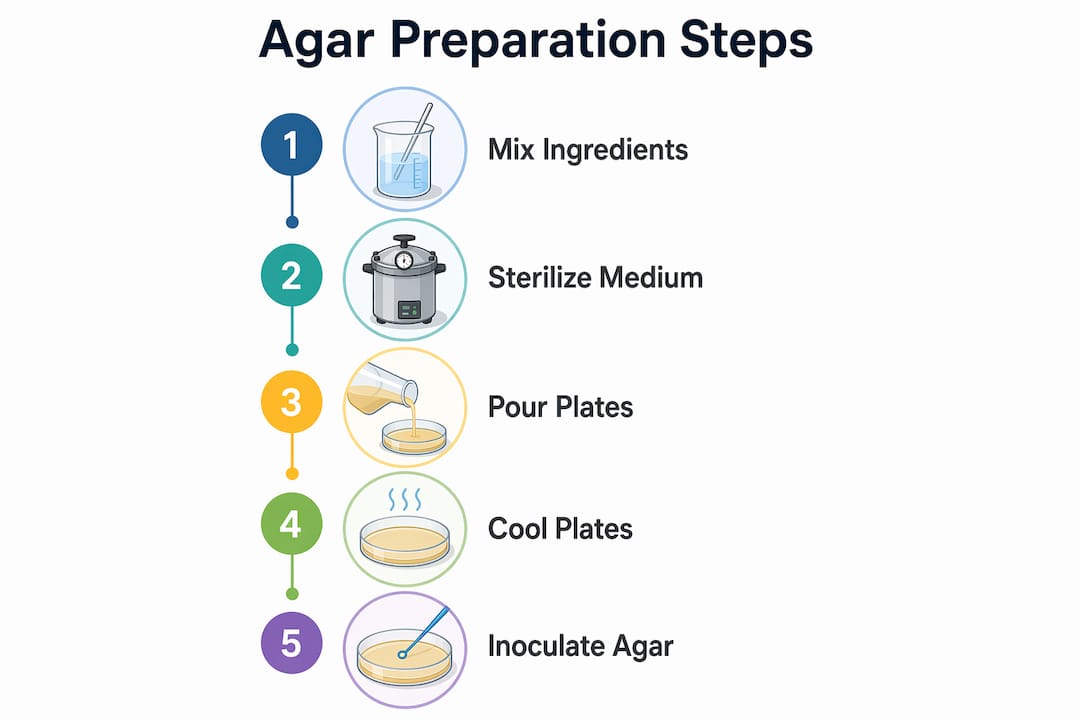
Step-by-step preparation
- Combine the malt extract and agar powder in your media bottle with 1 litre of distilled water.
- Stir gently until the powder is fully dissolved. Do not shake, as this creates bubbles that persist through pouring.
- Loosely cap the bottle and load it into your pressure cooker.
- Sterilise at 15 PSI for 90 to 120 minutes at 121°C to eliminate heat-resistant bacterial endospores and fungal contaminants.
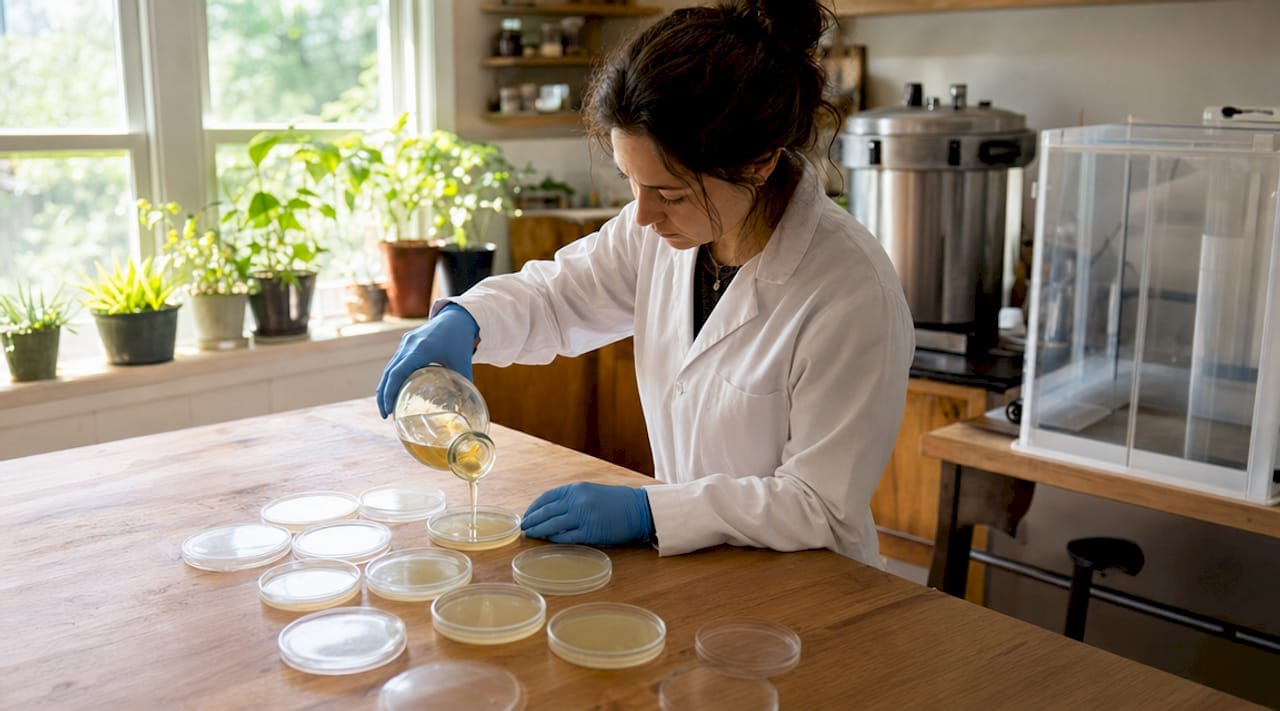
- Allow the bottle to cool to approximately 55 to 60°C before pouring. At this temperature, the agar is still liquid but will not scorch the petri dish plastic or create excessive condensation.
- Pour inside your still air box or under a laminar flow hood. Fill each dish to roughly one third depth, then replace the lid immediately.
- Leave the poured plates undisturbed for 30 to 60 minutes to set fully before stacking or storing.
Sterilisation is the step most beginners underestimate. Standard boiling at 100°C does not reach the temperatures needed to kill bacterial endospores. Only pressure cooking achieves the 121°C threshold that makes your agar genuinely sterile.
Pro Tip: Pour your agar with the petri dish lids slightly ajar rather than fully sealed. This allows steam to escape and prevents condensation droplets from forming on the lid surface, which would otherwise drip onto the agar and create wet spots that invite bacterial contamination.
How do you inoculate and isolate mycelium on agar?
Once your plates are poured and set, you have two main routes for introducing mushroom genetics: spore inoculation and tissue cloning. Each serves a different purpose, and understanding when to use which method separates experienced growers from beginners.
Spore inoculation involves introducing spores from a spore syringe or spore print directly onto the agar surface. This produces a multispore plate, where dozens of genetically distinct individuals germinate and compete. The result looks like a dense, overlapping carpet of mycelium sectors. Multispore plates are the starting point for strain selection, not the end product.
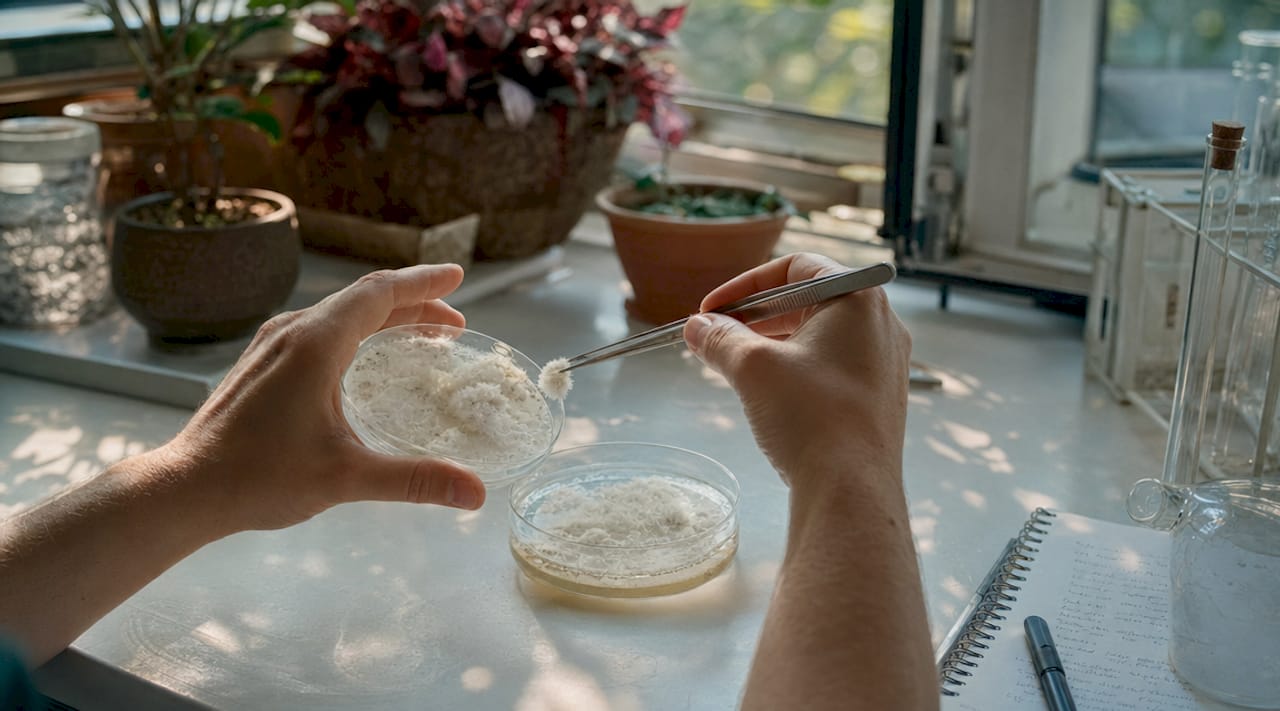
Tissue cloning takes a small piece of mushroom tissue from the interior of a fresh fruiting body and places it directly onto agar. This preserves the exact genetics of that individual mushroom. If you have grown an exceptionally large or fast-fruiting specimen, cloning it captures those traits permanently.
The isolation process works as follows:
- Allow your multispore plate to colonise for 5 to 10 days at room temperature.
- Examine the plate and identify sectors showing the most vigorous, dense, white mycelium growth.
- Healthy mycelium appears bright white and uncontaminated; reject any sector showing green, black, or pink colouration, or slimy bacterial patches.
- Using a flame-sterilised scalpel, cut a small wedge from the leading edge of the healthiest sector and transfer it to a fresh plate.
- Repeat this subculturing process over two to three generations. Selective subculturing over multiple generations isolates a single monoculture with consistent genetics.
Working inside a still air box reduces airborne contamination significantly during transfers. A still air box is simply a clear plastic tote with arm holes cut into one end. Air inside settles and becomes relatively particle-free within a few minutes of inactivity, giving you a cleaner working environment without the cost of a laminar flow hood.
Pro Tip: Always transfer from the leading edge of mycelium growth rather than the centre. The leading edge contains the youngest, most metabolically active cells, which colonise fresh agar faster and show fewer signs of senescence.
Managing contamination and keeping agar cultures clean
Contamination is the central challenge of agar work. New practitioners often see contamination rates exceeding 50% in their first sessions, which drops substantially as technique improves. That figure sounds discouraging, but it reflects poor sterile technique rather than any inherent difficulty in the process.
Common contaminants and their appearance on agar:
| Contaminant | Appearance | Risk level |
|---|---|---|
| Trichoderma (green mould) | Bright green patches, often powdery | High: spreads rapidly and outcompetes mycelium |
| Bacillus bacteria | Wet, slimy, cream or yellow patches | High: survives poor sterilisation |
| Aspergillus (black mould) | Black or dark grey spore clusters | Medium: visible early, easy to discard |
| Penicillium (blue-green mould) | Blue-green powdery growth | Medium: common airborne contaminant |
| Yeast | Wet, shiny, cream-coloured patches | Low to medium: slower to spread |
When you spot contamination on a plate, your response depends on where it appears. If the contamination is isolated to one edge and your mycelium has not yet reached it, you can sometimes rescue the culture by cutting a clean wedge from the opposite side and transferring it immediately to a fresh plate. If contamination is widespread, discard the plate entirely and seal it in a bag before disposal to prevent spore spread.
The choice of clean environment tool makes a measurable difference. A laminar flow hood reduces contamination rates to under 5%, compared to 10 to 20% with good still air box technique. A laminar flow hood pushes HEPA-filtered air in a steady, positive-pressure stream across your work surface, physically preventing airborne particles from settling. The cost is higher, typically £300 to £600 for a reliable unit, but for serious home growers it pays for itself quickly in saved substrate and time.
For contamination prevention at the hygiene level, wipe your work surface with 70% isopropyl alcohol before every session, wear nitrile gloves, and avoid talking or breathing directly over open plates. These habits alone account for the majority of contamination reduction achievable without upgrading equipment.
Storing agar plates at 4°C in a dedicated small refrigerator extends culture viability from days to weeks or months, depending on the species. Wrap sealed plates in cling film or store them in zip-lock bags to prevent desiccation.
Pro Tip: Label every plate with the strain name, inoculation date, and generation number before you pour. When you have 20 plates in the fridge, unlabelled plates become useless within a week.
What are the real benefits of agar work for home growers?
Agar plates slot into your cultivation cycle at several points, each one adding a layer of quality control that direct grain inoculation simply cannot provide.
- Culture verification: Before transferring mycelium to grain spawn, you can confirm on agar that your culture is clean, vigorous, and free of contamination. This single step eliminates the most common cause of failed grain jars.
- Strain preservation: A culture library of refrigerated agar plates lets you maintain multiple strains without running live grain jars continuously. Golden Teacher, B+, and oyster varieties all store well at 4°C for extended periods.
- Cloning exceptional fruits: When a particular flush produces unusually large or fast-growing mushrooms, tissue cloning onto agar captures those genetics permanently. You can return to that clone for every future grow.
- Cost efficiency: A single batch of MEA costs under £5 in ingredients and produces 25 plates. Compare that to the cost of repeatedly purchasing grain spawn or risking contaminated jars from unverified cultures.
- Incremental skill building: Agar work teaches you to read mycelium growth patterns, recognise contamination early, and understand fungal biology at a level that improves every other aspect of your cultivation.
Integrating agar into your routine does not require a complete overhaul of your current process. Start by pouring one batch of plates per month, practising transfers, and using the clean cultures to inoculate your grain. The improvement in consistency becomes apparent within two or three grow cycles. You can explore pre-poured agar plates as a starting point if you prefer to skip the preparation stage while you build confidence.
Key takeaways
Agar plates in mushroom growing give you direct control over culture quality, genetics selection, and contamination management at every stage of the cultivation cycle.
| Point | Details |
|---|---|
| Standard MEA recipe | Use 20g malt extract, 20g agar powder, and 1 litre distilled water per batch of 25 plates. |
| Sterilisation is non-negotiable | Pressure cook at 15 PSI for 90 to 120 minutes to eliminate heat-resistant contaminants. |
| Isolate from the leading edge | Transfer the fastest-growing mycelium sector across multiple generations for consistent genetics. |
| Clean environment matters | A laminar flow hood cuts contamination to under 5%; a still air box achieves 10 to 20% with good technique. |
| Refrigerate for longevity | Store sealed plates at 4°C to preserve culture viability for weeks to months. |
Why agar work changed how I grow mushrooms
When I started working with agar plates, my contamination rate in the first month was well above 50%. That is not an exaggeration. Green patches of Trichoderma, slimy bacterial films, and the occasional black Aspergillus bloom greeted me on plate after plate. My instinct was to blame the recipe or the ingredients. The real problem was technique, specifically the speed and confidence of my transfers.
What shifted things was slowing down before each session rather than during it. Wiping the still air box, letting the air settle for five full minutes, and having every tool within reach before opening a single plate reduced my contamination rate dramatically within a few weeks. The sterilisation workflow matters enormously, but it only protects you up to the point where you open the pressure cooker. Everything after that is about your hands, your environment, and your habits.
The other lesson I would pass on is this: do not rush to grain. I used to transfer cultures to grain spawn the moment I saw mycelium on agar. Now I wait for full colonisation, examine the plate carefully, and only proceed when I am genuinely confident in what I see. That patience, as professional cultivators consistently stress, is what separates a good grow from a failed one. Agar work is not a shortcut. It is a discipline, and it rewards the growers who treat it as one.
— Fabio
Start your agar journey with Sporebuddies
If you are ready to put these techniques into practice, Sporebuddies stocks everything you need to get started. Browse quality spore syringes from popular strains including Golden Teacher, B+, and lion’s mane, all sourced from reliable genetics. The Sporebuddies shop also carries mushroom cultivation equipment including petri dishes, sterilised substrates, and mycology tools suited to home growers at every level. As a UK-based supplier, Sporebuddies understands the specific needs of British cultivators and provides the products and guidance to support your agar work from first pour to final harvest.
FAQ
What is the best agar recipe for mushroom growing?
The 4% Malt Extract Agar recipe is the most widely used formulation: 20g light malt extract, 20g agar powder, and 1 litre distilled water, yielding around 25 petri dishes per batch.
How do you sterilise agar plates at home?
Pressure cook your prepared agar medium at 15 PSI for 90 to 120 minutes at 121°C. Standard boiling is insufficient because it does not reach the temperature needed to kill heat-resistant bacterial endospores.
How long can you store agar plates?
Agar plates stored at 4°C in a sealed container or wrapped in cling film remain viable for weeks to months, depending on the mushroom species and how well contamination was excluded during preparation.
What is the difference between a still air box and a laminar flow hood?
A still air box relies on settled, relatively particle-free air inside a sealed container, achieving contamination rates of 10 to 20% with good technique. A laminar flow hood uses HEPA-filtered positive-pressure airflow and reduces contamination below 5%, making it the superior option for serious home growers.
Can you clone mushrooms using agar plates?
Yes. Tissue cloning involves placing a small piece of fresh mushroom interior onto agar, which preserves the exact genetics of that individual. This is the most reliable method for capturing and repeating exceptional traits across future grows.