Quick Answer
To study mushroom spores under a microscope, you need a compound microscope (400x minimum), glass slides, coverslips, and a spore syringe. Place 1-2 drops of spore solution on a clean slide, apply a coverslip at an angle to avoid bubbles, then start viewing at 40x magnification to locate spores before switching to 400x for detailed observation. Adjust lighting and focus carefully. Psilocybe cubensis spores appear purple-brown, ellipsoid-shaped, and measure 12-15μm. Quality spore syringes produce clearer results with better spore distribution.
Introduction
There’s a genuinely magical moment when you first see individual mushroom spores under magnification.
After weeks of reading about microscopy and finally setting up your equipment, that first clear view of perfectly formed spores floating in your field of view makes everything click into place.
But getting to that moment isn’t always straightforward.
Many beginners buy a microscope and spore syringe, spend an hour trying to see something (anything), and end up staring at what looks like blurry dark blobs or complete emptiness. It’s frustrating. You know the spores are there, but you can’t see them.
This guide walks you through every step of successful mushroom spore microscopy, from preparing your first slide to identifying specific spore characteristics. You’ll learn the exact techniques that actually work for beginners, including the common mistakes that make viewing impossible.
By the end, you’ll confidently prepare slides, adjust your microscope correctly, and observe clear spore details. Whether you’re using Golden Teacher spores or any other psilocybe cubensis variety for UK microscopy research, these fundamentals apply universally.
Let’s turn that frustration into fascination.
Equipment You’ll Need
Essential Equipment (Minimum to Get Started)
You don’t need expensive laboratory equipment to start viewing mushroom spores successfully.
Compound microscope (100x-400x minimum)
This is your primary investment. A basic compound microscope with 40x, 100x, and 400x objectives covers everything beginners need.
Budget option: £80-150 student microscopes work fine for learning basic technique and viewing psilocybe cubensis spores clearly.
Quality investment: £200-400 microscopes offer better optics, sturdier construction, and more comfortable long viewing sessions.
The key specification: 400x magnification minimum. Lower magnifications won’t show spore details clearly enough.
Spore syringe
Pre-suspended spores in sterile water make slide preparation dramatically easier than working with spore prints.
SporeBuddies’ spore syringes come ready to use with consistent spore distribution. No scraping, no additional suspension work, no contamination risks from improper handling.
For beginners, this convenience matters significantly.
Glass microscope slides
Standard 75mm × 25mm glass slides. Buy a pack of 50-100 since you’ll use many while practising technique.
Clean, flat glass is essential. Plastic slides rarely work well because they scratch easily and distort the image.
Glass coverslips
These thin glass squares (typically 18mm or 22mm) protect your objective lens from moisture while flattening your sample.
Critical for proper viewing. Without coverslips, liquid samples dry quickly and focus becomes impossible.
Dropper or pipette
For transferring small amounts of spore solution to slides.
The spore syringe itself works, but a separate dropper gives you more control over drop size.
Clean cloth or lens paper
Microfibre cloths or proper lens paper for cleaning slides and objectives.
Regular tissues leave lint. Kitchen towels scratch glass. Invest in proper cleaning materials.
Notebook for observations
Recording what you see improves learning speed dramatically.
Date, strain name, magnification used, and quick sketches create a reference library that makes identifying subtle differences easier over time.
Recommended Additions (Improve Results)
Immersion oil for 1000x viewing
Once you’ve mastered 400x magnification, oil immersion takes you to 1000x for incredibly detailed spore study.
Not essential for beginners, but fascinating for serious hobbyists.
Slide warmer
Gentle heating prevents slides from fogging and extends viewing time before samples dry out.
Budget alternative: Work quickly or seal slide edges with petroleum jelly.
Staining solutions (optional for contrast)
Crystal violet or methylene blue can increase contrast, though psilocybe cubensis spores usually show clearly without staining.
More useful for other microscopy work than specifically for mushroom spores.
Digital microscope camera
Attaches to your microscope eyepiece, allowing documentation and sharing of your observations.
Smartphone adapters offer a cheaper entry point (£20-40) versus dedicated microscope cameras (£100+).
Slide storage box
If you create permanent slides worth keeping, proper storage protects your work.
Cardboard or wooden slide boxes hold 25-100 slides safely.
Preparing Your First Spore Slide (Step-by-Step)
The Wet Mount Method (Beginner-Friendly)
This technique produces viewable slides in under two minutes once you’ve practised a few times.
Step 1: Clean your workspace and equipment
Start with a clean, flat surface. Dust particles look enormous under magnification and will confuse your first observations.
Wipe your glass slide and coverslip with clean lens paper or microfibre cloth. Even invisible fingerprint oils create focusing problems.
Why this matters: Clear viewing depends on clean glass. Ten seconds of cleaning saves ten minutes of frustration wondering why everything looks blurry.
Step 2: Prepare the microscope slide
Place your clean slide on your flat workspace.
Have your coverslip within easy reach. You’ll need it immediately after applying the spore sample.
Position yourself comfortably. Rushed slide preparation creates air bubbles and uneven samples.
Step 3: Apply spore sample
Shake your spore syringe gently for 5-10 seconds. This redistributes any spores that settled during storage.
SporeBuddies’ double-density spore syringes contain approximately twice the spore concentration of standard syringes, which means better viewing success with smaller sample volumes.
Place 1-2 small drops in the centre of your slide. Seriously, just 1-2 drops.
Beginners almost always use too much liquid. Excess solution makes focusing nearly impossible because spores float in different depth planes.
Step 4: Apply coverslip correctly
This step separates successful slides from frustrating failures.
Hold the coverslip at a 45-degree angle, touching one edge to the slide next to your sample drop. Slowly lower the coverslip like a drawbridge closing.
This angled application pushes air out ahead of the coverslip, preventing bubbles.
If you simply drop the coverslip straight down, you’ll trap multiple air bubbles. Each bubble looks like a massive circular distortion under magnification.
Step 5: Label your slide
Use a permanent marker or label to note:
- Strain name
- Date prepared
- Any other observations (concentration, special notes)
Why record-keeping matters: After preparing slides from 3-4 different strains, they all look identical from above. Labels prevent confusion and help you learn which strains show which characteristics.
Pro Tip: Golden Teacher and B+ strains are ideal first specimens due to their consistent spore size and excellent visibility under standard magnification. Their spores show clear morphological features without requiring advanced technique or equipment.
Setting Up Your Microscope
Most “I can’t see anything” problems come from incorrect microscope setup, not bad spores.
Step 1: Start with lowest magnification (40x or 100x)
This is non-negotiable for beginners.
Place your prepared slide on the microscope stage. Secure it with stage clips if your microscope has them.
Select your lowest power objective (usually marked 4x or 10x on the objective barrel). Combined with your eyepiece (usually 10x), this gives you 40x or 100x total magnification.
Why start low: At 400x magnification, your field of view is tiny. Finding your specimen at high magnification is like searching for a coin in a football stadium while looking through a straw. At 40x, you can see the entire sample area and locate spore clusters easily.
Step 2: Focus using coarse adjustment
Look through the eyepiece while slowly turning the coarse focus knob to raise the stage toward the objective.
Watch from the side initially to ensure you don’t crash the slide into the objective. Once close, look through the eyepiece.
Turn the coarse adjustment slowly. The image will suddenly snap into focus.
The golden rule: Always focus by moving the stage UP toward the objective, never down. This prevents accidentally driving the objective through your slide.
Step 3: Centre your specimen
You should see spore clusters as dark areas even at low magnification.
Use the stage control knobs (if available) or carefully move the slide to centre the darkest, most concentrated area in your field of view.
This centring is critical. When you switch to higher magnification, the new field of view will be centred on whatever was centred at low magnification.
Step 4: Switch to higher magnification (400x)
Once your specimen is perfectly centred at low power, rotate the objective turret to your 40x objective (giving 400x total magnification with a 10x eyepiece).
Most microscopes are “parfocal,” meaning the image should stay roughly in focus when switching objectives.
If the image isn’t sharp, use ONLY the fine focus knob at this magnification. Never use coarse focus at 400x or higher.
Step 5: Adjust lighting and contrast
This is where beginners struggle most.
Condenser position: The condenser (the lens assembly under the stage) should be raised close to the bottom of your slide.
Diaphragm adjustment: Close the diaphragm partially. Too much light makes everything washed out and invisible. Too little light makes everything dark.
Adjust while looking through the eyepiece until spores appear as distinct purple-brown shapes against a lighter background.
Proper lighting transforms an invisible blur into crisp, clear spores.
Common Mistake: Starting at 400x magnification and seeing nothing. This happens because you can’t locate your specimen in the tiny high-magnification field of view. ALWAYS start at 40x or 100x to find and centre your sample first.
What You’re Looking For: Identifying Spore Characteristics
Now that you’ve achieved clear viewing, what exactly should you see?
Spore Shape and Size
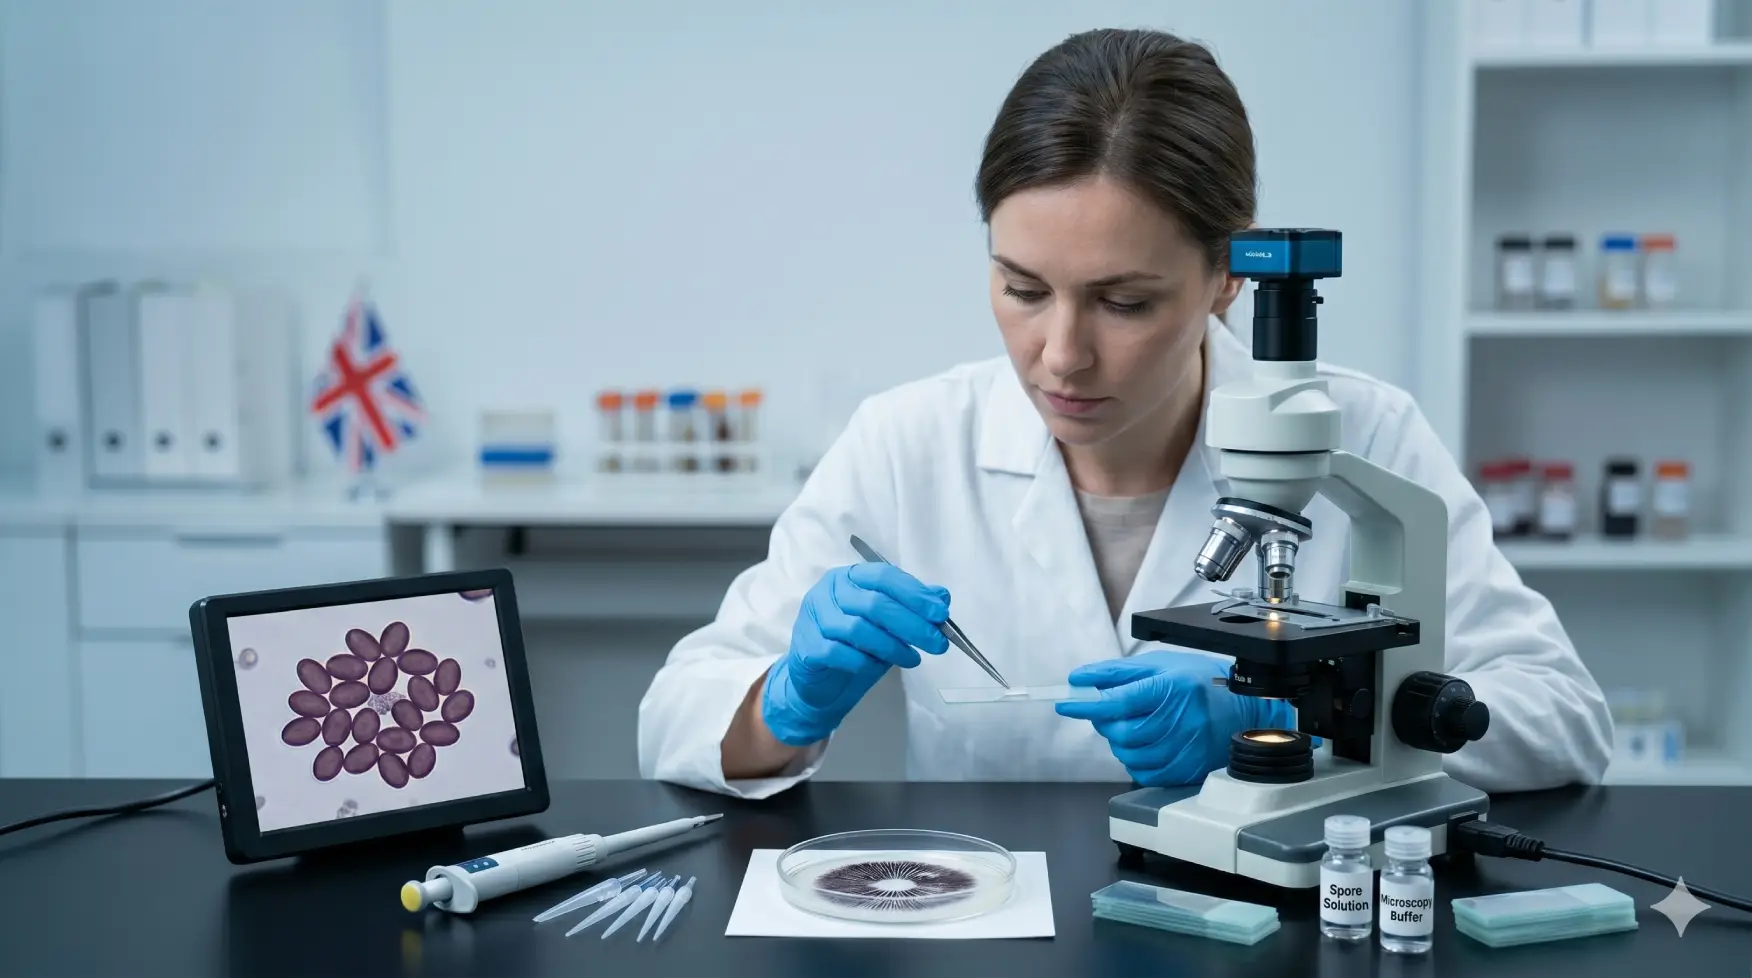
Psilocybe cubensis spores appear ellipsoid to oblong. Think of a stretched football or rugby ball shape, not spherical like a marble.
Typical measurements: 12-15μm long × 8-10μm wide.
You don’t need measuring equipment to appreciate this. The consistent oval shape is immediately recognisable once you’ve seen it clearly.
Some strains show rounder spores, others more elongated. These variations make comparing multiple strains fascinating for microscopy research.
Spore Colour
Under magnification, psilocybe cubensis spores appear purple-brown to purple-black.
The colour is darker and more saturated than spore prints appear to the naked eye. Individual spores in suspension show rich, deep purple-brown colouration.
Colour intensity varies slightly between strains. Ecuador tends towards darker purple-black. Golden Teacher shows more brown tones.
This colour variability creates interesting comparative studies when you examine multiple strain specimens.
Germ Pore
Look carefully at one end of each spore. You should see a slightly lighter area or tiny opening called the germ pore.
This is where the spore will eventually germinate (in cultivation contexts, not in microscopy study). For microscopy purposes, it’s simply an identifying feature.
The germ pore becomes most visible at 400x to 1000x magnification when you’ve nailed your focus and lighting.
Not everyone sees it clearly on their first attempt. Don’t worry if it’s subtle.
Spore Density and Distribution
Quality spore syringes show relatively even spore distribution with spores floating individually or in small clusters.
SporeBuddies’ double-density technology provides approximately 20-30 million spores per millilitre versus standard 10-15 million. This higher concentration means:
- More spores visible in each microscope field
- Easier initial location of specimens
- Better learning opportunities per slide
- Less frustration for beginners
Heavy clumping suggests old or poorly stored samples. Individual spores with some small clusters indicates fresh, viable specimens.
Sample Viability Indicators
Clear, uniformly coloured spores with distinct edges indicate quality samples.
Signs of good spore quality:
- Consistent shape across the population
- Rich, even colouration
- Clean background (minimal debris)
- Individual spores easily distinguished
- Spore walls appear intact and smooth
What contamination looks like (so you can avoid it):
- Bacterial growth appears as rod-shaped or spherical cells much smaller than spores
- Mold shows as branching filaments
- Debris includes irregular, non-uniform particles
Quality spore syringes from established UK suppliers rarely show contamination because they’re prepared in controlled conditions.
Troubleshooting Common Problems
Every beginner encounters these frustrations. Here’s how to solve them.
| Problem | Cause | Solution |
| Can’t see anything | Wrong focus, too high magnification first, inadequate lighting | Start at 40x magnification, ensure light is on, adjust condenser position, verify slide is on stage correctly |
| Image is blurry | Coverslip not flat, air bubbles, dirty objective lens, incorrect focus | Re-prepare slide carefully, clean objective with lens paper, use fine focus adjustment only at 400x |
| Spores moving around constantly | Too much liquid, no coverslip, air currents | Use only 1-2 drops of solution, ensure coverslip applied, work in still air environment |
| Can’t find spores in field of view | Sample not centred, too dilute, wrong focus plane | Start at low magnification to locate dark areas, centre specimen, switch to 400x |
| Everything looks the same colour | Wrong focus plane, insufficient magnification, poor lighting | Increase to 400x minimum, adjust diaphragm, use fine focus to find correct depth |
| Slide dries out quickly | Too much heat from lamp, thin sample layer, extended viewing time | Work efficiently, seal edges with petroleum jelly for extended sessions, or prepare fresh slides |
The most common issue: Using too much sample liquid and too high initial magnification. These two mistakes account for 80% of beginner frustration.
Documenting Your Observations
Microscopy becomes significantly more valuable when you record what you see.
Why Keep Microscopy Notes
Track different strains’ characteristics: After studying 5-6 varieties, written records prevent memory blur. Did B+ have rounder spores than Golden Teacher, or was that Ecuador?
Improve technique over time: Notes capture what worked. “Used 1 drop instead of 2, much clearer focus” becomes actionable knowledge for next session.
Build reference collection: Your documented observations become personal reference material more useful than generic descriptions.
Scientific practice: Recording observations is fundamental to serious microscopy research.
What to Record
Essential information for each observation session:
Date and strain name Simple but critical. “Golden Teacher, 18 May 2026”
Magnification used “Viewed at 400x, confirmed spore size at 400x”
Spore measurements and colours “Ellipsoid, purple-brown, approximately 13-14μm long”
Sketch or photo Even rough sketches help cement observations. Photos provide permanent records.
Interesting observations “More elongated than B+ examined last week. Darker colour overall. Germ pore visible on approximately 60% of spores at this magnification.”
Technique notes “1 drop worked better than 2. Adjusted diaphragm to 50% closed for optimal contrast.”
This level of detail transforms casual viewing into genuine microscopy practice.
Next Steps: Advancing Your Technique
Once you’ve successfully viewed your first strain clearly, natural progression points emerge.
Master Wet Mounts with Multiple Strains
The best way to understand morphological variation is direct comparison.
Purchase 3-4 different psilocybe cubensis strains and prepare slides from each during the same session. View them back-to-back.
SporeBuddies offers variety packs combining beginner-friendly strains like Golden Teacher and B+ at better value than individual syringes.
Comparative microscopy reveals differences invisible when viewing strains weeks apart.
Try Permanent Slide Preparation
Wet mounts last 20-60 minutes before drying. Permanent slides preserve specimens indefinitely.
The process uses mounting medium instead of water. The medium hardens, creating a permanent preparation sealed under the coverslip.
When to create permanent slides:
- Particularly clear specimens worth preserving
- Building a reference collection
- Documenting unusual characteristics
- Creating teaching materials
Most beginners stick with wet mounts for months before attempting permanent slides. No rush.
Experiment with Staining
Staining adds contrast by colouring specific structures.
Common stains for microscopy:
- Crystal violet (highlights cellular structures)
- Methylene blue (general contrast enhancement)
- Lactophenol cotton blue (specifically for fungal specimens)
Honestly? Psilocybe cubensis spores show beautifully without staining. Their natural purple-brown colour provides excellent contrast against clear mounting medium.
Staining becomes more relevant for:
- Studying mycelial structures
- Other fungal specimens with minimal natural colour
- Advanced research requiring specific structure highlighting
For basic spore morphology study, staining is optional.
Document with Photography
Capturing microscope images preserves observations and enables sharing.
Smartphone adapters (£20-40): Hold your phone camera aligned with the eyepiece. Surprisingly effective for basic documentation.
Dedicated microscope cameras (£100-400): Better image quality, easier alignment, software features for measurement and annotation.
Start with smartphone photography. If you find yourself taking hundreds of images, upgrade to dedicated equipment.
Building a personal reference library of spore images accelerates learning dramatically. Comparing photos side-by-side reveals patterns invisible in memory.
Why This Matters
Microscopy transforms mushroom spores from abstract concept into observable reality.
When you see individual psilocybe cubensis spores clearly for the first time, the microscopic world suddenly becomes accessible. What seemed impossibly small becomes visible, detailed, real.
This skill forms the foundation for serious mushroom research and identification. Professional mycologists distinguish species primarily through spore characteristics visible only under magnification.
Quality equipment matters, but quality specimens matter equally. SporeBuddies’ spore syringes optimise spore concentration and distribution specifically for microscopy success. Double-density preparation means more spores per field of view, which translates to easier learning and more satisfying observations.
Beyond practical utility, microscopy deepens appreciation for mycology as a genuine scientific hobby. You’re not reading about spore morphology in textbooks. You’re observing it directly, documenting it personally, and building understanding through hands-on research.
That first clear spore view hooks most people permanently. Welcome to microscopy.
Common Mistakes to Avoid
Learn from others’ errors rather than discovering them yourself.
1. Starting at Maximum Magnification
Always begin at 40x or 100x to locate your specimen.
At 400x magnification, your field of view is approximately 0.4mm diameter. Finding a spore cluster in that tiny area without first locating it at low power is nearly impossible.
Start low, centre your specimen, then increase magnification.
2. Using Too Much Sample Liquid
One small drop is sufficient. Two drops is often too much.
Excess liquid creates depth issues. Spores float at different levels within the liquid. When you focus on spores near the top surface, spores lower down appear blurry and vice versa.
Thin samples give you one focal plane where all spores appear sharp simultaneously.
3. Skipping Slide Cleaning
Dust particles and fingerprint oils look like massive blobs under magnification.
Clean slides take 5 seconds. Troubleshooting mysterious blurs takes 10 minutes.
Always wipe slides and coverslips with lens paper before use.
4. Forcing Focus Knobs
Microscope focus adjustments should feel smooth and gradual.
If you’re forcing, you’re doing something wrong. Forced adjustments damage delicate mechanisms or crack slides.
Gentle pressure only. If something seems stuck, stop and investigate.
5. Expecting Perfection Immediately
Your first three slides will probably be mediocre.
Air bubbles, too much liquid, slightly off-centre specimens, imperfect focus: these are completely normal first attempts.
Microscopy is a physical skill like learning to ride a bicycle. Initial wobbles are expected. By your fifth or sixth slide preparation, technique becomes natural.
Don’t get discouraged. Persistence pays off quickly in microscopy.
Frequently Asked Questions
What magnification do I need to see mushroom spores clearly?
400x magnification minimum for clear viewing of psilocybe cubensis spores. 1000x magnification with oil immersion allows detailed study of finer structures like germ pores and spore wall texture.
Most beginner microscopes offering 100x, 400x, and sometimes 1000x cover all essential viewing needs perfectly. Student-grade compound microscopes in the £100-250 range provide adequate magnification for learning proper technique and observing spore characteristics.
You don’t need professional laboratory equipment to see clear, detailed spores successfully.
Can I use a spore print instead of a spore syringe for microscopy?
Yes, but spore syringes are significantly easier for beginners.
Syringes provide pre-suspended spores in sterile water, requiring no additional preparation beyond shaking and applying drops to slides.
Spore prints require scraping spores from paper, suspending them in sterile water yourself, and managing contamination risks during preparation.
For new microscopists learning basic technique, syringes eliminate preparation variables and consistently produce viewable results. Once you’ve mastered wet mount preparation and microscope operation with syringes, transitioning to prints becomes straightforward if desired.
How long does a prepared spore slide last?
Wet mount slides last approximately 20-60 minutes before the water evaporates and slides dry out completely.
For extended viewing sessions, seal slide edges with petroleum jelly or nail polish. This extends viability to 2-4 hours.
Permanent mounted slides prepared with mounting medium rather than water can last years or even decades when stored properly in slide boxes away from direct sunlight.
For practice and learning microscopy technique, fresh wet mounts prepared from spore syringes work perfectly. Most microscopists prepare new slides for each session rather than trying to preserve wet mounts.
Why do my spores look like dark blobs instead of individual spores?
This frustrating problem has three common causes:
Too much sample liquid: Using 3-4 drops instead of 1-2 creates thick layers where spores clump and overlap. Solution: Start fresh with only ONE small drop.
Clumped spores: Spores settled in the syringe stick together. Solution: Shake syringe gently for 10-15 seconds before sampling to redistribute spores evenly.
Poor lighting/contrast: Incorrect condenser position or diaphragm setting. Solution: Adjust microscope lighting until individual spores appear distinct against the background.
High-quality spore syringes from SporeBuddies maintain better spore distribution through storage, reducing clumping issues compared to old or poorly stored samples.
Is it legal to study mushroom spores under a microscope in the UK?
Yes, completely legal throughout the United Kingdom.
Psilocybe cubensis spores contain no psilocybin or psilocin at the spore stage. UK law restricts psilocybin-containing mushrooms, not the dormant reproductive cells.
Microscopy research and educational study of mushroom spores is entirely lawful. Thousands of UK amateur mycologists, students, and hobbyists practice spore microscopy legally.
Only cultivation of psilocybin-containing mushrooms is restricted under UK law. Microscopy observation, spore collection, and scientific study remain legal activities.
For comprehensive legal information, see our detailed guide on spore legality in the UK.
Get High-Quality Spore Syringes for Microscopy Practice
Ready to put these techniques into practice?
SporeBuddies offers the UK’s most comprehensive selection of microscopy-grade spore syringes, all prepared specifically for clear viewing and successful observations.
Every syringe includes:
- Double-density spore concentration for better viewing success
- Sterile preparation for clean, debris-free samples
- Consistent spore distribution throughout solution
- Quality assurance from the UK’s most trusted supplier
Beginner-Friendly Recommendations:
- Golden Teacher Spore Syringe – Ideal first strain for practising technique
- B+ Spore Syringe – Excellent visibility and consistent morphology
- Starter Syringe Pack – Compare two strains at better value
Free UK delivery on orders over £30. Expert phone support if you get stuck: 0800 069 9269
All spore syringes supplied for legal microscopy research and educational purposes only.