Growing mushrooms at home is genuinely rewarding, but unpredictable yields can be deeply frustrating. You set up your kit carefully, wait patiently, and still end up with a sparse flush or caps that opened far too early. The difference between a disappointing harvest and a consistent, generous one often comes down to how carefully you observe and record what is happening during each grow. This guide walks you through practical, evidence-based methods for analysing mushroom growth at home, from the simplest written notes to digital tools, so that you can build the knowledge needed to improve every single batch.
Table of Contents
- Essential tools and preparation for growth analysis
- Step-by-step guide: How to observe and record mushroom growth
- Tracking data: From simple notes to advanced sensor techniques
- Common analysis mistakes and troubleshooting
- Interpreting your results: What healthy mushroom growth looks like
- Our take: Why patience and curiosity matter most in mushroom analysis
- Next steps: Tools and resources for your mushroom growing journey
- Frequently asked questions
Key Takeaways
| Point | Details |
|---|---|
| Check growth daily | Observing your mushrooms every day helps you identify key stages and act quickly. |
| Record each stage | Keeping simple notes or photos of morphological changes makes trends easier to spot and improve. |
| Try advanced methods | Digital tools and sensors can boost your yield for those ready to go beyond basics. |
| Interpret results confidently | Recognising normal growth patterns lets you troubleshoot problems and harvest at the perfect time. |
Essential tools and preparation for growth analysis
Now that you’re aware of the value of growth analysis, it’s important to start with the right equipment and preparation. The good news is that you do not need a laboratory full of expensive gear to begin. Most meaningful observations can be made with tools you already own.
Understanding mushroom mycology basics helps you know what you’re actually looking for when you observe a growing kit, so it is worth familiarising yourself with the fundamental stages before you start recording data.
The table below gives you a clear picture of what is genuinely essential versus what adds extra precision as you progress.
| Tool | Purpose | Level |
|---|---|---|
| Notepad or journal | Record daily observations, conditions, and timing | Essential |
| Ruler or tape measure | Track cap diameter growth over time | Essential |
| Smartphone camera | Document visual changes with dated photographs | Essential |
| Thermometer and hygrometer | Monitor temperature and humidity accurately | Essential |
| Digital scales | Weigh each flush to calculate yields | Recommended |
| USB microscope | Examine mycelium and pin structure up close | Advanced |
| Environmental sensors | Log temperature, humidity, and CO₂ automatically | Advanced |
| Data logging software | Organise and chart measurements digitally | Advanced |
Knowing your tools is only half the job. Preparation sets you up for consistent records from the very first day.
Here are the key preparation steps to follow before your grow begins:
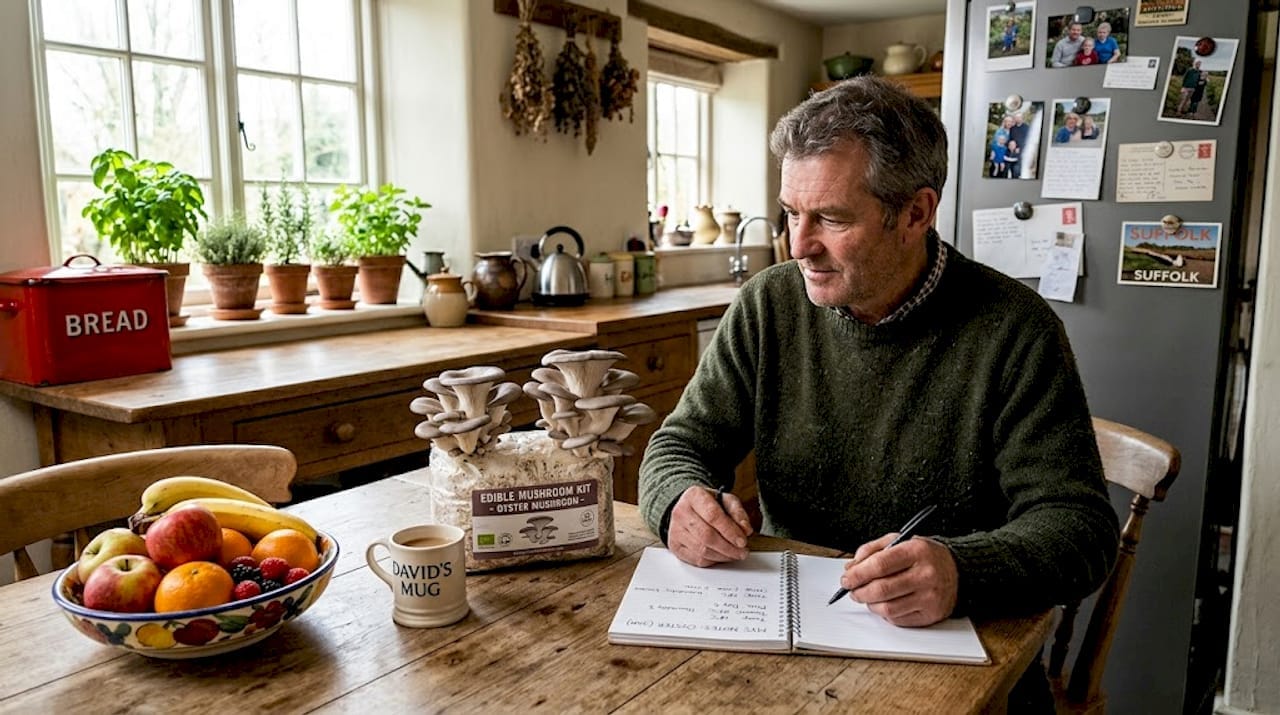
- Set up a dedicated grow journal. Use a notebook or a simple spreadsheet to record the date you inoculated your substrate, the strain you are growing, and the environmental conditions you are aiming for.
- Choose a well-lit observation spot. Natural or bright artificial light lets you see colour changes, surface texture, and pinning activity clearly without disturbing your fruiting environment.
- Label your kits clearly. If you are running more than one variety or batch, labels prevent mix-ups and keep your records accurate.
- Establish baseline conditions. Note your starting temperature, humidity, and fresh air exchange settings so you have a reference point if something changes.
- Photograph on day one. A baseline image of your colonised substrate or spawn block gives you a genuine before-and-after comparison.
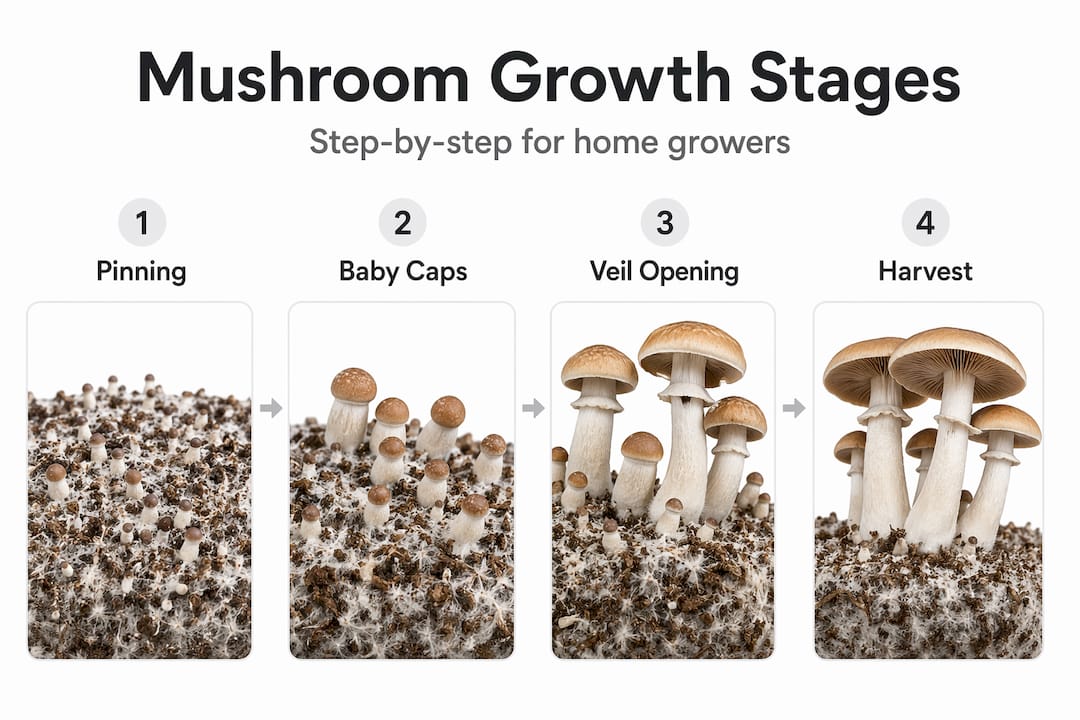
Tracking growth progression at home means observing visible morphological stages, from tiny pins pushing through the substrate surface, to fully expanding fruiting bodies ready for harvest. Each stage tells you something important about how your grow is performing.
Pro Tip: Keep your ruler, notepad, and phone charger right beside your grow kit. The fewer barriers between you and your daily check, the more likely you are to actually do it every single day without skipping.
Step-by-step guide: How to observe and record mushroom growth
With materials ready, you’re set to begin actual observation and step-by-step documentation. The process is straightforward once you build it into your daily routine, and the data you collect will pay dividends across future grows.
These mushroom growing steps form the backbone of a reliable observation system:
- Check your kit at the same time each day. Consistency matters. Morning checks work well for most growers and make it easy to build the habit.
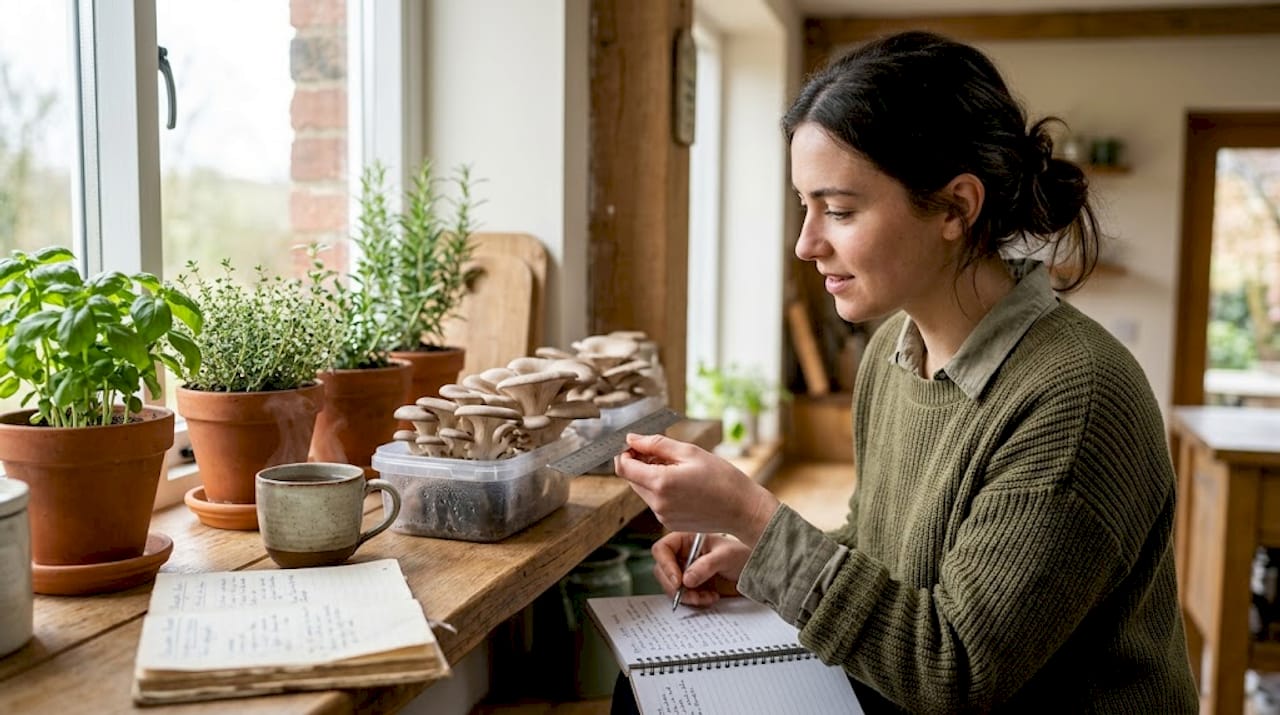
- Look for pins first. Pins are tiny, often pale, pin-head sized formations that signal the start of fruiting. Note the date they first appear and how many clusters you can count.
- Measure cap diameter every 24 hours. Use your ruler and gently measure across the widest point of several representative caps. Record each measurement with the date.
- Observe colour and texture changes. Healthy oyster mushrooms shift from dark grey to a lighter silver as they mature. Shiitake caps go from rounded and tightly closed to broader and flatter. Note any unexpected discolouration.
- Watch the veil carefully. On species like shiitake, a thin membrane called the partial veil connects the cap edge to the stem. When this veil begins to tear away from the cap margin, harvest time is very close.
- Record environmental readings alongside each observation. Temperature and humidity fluctuations often explain sudden changes in growth rate. Write both figures alongside every entry.
- Photograph every stage. A dated photo library gives you a visual timeline that written notes alone cannot match.
- Note any anomalies immediately. Yellow patches, slimy patches, unusual smells, or unusual colours should be flagged in your journal the moment you spot them.
Important timing warning: Mushrooms can double in size within a single day, especially in warm conditions. Missing even one daily check at peak fruiting can mean harvesting caps that have already opened fully and begun to release spores, which reduces shelf life, flavour, and weight significantly. Set a phone reminder if necessary.
What you are really looking for across these stages is a smooth, progressive development without sudden pauses or worrying colour changes. Healthy caps expand steadily, maintain firm texture, and show no wet or discoloured spots on the surface.
Pro Tip: Use your phone’s built-in timer function to take a photograph at exactly the same angle each day. Position a small sticky note in the background with the day number written on it. This turns your photos into a genuine growth timeline you can scroll through at a glance.
Tracking data: From simple notes to advanced sensor techniques
Recording visual progress is important, but for those seeking greater control, digital techniques further refine your analysis. This section explores how you can scale your approach as your confidence and ambition grow.
| Method | Advantages | Limitations |
|---|---|---|
| Manual note-taking | Free, simple, no technology needed, builds observational skills | Time-consuming, reliant on memory, human error possible |
| Digital apps and spreadsheets | Easy to organise, searchable, can generate basic charts | Requires data entry, still manual in collection |
| Environmental sensors and data loggers | Continuous automated recording, catches overnight fluctuations | Cost involved, some technical setup required |
Here is a concise summary of the benefits and trade-offs for each approach:
- Manual notes are the best starting point for beginners. They force you to engage directly with your grow and build genuine intuition about what normal development looks like.
- Spreadsheets and apps add structure to your observations. Being able to sort by flush number or compare conditions across batches reveals patterns that are easy to miss in a notebook.
- Sensors are genuinely powerful for serious growers. A basic temperature and humidity logger costs under £20 and can reveal that your fruiting chamber drops significantly in temperature overnight, explaining why pins stall unexpectedly.
For growers aiming for measurable efficiency, it is worth understanding the term biological efficiency. This figure expresses the weight of fresh mushrooms you harvested as a percentage of the dry weight of the substrate you used. A 100% biological efficiency means you harvested 1 kg of fresh mushrooms from 1 kg of dry substrate. Most home growers achieve between 50% and 100% on their first flush, but careful condition tracking can push this higher over time.
Research shows that sensor-based process analytics can predict biological efficiency from real-time measurements, meaning that data-driven growing is not just for commercial operations. Even a simple humidity logger can help you identify the conditions where your substrate performs best and replicate them intentionally on your next grow.
Using LED grow lights with a consistent daily photoperiod is one of the simplest ways to stabilise one variable in your records, making it easier to isolate the effect of humidity or temperature changes.
Common analysis mistakes and troubleshooting
Once you’re familiar with the main techniques, it is useful to be aware of common pitfalls and how to resolve them. Many growers start with good intentions but fall into habits that undermine the usefulness of their records.
Watch out for these frequent mistakes:
- Skipping daily checks during busy periods. Even two missed days at peak fruiting can leave you with overripe mushrooms and a gap in your data that is impossible to fill retrospectively.
- Forgetting to record environmental conditions. Noting only the growth stage without the corresponding temperature and humidity leaves you unable to explain why development suddenly slowed or accelerated.
- Confusing growth stages. Pins and early primordia (very small, undeveloped fruiting body initials) look similar. Mistaking one for the other throws off your timing records.
- Using inconsistent measurement points. Measuring the cap at different positions each day produces data that cannot be meaningfully compared. Always measure the widest point from the same angle.
- Changing multiple conditions at once. If you adjust humidity and temperature simultaneously, you cannot know which change influenced the outcome. Alter one variable at a time wherever possible.
Good troubleshooting starts with honest records. When morphological stages are carefully logged, you can often trace an unexpected drop in yield back to a specific day when temperature dipped or humidity rose above the ideal range.
If your data becomes inconsistent, start by cross-referencing your environmental readings with your growth observations. A sudden stall in cap development almost always correlates with a measurable environmental event. Check your sterilisation workflow as well, since contamination can suppress growth gradually before it becomes visibly obvious.
Pro Tip: Set a daily phone reminder at a fixed time and pair it with a simple, standardised recording format. For example: Date, Day number, Pin count, Average cap diameter, Temperature, Humidity, Notes. Keeping the format identical every day makes comparison effortless.
Interpreting your results: What healthy mushroom growth looks like
After tracking and troubleshooting, you will want to make sense of your data and understand what success actually looks like in practice. Having numbers is useful only if you can interpret them correctly.
Healthy mushroom growth typically shows these characteristics:
- Pins appear within 3 to 7 days of initiating fruiting conditions, depending on species and temperature.
- Caps expand steadily, roughly doubling in diameter every 24 to 48 hours during peak growth.
- Colour remains consistent and species-appropriate, without unexpected yellowing, browning, or dark mottling.
- Stems are firm and upright, not limp or leaning at unusual angles.
- The substrate surface stays pale and dense, without wet patches, green or black discolouration, or foul odour.
The table below gives you a general timeline for oyster mushrooms, one of the most popular species for home cultivation in the UK.
| Days after pinning | Normal observation |
|---|---|
| Day 1 to 2 | Pins visible, grey and firm, 2 to 5 mm |
| Day 2 to 3 | Pins elongate, caps begin to form, 10 to 20 mm |
| Day 3 to 4 | Caps expand and flatten slightly, 30 to 50 mm |
| Day 4 to 5 | Caps near full size, edges begin to wave outward |
| Day 5 to 6 | Harvest window opens; caps flat, firm, not yet releasing spores |
Tracking cap development and veil opening relative to your recorded timeline shows you whether your grow is running ahead, on schedule, or slower than expected. Any deviation beyond two days from the typical range warrants a close check of your environmental conditions.
Deviations are not failures. They are information. A slower than expected development often points to low humidity or cool temperatures, while unusually rapid but thin cap growth frequently indicates CO₂ levels are too high. Your journal gives you the evidence to diagnose correctly rather than guess. Exploring different substrate performance options can also dramatically shift your baseline timelines and yields, so noting which substrate you used with each grow is particularly valuable.
Our take: Why patience and curiosity matter most in mushroom analysis
Interpreting results brings us to a fundamental truth about mushroom analysis that sits beyond any chart or checklist. In our experience, the growers who improve fastest are not the ones with the most sophisticated sensors. They are the ones who show up every day, actually look at what is happening, and stay genuinely curious about what their observations mean.
There is a tendency among newer growers to reach for technology as a shortcut. A data logger is a useful tool, but a data logger combined with a grower who does not stop to think about what the numbers mean is actually less effective than a grower with a notebook and a questioning mind. Structure and patience consistently outperform expensive kit used without engagement.
Unexpected variables are simply part of cultivating living organisms. A warm week, a new substrate bag from a different supplier, a slightly different misting schedule, these things introduce variation no checklist fully accounts for. Curiosity is what allows you to treat that variation as useful data rather than annoying noise. The grower who asks “why did this flush produce half the weight of the last one?” and then actually investigates, is the grower who builds real expertise.
We also want to be honest about something: your first few grows will not be perfect, and your early records will probably have gaps. That is completely fine. The habit of observation builds gradually, and even imperfect notes are more valuable than no notes at all. Each grow you document adds another data point to your personal growing knowledge, which compounds over time into a genuinely useful body of understanding.
If you are ready to go deeper, the advanced growing guide offers a thorough walkthrough of the cultivation process that pairs well with everything you have learned here about tracking and interpretation.
Next steps: Tools and resources for your mushroom growing journey
With practical experience and understanding, you are ready to expand your mushroom growing journey. Choosing the right equipment from the start makes analysis easier and your results more repeatable. Browse the range of cultivation equipment at Spore Buddies to find thermometers, humidity gauges, and grow kits suited to every level of experience.
When you are confident with your observation skills, selecting high-quality mushroom spores gives you reliable genetics to work with, which means fewer confusing variables in your analysis. For a structured starting point, the home cultivation guide brings together everything from substrate preparation to harvest timing in one place. Spore Buddies is here to support your progress at every stage.
Frequently asked questions
How often should I check my mushrooms for growth analysis?
Check daily because mushrooms grow rapidly, sometimes doubling in size overnight, and missing a day at peak fruiting can mean overripe caps and lost yield.
What stage of growth should I harvest mushrooms?
Harvest when the caps are fully expanded but before the veil opens completely, as this gives you the best texture, flavour, and shelf life.
Can sensors really improve mushroom growing results?
Yes. Sensors and process analytics can predict biological efficiency and reveal environmental fluctuations you would otherwise miss, enabling more informed decisions about conditions.
Is manual observation enough for home growers?
For most hobbyists, regular and structured manual observation of morphological stages is sufficient to achieve healthy, consistent crops without any specialist technology.
What signs show a problem with mushroom growth?
Slow development, unexpected colour changes such as yellowing or dark spotting, slimy texture, or inconsistent cap sizes are all warning signs that your environmental conditions or substrate need immediate review.