Many UK home growers assume mushrooms will thrive in ordinary garden soil, just as they seem to in forests and fields. That assumption leads to frustration fast. Mushrooms actually require a carefully chosen growing medium, called a substrate, that matches their specific nutritional needs. Get it right and you will see healthy flushes of oyster, shiitake, or lion’s mane. Get it wrong and you will battle green mould, failed colonisation, and wasted effort. This guide walks you through everything you need to know about mushroom substrates, from what they are to how to prepare and reuse them.
Table of Contents
- Understanding mushroom substrate: The foundation of home cultivation
- Popular substrate types for UK home growers
- Preparing substrate for cultivation: Pasteurisation, sterilisation, and contamination control
- What happens after harvest? The role of spent mushroom substrate
- Why most beginners underestimate substrate preparation
- Find the right substrate and cultivation tools with Spore Buddies
- Frequently asked questions
Key Takeaways
| Point | Details |
|---|---|
| Substrate is essential | Mushroom substrate provides tailored nutrients and structure—unlike plain soil—to support successful mushroom growth. |
| Choose substrate wisely | Different mushroom species thrive on particular substrates such as compost, manure, straw, or coffee grounds. |
| Preparation prevents contamination | Pasteurisation and sterilisation help keep competing organisms at bay for healthier home-grown mushrooms. |
| Spent substrate is valuable | After harvest, spent substrate can enhance garden soil thanks to its rich organic matter content. |
| Expert preparation is key | Following phased, evidence-backed preparation results in higher yields and lower risk of contamination. |
Understanding mushroom substrate: The foundation of home cultivation
Substrate is simply the material that mushroom mycelium (the white, root-like network of the fungus) colonises and feeds from. Think of it as both the food and the home for your mushrooms. Unlike plant roots, which absorb nutrients from soil, mycelium physically breaks down the substrate and extracts what it needs.
Ordinary garden soil is not suitable for most cultivated mushrooms. It typically lacks the right carbon-to-nitrogen ratio, retains too much water in the wrong way, and carries a high load of competing bacteria and fungi. These competitors can overrun your mycelium before it even gets established. Substrate, by contrast, is chosen or prepared specifically to give your chosen mushroom species an advantage.
According to BBC Gardeners’ World Magazine, substrates are often compost or manure for traditional growing such as button mushrooms, or other media including coffee grounds or straw depending on the species and method. That variety matters enormously for UK home growers, because the species you want to grow will largely determine which substrate you need.
Here is a quick overview of how substrate affects your grow:
- Nutrient content determines how fast mycelium colonises and how heavy your fruiting bodies become
- Moisture retention affects hydration throughout the growth cycle
- Particle size and structure influences how air and water move through the medium
- pH level must suit the target species, most edible mushrooms prefer a slightly acidic to neutral range
- Microbial competition is lowered through preparation, giving your mycelium the best start
“The substrate is the engine of your mushroom grow. Choose the wrong one and no amount of careful watering or humidity control will save it.”
You can explore a wide range of ready-to-use options through the mushroom substrate overview at Spore Buddies, which is particularly useful if you are still learning what suits your setup.
| Mushroom species | Preferred substrate type |
|---|---|
| Button mushroom | Composted manure |
| Oyster mushroom | Straw or coffee grounds |
| Shiitake | Hardwood sawdust or chips |
| Lion’s mane | Hardwood sawdust |
| King oyster | Straw or supplemented sawdust |
Popular substrate types for UK home growers
Now that we understand what substrate is, let us explore which kinds UK home growers commonly use and how to choose between them.
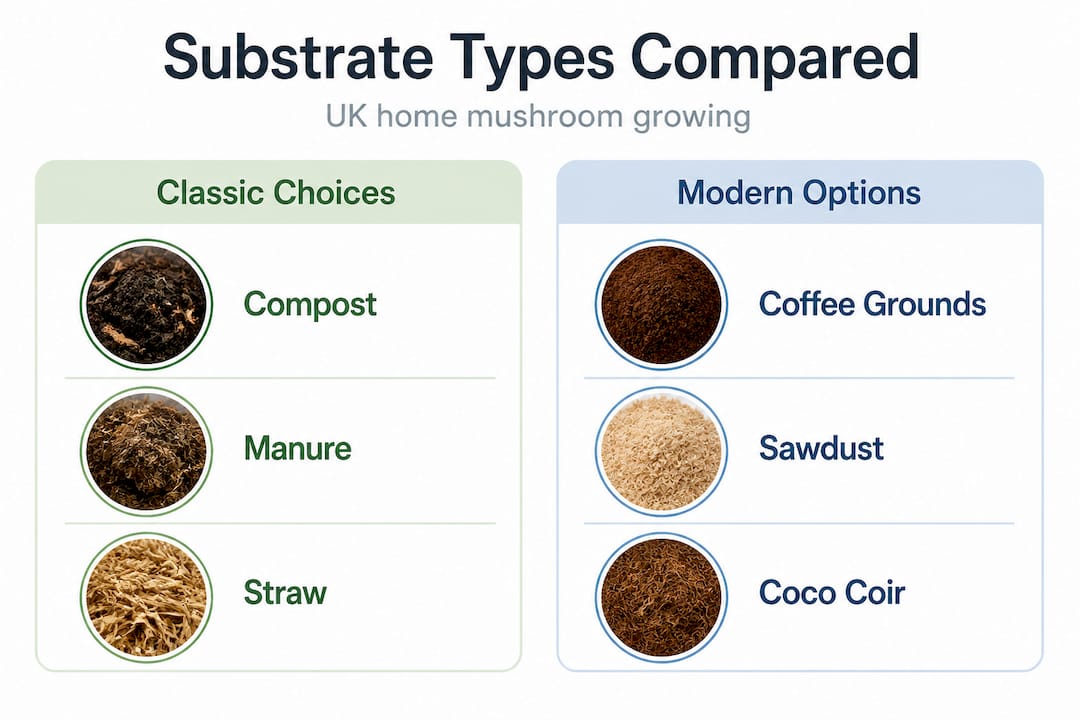
Substrates can be compost, manure, coffee grounds, or straw depending on species and method, which gives you plenty of options depending on what is readily available and what you are growing.
Compost and composted manure are classic choices for button mushrooms (Agaricus bisporus). Horse manure compost is the traditional standard, partly because it is still relatively easy to source in rural UK areas. It provides a rich, nitrogen-heavy base that button mushrooms thrive in. The downside is the strong smell and the preparation work required.
Straw is probably the most popular choice for UK home growers tackling oyster mushrooms. Wheat straw is easy to source, inexpensive, and holds moisture well. It is a low-nutrient substrate, which actually works in your favour because it requires only pasteurisation rather than full sterilisation, reducing the risk of competing moulds.
Coffee grounds are brilliant for urban growers who do not have access to agricultural supplies. Many UK cafés will give away spent grounds for free. Coffee grounds suit oyster mushrooms well and are already partially sterilised through the brewing process. However, they degrade quickly and should be used within a day or two of collection.
Hardwood sawdust is the go-to choice for shiitake and lion’s mane. Oak, beech, and alder are all excellent. You often see it combined with wheat bran or rice bran to boost nitrogen content and speed up colonisation. In the UK, specialist suppliers and online mycology shops stock ready-prepared hardwood sawdust blocks.
Coco coir mixed with vermiculite is widely used as a casing layer (a thin top layer applied after colonisation) rather than a primary substrate. It helps retain moisture at the surface and supports pinning, which is when the first tiny mushrooms begin to form.
| Substrate | Best for | Preparation needed | Accessibility in UK |
|---|---|---|---|
| Composted manure | Button mushrooms | Phase I and II composting | Medium (rural areas) |
| Wheat straw | Oyster mushrooms | Pasteurisation | High (farm suppliers) |
| Coffee grounds | Oyster mushrooms | Minimal | Very high (cafés) |
| Hardwood sawdust | Shiitake, lion’s mane | Sterilisation | Medium (specialist shops) |
| Coco coir/vermiculite | Casing layer | None required | High (garden centres) |
Pro Tip: If you are just starting out, wheat straw pasteurised in hot water is the most forgiving substrate to begin with. It is cheap, widely available, and does not require specialist equipment.
For practical bulk substrate recipes that combine different materials for better results, and detailed substrate recipe guides that cover ratios and preparation steps, Spore Buddies has put together resources specifically aimed at UK home growers.
Preparing substrate for cultivation: Pasteurisation, sterilisation, and contamination control
Choosing a substrate is just one part of the process. Preparing it correctly is equally vital. Here is how it works.
Raw substrate almost always carries bacteria, moulds, and other fungi that will compete with your mycelium. Preparation methods reduce these competitors so your mushroom culture has a genuine head start.
Substrate preparation often involves pasteurisation or sterilisation to reduce competitors, and the right choice depends on the nutrient level of your substrate and the mushroom species you are growing. High-nutrient substrates, such as hardwood supplemented with bran, require sterilisation because they support aggressive competitor moulds. Low-nutrient substrates like straw do fine with pasteurisation.
Pasteurisation heats your substrate to between 65°C and 82°C and holds it there for one to two hours. This kills most bacteria and competitor fungi while preserving beneficial microbes that actually help protect against reinfection later. You can do this at home using a large stockpot and a thermometer.
Sterilisation involves heating to 121°C or higher, typically using a pressure cooker or autoclave. This eliminates virtually all living organisms in the substrate, giving you a completely clean slate. It is essential for high-nutrient grain and hardwood sawdust grows, but overkill for straw.
Penn State Extension describes Phase I and Phase II composting as distinct stages in professional mushroom substrate preparation, with Phase II including pasteurisation to finish the process correctly. Phase I involves outdoor composting of raw materials over several weeks, building heat and breaking down nutrients. Phase II brings the compost inside and heats it to pasteurisation temperatures.
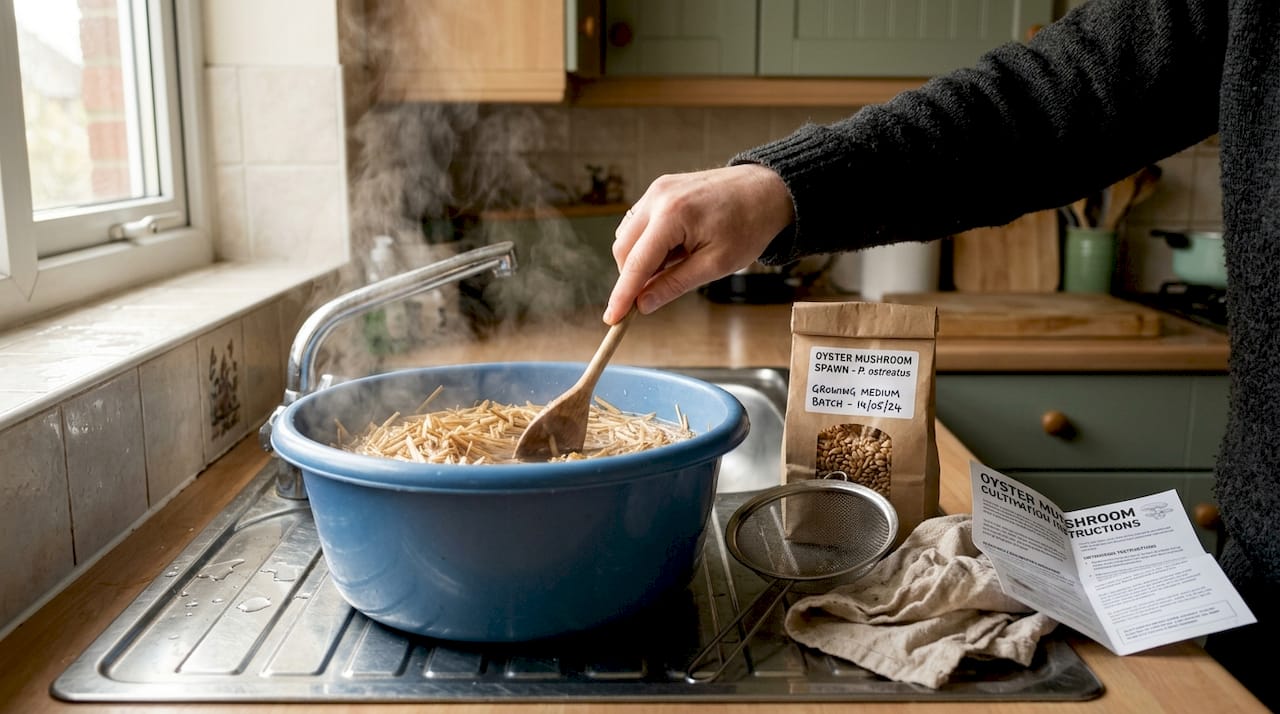
Here is a straightforward home preparation process for straw:
- Chop straw into pieces around 10 to 15 centimetres in length. Shorter pieces pack more evenly.
- Fill a large stockpot with water and bring it to 75°C. Use a thermometer rather than guessing.
- Submerge the straw using a weight or lid to keep it below the waterline.
- Hold the temperature between 65°C and 80°C for 60 to 90 minutes.
- Drain the straw through a clean colander and allow it to cool to room temperature.
- Once cooled, test for the right moisture level. Squeeze a handful firmly. A few drops of water should come out. More than that means it is too wet.
- Pack into your grow bags or monotub and inoculate with your spawn.
Pro Tip: Never inoculate warm substrate. If it is still above 30°C, your spawn may be damaged or the environment may still favour competitors. Patience here pays off.
“Contamination does not usually arrive from nowhere. It enters through improperly prepared substrate, unclean tools, or too-warm inoculation conditions.”
For a deeper walkthrough on pasteurising substrate at home, including troubleshooting common problems, that guide is well worth reading before your first grow. If you would rather skip the preparation stage entirely, ready-to-use pasteurised bulk substrate is available and takes the guesswork out of the process.
What happens after harvest? The role of spent mushroom substrate
Once a mushroom crop has been harvested, your substrate does not go to waste. It still holds real value, both for your garden and potentially for additional growing.
Spent mushroom substrate is the soil-like material remaining after a crop, and it is typically rich in organic matter that makes it useful as a soil amendment or conditioner. After your mushrooms have fruited and you are ready to move on, rather than throwing the block or bag away, consider what it can do outside.
Here is how UK home growers commonly use spent substrate:
- Compost addition: Mix spent substrate into your compost heap. It is already partially broken down, so it accelerates decomposition and adds structure.
- Vegetable bed amendment: Dig it into garden beds to improve moisture retention and add organic matter. It works particularly well in sandy or clay-heavy soils.
- Mulching: Spread it around the base of shrubs or fruit trees. It suppresses weeds and slowly releases nutrients.
- Second flush attempts: Some species, particularly oyster mushrooms, will produce a second or even third flush if the substrate is rehydrated and rested. Soak in cold water overnight and place back in fruiting conditions.
- Worm farming: Spent substrate is an excellent food source for composting worms, which then produce high-quality worm castings for your garden.
Pro Tip: Let spent substrate dry out slightly before adding it to your compost heap. If it is still very wet, it can compact and create anaerobic (airless) pockets that slow the composting process.
“Many new growers see spent substrate as waste. Experienced ones see it as a gift for the garden.”
If you want to maximise your yields before the substrate is truly spent, supplementing during growing with products like wheat bran can extend productive colonisation and increase the size of your flushes.
Why most beginners underestimate substrate preparation
Here is an observation we see repeated constantly among new UK growers. They spend time researching spore varieties, they invest in good growing containers, and they track humidity levels carefully. Then they pasteurise their straw at 55°C because it seemed hot enough, skip the temperature hold, and wonder why everything goes green within a week.
Substrate preparation is treated as a formality rather than the backbone of the entire grow. The truth is, it is the single step where most failures are decided. Not the inoculation, not the fruiting chamber, not the casing layer. The substrate prep.
Pasteurisation in Phase II selectively reduces competitors while preserving a supportive microbial environment. That balance is the point. You are not trying to sterilise straw. You are trying to tilt the playing field heavily in favour of your mycelium. If the temperature is too low or the hold time too short, enough competitor spores survive to win the race.
Seasoned growers will tell you they check substrate temperature multiple times during pasteurisation, not just once at the start. They let substrate cool fully before inoculating, sometimes overnight. They handle cooled substrate in as clean an environment as possible, because reintroducing contamination after preparation defeats the purpose entirely.
There is also an impatience problem. Mushroom cultivation rewards those who wait. A substrate that looks ready at 45°C might not be safe. A substrate that feels cool to the touch might still be 35°C in the centre. Small oversights like these consistently separate successful grows from failed ones.
Good best substrate practices are not complicated, but they do require consistency and care. Building those habits early on will make every subsequent grow more predictable and more rewarding.
Find the right substrate and cultivation tools with Spore Buddies
Having explored both foundational and advanced substrate concepts, here is how Spore Buddies helps UK growers take the next step. Whether you are buying your first substrate or looking to refine your technique, you can buy mushroom substrate directly from our shop, with options suited to everything from button mushrooms to specialist species. If you want a complete starting point, our easy grow kits bundle substrate, spawn, and instructions so nothing is left to guesswork. For those who want a thorough understanding of the full cultivation process from start to finish, our home growing process guide covers every stage in detail. Spore Buddies is here to make UK home mushroom growing accessible, reliable, and genuinely enjoyable.
Frequently asked questions
Which mushroom substrate is best for beginners?
Compost or manure-based substrates are typically easiest for UK beginners, particularly for traditional species like button mushrooms, as they are widely available and relatively forgiving during preparation.
How do I prevent contamination when preparing substrate?
Use pasteurisation or sterilisation methods appropriate for your substrate type, follow careful temperature guidelines, and always allow substrate to cool completely before inoculation to avoid killing your spawn.
Can I use spent mushroom substrate in my garden?
Yes, spent substrate is rich in organic matter and works well as a soil conditioner or compost additive, improving moisture retention and nutrient levels in UK garden beds.
What are the main differences between pasteurisation and sterilisation?
Pasteurisation uses lower heat to reduce competitors while preserving helpful microbes, whereas sterilisation eliminates all organisms using higher pressure and temperature, which is necessary for high-nutrient substrates like supplemented hardwood sawdust.