
Fungi lab experiments are defined as structured practical activities that use fungal organisms to demonstrate biological principles including growth, genetics, reproduction, and ecology. The three most widely used model organisms in educational mycology are Rhizopus stolonifer (bread mould), Saccharomyces cerevisiae (baker’s yeast), and Sordaria fimicola (a filamentous ascomycete). Together, these species cover the full range of examples of fungi lab experiments, from simple mould observation to chromosome-level genetic mapping. Whether you are designing a secondary school biology lesson or a university microbiology lab project, the experiments below give you proven protocols, clear learning outcomes, and honest guidance on what to expect.
1. Classic bread mould growth experiment
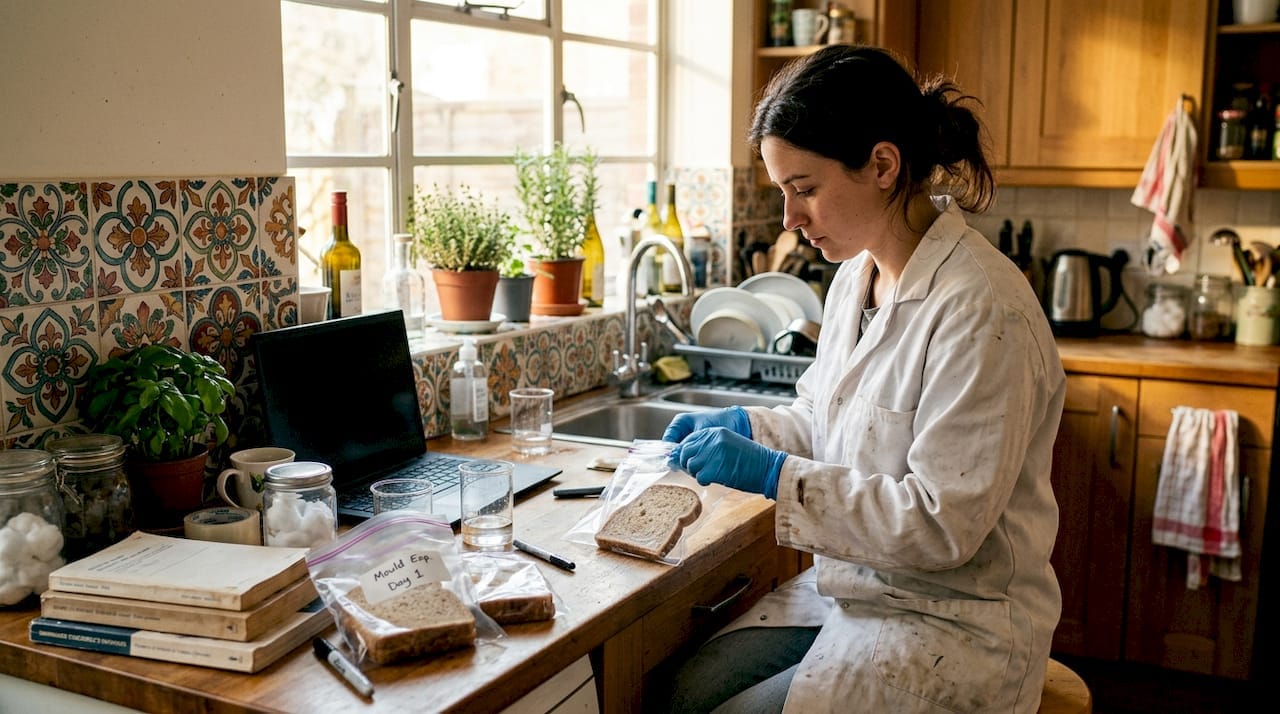
The bread mould experiment is the most accessible entry point into fungal biology experiments, requiring no specialist equipment and producing visible results within days.
Setting up your variables
Place preservative-free bread slices into separate sealed bags, each representing one condition. Preservative-free bread and correct moisture are the two non-negotiable requirements. Bread containing calcium propionate or sorbic acid will suppress fungal colonisation entirely, making your results unreadable. Lightly mist each slice before sealing to create humidity without pooling water, which invites bacterial contamination instead of mould.
Test at least three conditions across your class groups:
- Room temperature (18–22°C) with moderate humidity
- Refrigerated (4°C) to observe growth inhibition
- Warm and dark (28–30°C) to accelerate colonisation
- Dry control with no moisture added
- Light exposure versus complete darkness at room temperature
What you will observe and when
Visible growth occurs in 3–7 days, with the warm, humid condition typically showing the fastest colonisation. A full 10–14 day observation period gives you enough data points to draw meaningful comparisons between conditions. That timeline matters because early growth is often invisible to the naked eye, and premature conclusions are the most common student error.
The two fungi you are most likely to identify are Rhizopus stolonifer, which appears as grey-black, fluffy growth with visible sporangiophores, and Penicillium species, which present as blue-green powdery patches. Recording both colour and texture on a simple descriptive scale (absent, trace, moderate, heavy) gives you quantitative data without requiring a microscope.
Pro Tip: Seal your bags with tape rather than relying on the zip alone. Any air gap introduces uncontrolled humidity variables and risks cross-contamination between experimental conditions.
| Condition | Expected growth onset | Dominant fungi likely observed |
|---|---|---|
| Warm and dark (28–30°C) | 2–4 days | Rhizopus stolonifer |
| Room temperature | 4–7 days | Penicillium spp., Rhizopus |
| Refrigerated (4°C) | Minimal or none | None typically |
| Dry control | None | None |
2. Oyster mushroom cultivation in a bucket tower
Indoor mushroom cultivation is one of the most rewarding fungi lab activity ideas because it demonstrates the complete fungal life cycle from inoculation to fruiting body formation in a single project.
Materials and setup
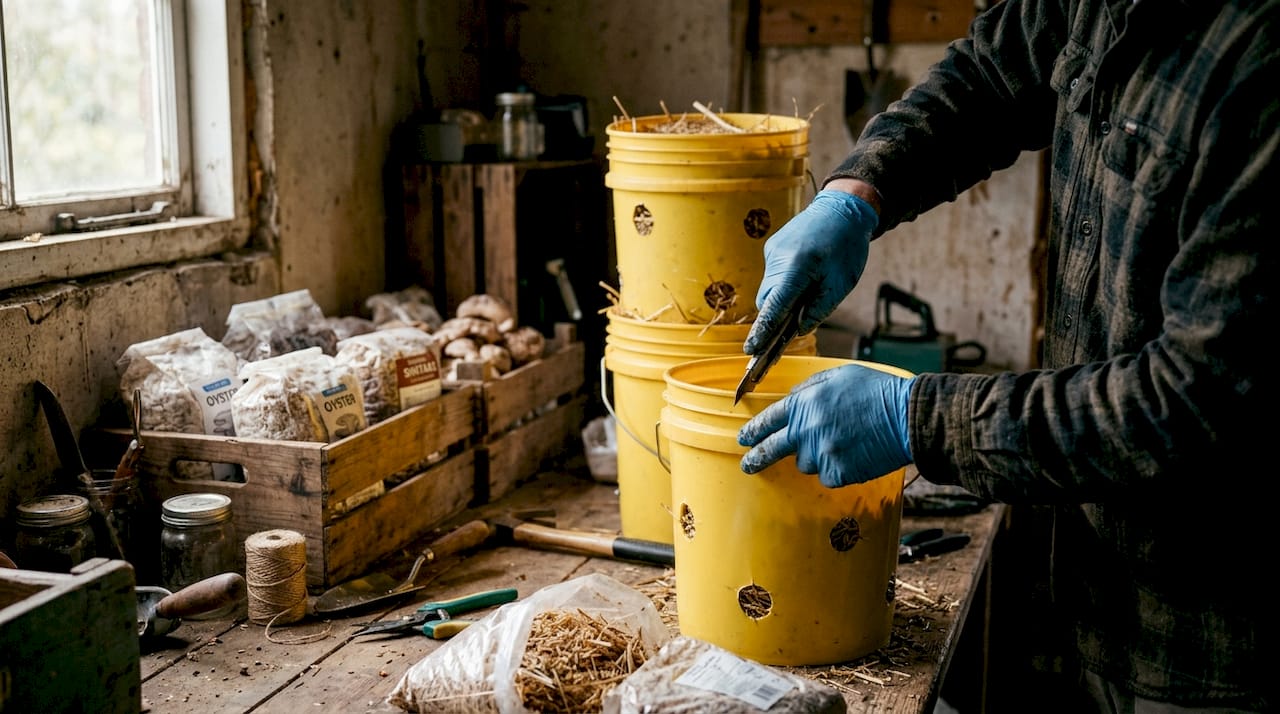
The bucket tower method uses a standard 5-litre or 5-gallon bucket as the growing vessel. Drill 12–16 holes of roughly 2.5 cm diameter around the sides to allow pinning and air exchange. Your substrate can be pasteurised straw, cardboard, or coffee grounds, all of which are low-cost and widely available. Grain spawn, which is cereal grain colonised by oyster mushroom mycelium, is mixed through the substrate at a ratio of roughly 1 part spawn to 5 parts substrate by weight.
Key stages to observe and record:
- Inoculation day: Spawn mixed into substrate, bucket sealed loosely
- Days 3–7: White mycelial threads appear throughout the substrate
- Days 10–14: Full colonisation visible, substrate turns white
- Days 14–21: Pins form at hole sites and top surface
- Days 18–25: Fruiting bodies ready to harvest
Learning outcomes
Oyster mushroom cultivation projects last 2–3 weeks and can be completed for under £10 using repurposed household materials. That cost efficiency makes this one of the most scalable mushroom cultivation experiments for classroom settings. Students observe mycelial growth, environmental responses to humidity and temperature, and the transition from vegetative growth to reproduction. For a deeper understanding of substrate science, the mushroom substrate guide from Sporebuddies covers material choices and preparation in practical detail.
3. Yeast growth curves and ploidy comparison
Yeast growth curve experiments represent a step up in technical complexity, sitting firmly in the category of applied microbiology lab projects suitable for A-level and undergraduate settings.
The biological question
Saccharomyces cerevisiae exists naturally in both haploid and diploid forms. Diploid cells carry two copies of each chromosome, while haploid cells carry one. The experiment asks whether ploidy affects growth rate under identical nutrient conditions, a question with direct relevance to evolutionary biology and industrial fermentation.
Protocol overview
Set up a 96-well microplate with replicate wells for each yeast strain. Standardise your starting culture by serial dilution to a consistent inoculum density before loading wells. Inconsistent starting densities are the primary source of error in this experiment, so this step is not optional. Measure optical density at 600 nm (OD600) using a plate reader.
OD600 readings every 20 minutes over 24 hours generate a full growth curve showing lag phase, exponential phase, and stationary phase for each strain. Plot your data in a spreadsheet and overlay the haploid and diploid curves to visualise any growth rate difference.
Pro Tip: Run at least three biological replicates per strain. Single-replicate yeast growth data is not publishable or defensible in a lab report, and examiners at A-level and degree level will flag it immediately.
The 96-well format also allows you to test multiple carbon sources or temperatures simultaneously, making this one of the most information-dense fungal biology experiments available to a teaching lab.
4. Sordaria fimicola crossing-over and tetrad analysis
The Sordaria fimicola experiment is the gold standard for teaching meiosis and genetic recombination in a fungal organism. It belongs to a category of fungal life cycle studies that make abstract genetics visible and countable.
Biological background
Sordaria fimicola is an ascomycete fungus that produces perithecia, flask-shaped fruiting bodies containing asci. Each ascus holds eight ascospores arranged in a linear order that directly reflects the sequence of meiotic divisions. Wild-type strains produce black spores; mutant strains produce tan or grey spores. When you cross the two strains, the arrangement of spore colours within each ascus tells you whether a crossover event occurred between the gene and the centromere.
Setting up the cross
- Inoculate a cornmeal agar plate with wild-type Sordaria on one half and a tan mutant strain on the other half.
- Allow the two colonies to grow towards each other and meet at the centre.
- Incubate at 22–25°C for 7–10 days until perithecia develop at the junction.
- Mount a small section of the junction zone in water on a microscope slide.
- Apply a coverslip and gently press to release asci from perithecia.
- Observe under 100x and 400x magnification.
Counting and calculating
Tetrad analysis requires observing asci before ascospore discharge, which means timing is critical. Cultured plates remain viable for only 2 days under refrigeration once perithecia are mature, so schedule your microscopy session to coincide with peak fruiting body development. Count at least 50 asci and classify each as parental type (4 black + 4 tan in a block arrangement) or recombinant type (alternating colours).
| Ascus type | Spore arrangement | Crossover occurred? |
|---|---|---|
| Parental (non-crossover) | 4 black + 4 tan (block) | No |
| Recombinant type 1 | 2 black, 2 tan, 2 black, 2 tan | Yes |
| Recombinant type 2 | 2 tan, 2 black, 2 tan, 2 black | Yes |
Calculate recombinant frequency using the formula: (number of recombinant asci ÷ total asci counted) × 100, then divide by 2 to convert to map units (centimorgans). This gives students a real genetic map distance derived from their own data.
5. Adaptive laboratory evolution with yeast
Adaptive laboratory evolution (ALE) is an underused but highly effective method for investigating fungi growth and evolutionary biology in a teaching lab. The technique involves growing Saccharomyces cerevisiae through repeated serial transfers in a selective medium, then comparing the fitness of evolved populations to the ancestral strain. ALE with fungi reveals evolutionary paths that would otherwise require years of field observation. For advanced students, this experiment connects fungal genetics to broader concepts in host adaptation and population biology.
6. Choosing the right experiment for your educational goals
Selecting the right fungal biology experiment depends on your available equipment, time, and the biological concept you want to teach.
| Experiment | Duration | Complexity | Key equipment | Primary learning outcome |
|---|---|---|---|---|
| Bread mould growth | 10–14 days | Low | Bags, bread, ruler | Environmental effects on growth |
| Oyster mushroom cultivation | 2–3 weeks | Low to medium | Bucket, substrate, spawn | Fungal life cycle, fruiting |
| Yeast growth curves | 24 hours | Medium to high | Plate reader, 96-well plates | Growth kinetics, ploidy effects |
| Sordaria tetrad analysis | 10–14 days | High | Microscope, agar plates | Meiosis, genetic recombination |
| Adaptive laboratory evolution | 4–6 weeks | High | Spectrophotometer, serial culture | Evolutionary biology, fitness |
Observational experiments like bread mould suit secondary school settings with limited budgets. Cultivation experiments work well as extended projects for any level. Genetic and growth-curve experiments require more equipment but produce richer, quantitative data suited to A-level and undergraduate assessment. Transitioning from basic observation to molecular experiments requires rigorous experimental design skills that build progressively across these experiment types.
Key takeaways
The most effective fungi lab experiments combine a clear biological question, a named model organism, and a measurable outcome recorded over a defined time period.
| Point | Details |
|---|---|
| Choose the right model organism | Rhizopus, Saccharomyces, and Sordaria each teach distinct biological principles. |
| Timing is non-negotiable | Bread mould needs 10–14 days; Sordaria asci must be observed within 2 days of maturity. |
| Control your variables | Preservative-free bread and standardised inoculum density are the two most common failure points. |
| Match complexity to your level | Cultivation suits beginners; tetrad analysis and ALE suit advanced or undergraduate labs. |
| Record quantitatively | Descriptive scales, OD600 readings, and ascus counts all produce data that can be analysed statistically. |
Sporebuddies supplies for your fungi lab
Running a fungi lab experiment is straightforward when you have reliable starting materials. Sporebuddies supplies quality mushroom spore syringes suited to both educational microscopy and cultivation projects across the UK. The range covers species relevant to lab work, including oyster and lion’s mane, alongside the mycology equipment needed to support practical sessions. Whether you are setting up a classroom cultivation project or sourcing spores for microscopy observation, Sporebuddies provides consistent, clearly labelled products with supporting educational content. The mycology science and education section of the site is a useful starting point for educators planning a full programme of fungal biology activities.
FAQ
What is the easiest fungi lab experiment for beginners?
The bread mould experiment using Rhizopus stolonifer is the most accessible option. It requires only preservative-free bread, sealed bags, and a warm location, with visible results in 3–7 days.
How long does a Sordaria crossing-over experiment take?
The cross takes 7–10 days to produce mature perithecia. Microscopy must be completed within 2 days of maturity, as cultured plates lose viability rapidly even under refrigeration.
Can yeast growth curve experiments be done without a plate reader?
A plate reader measuring OD600 is the standard tool for this experiment. Without one, you can use a colorimeter as a lower-resolution alternative, though the 20-minute sampling interval becomes difficult to maintain manually.
Are fungi lab experiments safe for school students?
Bread mould and oyster mushroom cultivation experiments carry minimal risk when handled with gloves and basic hygiene. Sordaria and yeast experiments require standard microbiology lab precautions including disinfection of work surfaces and disposal of cultures in sealed bags.
What supplies do I need for a mushroom cultivation experiment?
You need grain spawn, a pasteurised substrate such as straw or coffee grounds, a clean bucket with drilled holes, and a spray bottle for humidity management. Total material costs typically stay under £10 for a single bucket tower project.