Growing mushrooms at home requires following a precise sequence of steps, each with specific environmental conditions and timing. At SporeBuddies, we’ve refined this process through thousands of successful UK grows, identifying the exact points where beginners struggle and how to avoid them. This complete step-by-step guide covers every stage from preparing your workspace through harvesting multiple flushes, with troubleshooting advice for each phase.
Understanding the cultivation process before you start prevents costly mistakes and wasted supplies. Most failed grows happen because growers skip preparation steps or misunderstand the environmental requirements at each stage.
Quick Answer
Mushroom cultivation follows six stages: workspace preparation (sterile environment setup), inoculation (introducing spores to substrate), colonisation (mycelium growth at 21-27°C for 2-4 weeks), fruiting conditions (lowering temperature, increasing fresh air exchange and humidity to 85-95%), harvesting (picking before spores drop), and post-harvest handling (drying or refrigeration within 6 hours). Beginners should start with all-in-one grow kits or inject-and-forget bags which simplify the first four stages significantly. Success depends on maintaining sterile technique during inoculation and stable environmental conditions throughout colonisation.
Why This Matters
Each cultivation stage has a narrow window for optimal conditions. Temperature too high during colonisation causes bacterial contamination. Humidity too low during fruiting produces aborted pins. Understanding why each step matters prevents random troubleshooting and helps you diagnose problems accurately when they occur.
Stage 1: Workspace Preparation and Equipment Setup
Before touching any cultivation supplies, establish a clean workspace and gather all necessary equipment. Contamination prevention begins before you open any sterile packaging.
Essential Equipment Checklist
For all growers:
- Isopropyl alcohol (70%) in spray bottle
- Nitrile gloves (powder-free)
- Clean workspace with minimal air movement
- Room thermometer and hygrometer
- Grow kit or substrate system appropriate to your experience level
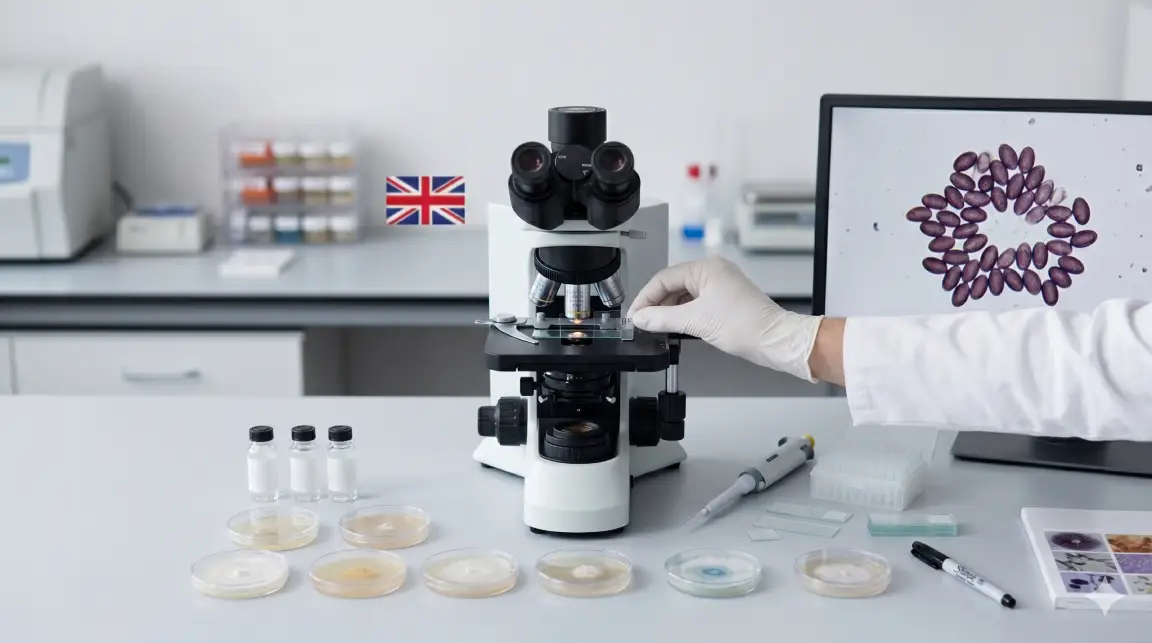
- Spore syringe for microscopy research (legal gourmet species only in UK)
For intermediate/advanced growers:
- Heat mat or incubator for temperature control
- Monotub system for larger grows
- Spray bottle for misting during fruiting
- Bulk substrate if building custom systems
Workspace Sterilisation Process
Clean your work surface thoroughly with standard household cleaner, then spray the entire area with 70% isopropyl alcohol. Wipe down with paper towels, allowing alcohol to evaporate naturally (30-60 seconds).
Repeat this process for:
- Work surface (table or countertop)
- Any tools touching the substrate
- Outside of sealed grow bags or kits
- Your gloved hands before and during work
Pro Tip: Work in a bathroom 30 minutes after a hot shower. The humidity pulls airborne contaminants down, creating one of the cleanest home environments possible without expensive filtration equipment.
Stage 2: Inoculation (Introducing Spores to Substrate)
Inoculation is the highest-risk stage for contamination. Once you break sterile seals on substrate or spore syringes, the clock starts on potential contamination exposure.
Inoculation Steps for Grow Bags
Before starting:
- Wash hands thoroughly with antibacterial soap
- Put on clean nitrile gloves
- Spray gloves with isopropyl alcohol
- Wipe down the injection port on your grow bag with alcohol-soaked paper towel
Inoculation process:
- Shake your spore syringe vigorously for 30 seconds to distribute spores evenly
- Remove needle cap and wipe needle with alcohol-soaked paper towel
- Insert needle through self-healing injection port at a 45-degree angle
- Inject 2-4ml of spore solution (for 1-2lb bags) or 4-6ml (for 4-6lb bags)
- Withdraw needle slowly whilst maintaining pressure on injection port
- Wipe injection site with fresh alcohol-soaked paper towel
Critical rule: Never flame-sterilise needles when using plastic grow bags. The heat weakens the plastic and creates contamination entry points. SporeBuddies supplies pre-sterilised needles specifically for this reason.
Common Inoculation Mistakes
Mistake: Using too much spore solution, thinking more is better.
Why it fails: Excess moisture creates pooling inside bags, which drowns mycelium and encourages bacterial contamination.
Fix: Follow the recommended volumes exactly. If using SporeBuddies double-density spore syringes, you can use 20-30% less solution than standard syringes whilst achieving the same colonisation speed.
Stage 3: Colonisation (Mycelium Growth Phase)
After inoculation, mycelium spreads through the substrate, converting it from loose grain or coco coir into a solid white mass. This stage requires patience and stable conditions but minimal intervention.
Optimal Colonisation Environment
Temperature: 21-27°C (ideal range is 24-26°C)
Humidity: Not critical at this stage (sealed bags maintain their own humidity)
Light: Complete darkness or low ambient light
Fresh air exchange: None needed (bags have filter patches for gas exchange)
Duration: 12-14 days for 1lb bags, 21-28 days for 4-6lb bags, 28-35 days for monotub systems
What Healthy Colonisation Looks Like
Days 1-3: No visible changes. Spores are germinating but growth is microscopic.
Days 4-7: White fuzzy patches appear around injection points. This is young mycelium beginning to spread.
Days 8-14: White mycelium spreads rapidly, covering 50-80% of visible substrate. Growth accelerates as the network expands.
Days 15-21: Substrate becomes completely white and consolidates into a firm block. Ready for fruiting.
Temperature Control for UK Growers
UK homes regularly drop to 14-18°C during winter, significantly slowing colonisation. Without supplemental heat, winter grows take 2-3x longer and face higher contamination risk.
Solution: Place bags on a heat mat or inside a GrowBuddie incubator. These maintain steady 24-26°C regardless of ambient temperature.
For budget-conscious growers, an airing cupboard with the boiler often provides consistent warmth without additional equipment.
Recognising Contamination During Colonisation
Green mould (Trichoderma): Bright green or blue-green patches, often appearing fuzzy. Appears suddenly and spreads rapidly. Unrecoverable. Dispose of contaminated bags immediately.
Black mould (Aspergillus): Black spots or patches with powdery texture. Toxic when disturbed. Do not open bags with black mould indoors.
Bacterial contamination: Sour or rotten smell, slimy texture, grey or yellow discolouration. Often caused by excess moisture or inadequate sterilisation.
Cobweb mould: Grey, wispy growth that spreads very quickly (visible changes within 24 hours). Distinct from white mycelium by colour and growth pattern.
Healthy mycelium is pure white, rope-like, and has a pleasant earthy or mushroom smell (not sour or chemical).
Pro Tip: If contamination appears during colonisation, take a photo and contact SporeBuddies support before disposing of the bag. Pre-contamination (sterilisation failure) qualifies for replacement under our contamination guarantee. Post-inoculation contamination indicates technique issues we can help you fix for the next attempt.
Stage 4: Initiating Fruiting Conditions
Once substrate is fully colonised, you trigger mushroom formation by changing environmental conditions. This signals the mycelium that it’s time to reproduce.
Fruiting Trigger Checklist
Temperature drop: Lower from 24-26°C (colonisation) to 18-21°C (fruiting)
Fresh air exchange: Increase significantly (open bags or increase monotub ventilation)
Humidity increase: Raise to 85-95% relative humidity
Light introduction: 12 hours indirect light per day (normal room light is sufficient)
Evaporation: Surface moisture evaporating is the primary fruiting trigger
How to Initiate Fruiting with Different Systems
Inject-and-forget bags:
- Confirm complete colonisation (100% white coverage, no bare substrate visible)
- Move bag to fruiting location (18-21°C room with natural light)
- Cut small X pattern in bag over substrate surface using sterilised scissors
- Mist cut opening 2-3 times daily with clean water
- Pins (baby mushrooms) appear within 5-10 days
All-in-one bags:
- Fully colonised bags often fruit inside the sealed bag naturally
- Once pins form, cut bag open completely to allow mushroom expansion
- Place opened bag in fruiting chamber or humidity tent
- Mist 3-4 times daily, maintaining visible water droplets on substrate surface
Monotub systems:
- Introduce fresh air exchange by opening lid crack or activating fan timers
- Mist substrate surface until water droplets form
- Fan gently with lid 2-3 times daily to promote evaporation
- Maintain visible condensation on tub walls
Read our detailed monotub kit guide for species-specific fruiting parameters.
Stage 5: Pin Formation and Mushroom Development
Pins are tiny mushroom primordia that form when fruiting conditions are correct. This stage requires constant environmental monitoring and frequent misting.
Optimal Fruiting Environment
Temperature: 18-21°C (species-dependent, some prefer 16-18°C)
Humidity: 85-95% (visible water droplets on substrate and chamber walls)
Fresh air exchange: 4-6 times per hour (monotubs) or frequent fanning (bags)
Light: 12 hours indirect daylight or equivalent LED
Misting frequency: 3-5 times daily, more in dry conditions
Pin to Mature Mushroom Timeline
Days 1-3: Pins form as tiny white bumps across substrate surface. Hundreds may appear simultaneously.
Days 4-7: Pins develop into recognisable mushroom shapes. Caps begin to separate from stems.
Days 8-12: Rapid growth phase. Mushrooms double in size daily. Caps expand and flatten.
Days 12-14: Approaching maturity. Veil (thin membrane under cap) begins stretching. Harvest window opens.
Common Fruiting Problems and Solutions
Problem: Pins form but abort (stop growing and turn dark).
Cause: Insufficient humidity or fresh air exchange. Pins dry out before they can mature.
Solution: Increase misting frequency and ensure proper ventilation. Aborted pins are harmless but indicate environmental stress.
Problem: Mushrooms grow tall and thin with tiny caps (“leggy growth”).
Cause: Insufficient fresh air exchange. High CO2 concentration signals the mushrooms to grow upward seeking oxygen.
Solution: Increase ventilation frequency. For bags, fan opening 3-4 times daily. For monotubs, increase FAE holes or fan duration.
Problem: Few or no pins despite fully colonised substrate.
Cause: Insufficient fruiting triggers. Temperature, humidity, or light conditions not meeting requirements.
Solution: Verify temperature dropped from colonisation range. Ensure surface stays moist with frequent misting. Introduce 12-hour light cycle if growing in complete darkness.
Stage 6: Harvesting and Post-Harvest Handling
Harvest timing significantly impacts yield, potency (for medicinal species), and spore mess. There’s a 12-24 hour window where mushrooms are at peak maturity.
When to Harvest
Optimal harvest point: Just before or immediately after veil breaks (thin membrane connecting cap edge to stem tears).
Visual indicators:
- Veil visibly stretched and beginning to tear
- Cap still slightly curved (not completely flat)
- Gills visible but not darkened with spores
- Stem firm and white throughout
Too early: Reduced yield. Mushrooms harvested before veil breaks have less mass.
Too late: Spore drop creates black/purple dust covering substrate. Messy but not harmful. Spores inhibit subsequent flush formation if heavy.
Harvesting Technique
For cluster grows: Twist entire cluster at the base with gentle rotation. Avoid pulling straight up, which damages substrate surface.
For individual mushrooms: Grasp stem as close to substrate as possible. Twist and pull gently in one motion.
For monotub grows: Use clean, sharp knife or scissors to cut stems at substrate level if twisting risks damaging the block.
Remove all mushroom tissue from substrate after harvest. Leftover stems rot and attract contamination.
Post-Harvest Handling
Immediate use (within 6 hours): Fresh mushrooms stored in paper bags in refrigerator stay fresh for 5-7 days. Never use plastic bags. They trap moisture and accelerate decomposition.
Long-term storage: Dehydrate mushrooms at 50-60°C until cracker-dry (no flexibility when bent). Store in airtight containers with desiccant packets. Properly dried mushrooms last 12+ months.
For detailed preservation techniques, see our mushroom preparation guide.
Preparing for Second Flush
After harvesting first flush, substrate needs rehydration and rest before producing again.
Rehydration process:
- Remove all remaining mushroom tissue from substrate
- Mist substrate heavily or soak entire block in clean water for 6-12 hours
- Drain excess water completely
- Return to fruiting conditions
- Second flush appears 7-14 days later
Most grow bags produce 3-5 flushes with decreasing yields. First flush typically accounts for 60-70% of total kit yield.
Common Mistakes Across All Stages
Mistake 1: Impatient Intervention
The problem: Opening bags early to “check progress,” moving substrate to different locations repeatedly, or adjusting temperature/humidity constantly.
Why it fails: Each intervention introduces contamination risk and environmental stress. Mycelium performs best with stable, undisturbed conditions.
The fix: Follow the timeline for your kit size. Resist the urge to check daily. Most growth happens invisibly before becoming visible.
Mistake 2: Over-Misting During Fruiting
The problem: Soaking substrate surface until water pools, thinking more moisture means faster growth.
Why it fails: Standing water drowns developing pins and creates bacterial contamination. Mushrooms need surface moisture for evaporation, not waterlogging.
The fix: Mist until fine droplets form on substrate surface. If water pools, you’ve over-misted. Aim for “dewy” not “wet.”
Mistake 3: Inadequate Fresh Air Exchange
The problem: Keeping bags completely sealed during fruiting or never fanning monotubs, assuming humidity maintenance requires sealed environments.
Why it fails: Mushrooms breathe. They need oxygen and release CO2. Without fresh air exchange, CO2 accumulates, producing deformed mushrooms or no fruiting at all.
The fix: After pins form, increase air exchange significantly. For bags, cut larger openings. For monotubs, fan 3-4 times daily or use automated ventilation.
Mistake 4: Mixing Species-Specific Requirements
The problem: Applying Lion’s Mane growing parameters to oyster mushrooms, or using tropical species temperature ranges for temperate species.
Why it fails: Each species evolved in specific environments. Their fruiting triggers reflect their native conditions. One-size-fits-all approaches produce inconsistent results.
The fix: Research species-specific requirements before starting. Our Lion’s Mane growing guide and Cordyceps cultivation guide provide detailed parameters for these popular species.
Mistake 5: Ignoring Contamination Warning Signs
The problem: Continuing to fruit obviously contaminated substrate, hoping mushrooms will grow anyway.
Why it fails: Contamination outcompetes mushroom mycelium. It never reverses. Contaminated substrate produces toxic mould, not mushrooms.
The fix: Learn to recognise contamination early. Remove contaminated bags immediately. Review our contamination identification guide for visual reference photos.
Frequently Asked Questions
How long does it take to grow mushrooms from start to harvest?
From inoculation to first harvest takes 4-8 weeks depending on kit size and species. Small 1lb inject-and-forget bags fruit in 4-5 weeks. Larger 6lb all-in-one bags take 6-8 weeks. Monotub systems typically require 8-10 weeks for first harvest. Subsequent flushes appear every 7-14 days after rehydration.
Do I need special equipment to grow mushrooms at home?
Basic cultivation requires only a grow kit, spore syringe, isopropyl alcohol, and spray bottle. UK growers typically need supplemental heating (heat mat or incubator) for consistent winter results. Advanced setups benefit from monotubs, humidity controllers, and environmental monitoring tools, but these aren’t necessary for first grows using pre-sterilised grow bags.
What temperature should I keep my mushroom grow kit?
Colonisation phase requires 21-27°C (24-26°C optimal). Fruiting phase requires 18-21°C for most gourmet species. Some species like Lion’s Mane prefer cooler fruiting (16-18°C). Temperature stability matters more than hitting exact numbers. Fluctuations above 2-3°C daily stress mycelium and increase contamination risk.
Why did my mushrooms grow tall and skinny with small caps?
Tall, thin mushrooms with underdeveloped caps indicate insufficient fresh air exchange. High CO2 concentration signals mushrooms to grow vertically seeking oxygen. Increase fanning frequency to 4-6 times daily or cut larger ventilation holes in grow bags. This problem is completely reversible for the next flush.
Can I reuse substrate after harvesting all flushes?
Technically possible but not recommended for beginners. Reusing bags requires re-sterilisation (pressure cooking), new substrate additions, and significantly increases contamination risk. Most UK growers find it more cost-effective to buy fresh sterilised grain bags rather than attempting to reuse exhausted substrate.
Is mushroom cultivation legal in the UK?
Cultivation of gourmet and medicinal mushroom species is completely legal in the UK. Possession of psilocybin mushroom spores for microscopy research is legal. Cultivation of psilocybin-containing mushrooms is illegal under the Misuse of Drugs Act 1971. SporeBuddies supplies support legal mycology projects and gourmet mushroom cultivation only. Review our UK mushroom cultivation legality guide before starting any cultivation project.
Related Guides
Continue developing your cultivation skills with these specialised resources:
- Mushroom Grow Kit Buyer’s Guide
- How to Use Inject & Forget Mushroom Grow Bags
- Contamination in Cultivation: Prevention and Identification
- Bulk Substrate Recipe for Mushrooms
- Field Capacity for Mushroom Substrate
- Mistakes to Avoid When Growing Mushrooms in the UK
Ready to Start Your First Cultivation?
SporeBuddies provides everything UK growers need for successful mushroom cultivation, from beginner-friendly grow kits to advanced cultivation supplies. Every product includes detailed instructions, and our support team offers personalised troubleshooting assistance.
Browse Grow Kits for Beginners | Shop All Cultivation Supplies | View Spore Selection