Contamination is the single most common reason a UK home mushroom grow fails, and if you have watched a promising jar of grain turn green or pink overnight, you already know how disheartening it feels. Sterilisation is your most powerful tool against this problem, yet it is also the step most growers underestimate or rush. This guide walks you through everything, from understanding the science behind it to following a tested, step-by-step workflow that protects your substrate, your time, and your results.
Table of Contents
- Why sterilisation matters in mushroom growing
- What you’ll need: essential tools and materials
- Step-by-step sterilisation workflow
- Common mistakes and troubleshooting
- What to expect: checking success and next steps
- A fresh take: why home mushroom sterilisation is an art, not a checklist
- Ready to grow? Find reliable spores, equipment and support
- Frequently asked questions
Key Takeaways
| Point | Details |
|---|---|
| Sterilisation prevents crop loss | Consistent sterilisation stops contaminants before they start and protects your mushroom yields. |
| Right tools matter | A pressure cooker and proper workflow are essential for reliable results on grain and enriched substrates. |
| Follow clear workflow steps | Careful and patient execution of each step prevents common mistakes and boosts harvest reliability. |
| Mistakes can be fixed | Most problems have clear solutions—troubleshooting early saves time and resources. |
Why sterilisation matters in mushroom growing
Now that we have highlighted the problem, let us get into why sterilisation is so crucial before you begin any practical steps.
Many growers use the words “sterilisation” and “pasteurisation” interchangeably, but they refer to entirely different processes with very different outcomes. Pasteurisation heats your substrate to around 65 to 82 degrees Celsius, which reduces the population of competing organisms without eliminating every living cell. Sterilisation, by contrast, reaches temperatures above 121 degrees Celsius under pressure, destroying bacteria, fungal spores, and endospores completely. That distinction matters enormously depending on what you are growing and on what substrate.
High-nutrient substrates such as rye grain, brown rice, or supplemented sawdust are rich in proteins, carbohydrates, and moisture. These are conditions that bacteria and fast-growing moulds absolutely thrive in. When you use these substrates, sterilisation is preferred over pasteurisation to prevent bacterial and mould takeover, though it does require strict sterile handling afterwards. Pasteurisation remains simpler for beginners working with oyster mushrooms on straw, where beneficial microbes and natural competition offer some buffer. But for grain spawn or any enriched mix, cutting corners here is almost always the reason for failure.
Here is a quick summary of when each method applies:
- Sterilisation: Grain spawn, brown rice flour and vermiculite (BRF/verm), supplemented sawdust, any high-nutrient substrate
- Pasteurisation: Straw, cardboard, wood chips, coffee grounds, low-nutrient bulk substrates
- Neither is optional: Both methods are active choices; doing nothing is not a strategy
Understanding contamination in cultivation is really the foundation for understanding why sterilisation cannot be skipped. Without it, every promising jar is simply an incubator waiting for the wrong organism to move in first.
“If sterilisation is skipped or done poorly on high-nutrient substrates, contamination is not a possibility — it is a near certainty.”
What you’ll need: essential tools and materials
With the importance of rigorous sterilisation clear, let us look at exactly what you will need to get the job done right at home.
Your equipment list does not need to be elaborate, but every item has a specific job. Substituting tools or improvising with unsuitable alternatives is one of the most common reasons home grows fail even before inoculation begins. Here is what the core kit looks like:
| Equipment | Purpose | Notes |
|---|---|---|
| Pressure cooker (15 PSI minimum) | Achieves true sterilisation temperature | 23-litre capacity recommended for batches |
| Canning rack or trivet | Elevates jars off the base | Prevents uneven heating and jar cracking |
| Wide-mouth mason jars or polypropylene bags | Holds substrate during sterilisation | Choose filter patch bags for grain spawn |
| Digital kitchen scale | Accurate substrate measurement | Ratios matter for moisture content |
| Measuring jug | Correct water amounts in cooker | Prevents dry burn or flooding |
| Kitchen timer | Accurate sterilisation duration | Never estimate this step |
| Tin foil or polyfill filter discs | Covers jar lids during sterilisation | Prevents water and contaminant ingress |
A well-structured mycology equipment setup does not have to cost a great deal, but investing in the right pressure cooker is not somewhere to economise. Cheap units often fail to hold a steady 15 PSI, which is the critical threshold for killing bacterial endospores.
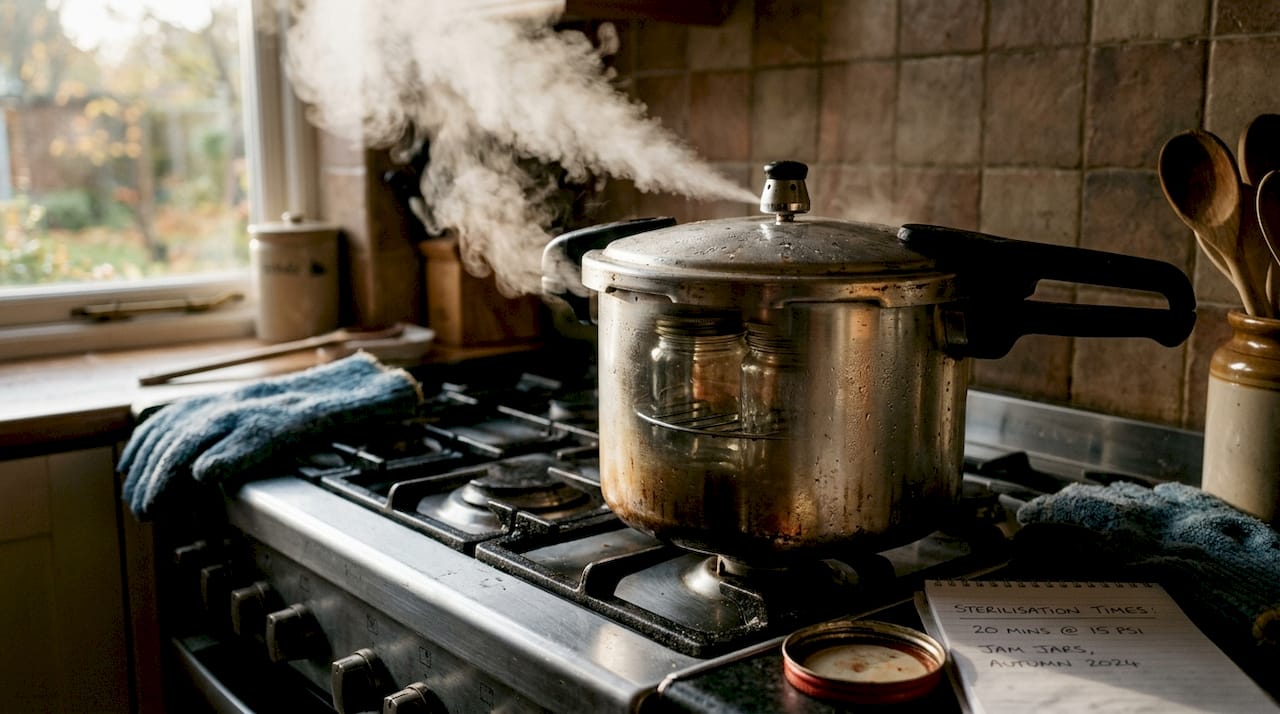
The pressure cooker workflow starts with adding 2 to 3 inches of water, loading jars or bags on a rack, venting steam for 10 minutes, and then bringing the unit up to 15 PSI. The rack might seem like a minor detail, but without it, jars sitting directly on the metal base crack from concentrated heat, and the substrate at the bottom processes unevenly.
Pro Tip: Keep a dedicated set of tools purely for mycology. Using the same pressure cooker for cooking food introduces organic residues and unpredictable bacterial loads. A separate unit keeps your sterilisation environment consistent and dramatically reduces background contamination rates.
If you are new to the whole process and want to see what a basic setup looks like in practice, the mushroom kit FAQs offer a helpful overview of the kind of equipment that comes with beginner kits.
Step-by-step sterilisation workflow
Once you have all your supplies ready, follow this tested workflow for consistent, sterile results.
The sequence matters as much as the individual steps. Missing or reordering any stage introduces risk.
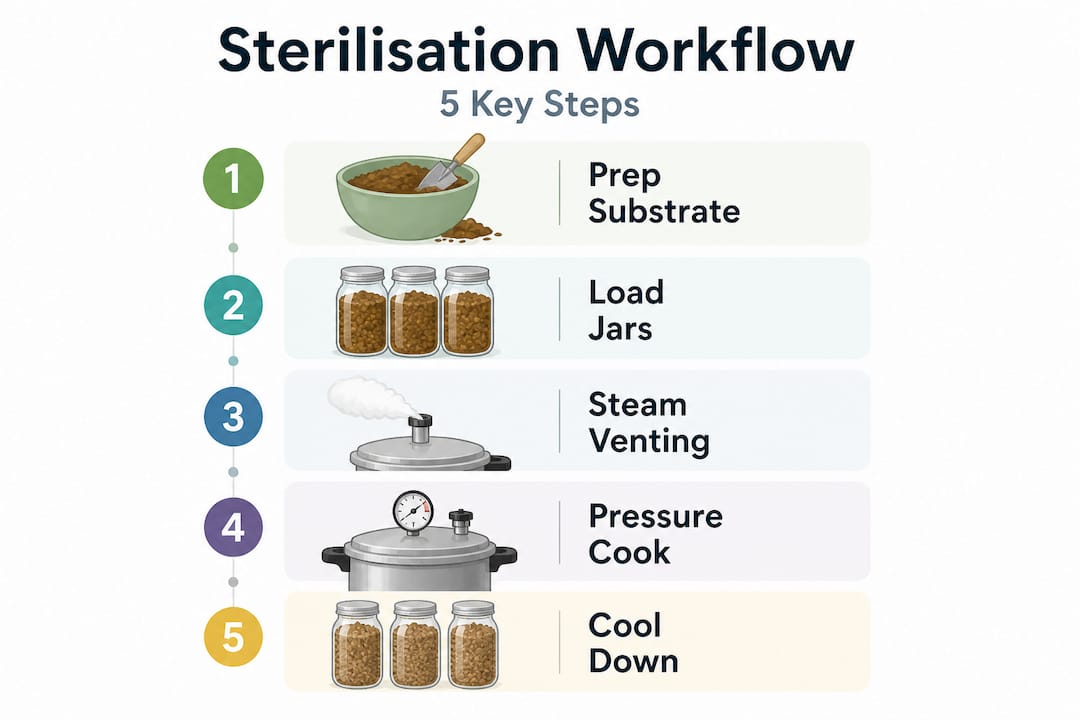
- Prepare your substrate. Mix your grain or enriched substrate to the correct moisture content. For rye grain, this typically means simmering until slightly soft, draining, and allowing surface moisture to dry. Squeeze a handful: it should hold its shape but not release water.
- Fill your jars or bags. Load substrate to roughly two-thirds full. Overfilling slows heat penetration; underfilling wastes space and resources. Leave enough headspace for mycelium to colonise later.
- Cover and seal. Place polyfill-stuffed lids on jars or fold filter patch bags correctly. The cover keeps moisture from pooling during pressure cooking while still allowing some gas exchange.
- Load the pressure cooker. Place a rack or folded towel at the base, then load jars or bags. Do not pack them in so tightly that steam cannot circulate between containers.
- Add water and begin heating. Pour 2 to 3 inches of water into the cooker base. Heat with the lid on but the vent open. Allow steam to vent freely for at least 10 minutes to purge air pockets, which would otherwise reduce effective temperature.
- Pressurise and time accurately. Close the vent and allow pressure to build to 15 PSI. At this point, begin your timer. For pint-sized grain jars, pressure cook for 90 minutes; for quart jars or supplemented sawdust, run for 120 to 150 minutes.
- Natural cool-down. Turn off the heat and leave the cooker entirely undisturbed. Do not remove the weight, do not open the lid, do not rush. Natural cooling over 12 to 24 hours is not optional.
- Transfer to clean environment. Once fully cooled and pressure has normalised, move jars or bags to your cleanest available workspace. A still air box or flow hood is ideal here.
“Patience at the cool-down stage is non-negotiable. Releasing pressure early forces temperature differentials that can pull outside air past lids and directly into your substrate.”
Here is a quick comparison of sterilisation times by substrate type:
| Substrate type | Container size | Time at 15 PSI |
|---|---|---|
| Rye or wheat grain | Pint jar | 90 minutes |
| Rye or wheat grain | Quart jar | 120 minutes |
| Supplemented sawdust | Polypropylene bag | 120 to 150 minutes |
| Brown rice and vermiculite | Half-pint jar | 60 to 90 minutes |
For a comparison with alternative methods, our guide on pasteurisation steps explains where lower-temperature processing fits in your workflow.
Pro Tip: If you are running multiple batches, keep a written log of cooker pressure readings, steam vent duration, and processing time for every single run. Growers who track this data spot inconsistencies in their equipment far earlier than those who rely on memory.
Common mistakes and troubleshooting
Even with good technique, things can go wrong. Here is how to recognise mistakes early and what to do next.
Problems after sterilisation almost always trace back to one of a small number of root causes. Learning to diagnose these quickly means you waste fewer jars and build better habits.
Common signs of failed sterilisation or contamination:
- Green, blue, or black patches on the substrate surface indicate trichoderma or aspergillus mould, both highly aggressive and typically present when sterilisation was incomplete or handling was not sterile
- Pink or orange colouration often points to bacterial contamination, which thrives especially when moisture content was too high or processing time was too short
- Sour or yeasty smell when opening a jar is a reliable sign of bacterial activity, even if the substrate appears visually clean
- Wet grain that clumps heavily suggests excess moisture before sterilisation, creating a breeding ground for anaerobic bacteria during processing
- Mould appearing within 24 to 48 hours of inoculation is usually a sterile technique issue rather than a sterilisation failure, and the two are worth distinguishing clearly
The phrase “sterilisation requires strict handling” is worth taking seriously. You can run a perfect pressure cycle and still introduce contamination the moment you handle a jar in a non-sterile environment. This is why proper sterile technique after sterilisation is equally important.
Wet jars are one of the most common and fixable problems. They usually result from condensation during cooling, either because jars were moved before pressure fully equalised, or because the cooker was opened too soon. The solution is to let jars cool completely inside the sealed pressure cooker and to ensure your substrate was not over-moistened before loading.
Pro Tip: Before inoculating any jar, always inspect it under good light and give it a gentle sniff through the filter. If anything looks or smells unusual, discard it without hesitation. A contaminated jar inoculated is not a jar that might recover; it is a contamination source that will spread.
What to expect: checking success and next steps
After running the process, verifying your results is simple. Here is what to look for before moving ahead.
After your jars or bags have completed the full cool-down period, your inspection process should follow a consistent routine every single time. Developing this habit early saves a great deal of time and substrate.
Signs of successful sterilisation and safe-to-use containers:
- Light, even condensation inside the jar walls (this is normal and expected)
- No visible discolouration, patches, or unusual growth on the substrate surface
- A neutral, earthy smell when sniffed through the polyfill or filter patch
- Grain that moves freely when the jar is tilted gently, rather than clumping in a solid mass
- Filter patch or polyfill feels dry to the touch on the outside
Once you confirm all of these, move jars to your inoculation space as soon as reasonably possible. Every additional hour in a non-sterile environment is an extra opportunity for airborne spores to settle. This is also the moment where your sterile technique for injecting or transferring needs to be just as solid as your sterilisation process.
Natural cooling for 12 to 24 hours is not just about waiting for a safe temperature to handle the jars. The pressure differential that occurs as the cooker cools creates a slight inward pull on lids and seals. If the pressure drops too quickly, that force can draw in ambient air around imperfect seals, introducing contaminants even into an otherwise perfectly processed batch.
Pro Tip: Store your cooled, uninoculated jars in a clean space for 48 to 72 hours before inoculation if your schedule requires a delay. During this window, any contamination that survived will often show visible signs, saving you from inoculating a compromised jar.
Building good workflow habits also means thinking beyond a single grow. Keeping notes on substrate recipes, moisture ratios, and outcomes helps you refine your approach over time. For more advanced techniques on substrate preparation, our resource on optimising substrate recipes is worth reading through once you are comfortable with basic sterilisation.
A fresh take: why home mushroom sterilisation is an art, not a checklist
Most new growers read a sterilisation guide, follow the steps reasonably well, and then get frustrated when results are inconsistent. The honest answer to why this happens is that sterilisation is not purely a mechanical process. It is a practice, and like any practice it improves with deliberate attention.
What the guides do not tell you is that your environment matters in ways that a numbered list cannot fully capture. The ambient temperature in your kitchen affects how quickly your pressure cooker heats up and how evenly it distributes steam. The mineral content of your local tap water can influence sediment build-up in the cooker, which affects consistent heating over time. Even the size and shape of jars you pack in together changes airflow inside the chamber.
This is not an argument for abandoning process. The steps outlined above are sound. But the growers who achieve reliable results batch after batch are not the ones who follow a checklist more rigidly. They are the ones who observe closely, notice small deviations, and adapt. They notice when grain takes longer to soak than usual. They notice when their cooker takes two minutes longer to reach pressure on a cold morning. These observations become intuition over time.
There is also the psychological side of patience. Rushing any stage feels harmless in the moment but compounds into failure. Opening the cooker ten minutes early, skipping the sniff test, inoculating in a slightly draughty corner of the room, these are not catastrophic decisions individually, but they represent the habit of cutting corners. That habit is what separates growers who succeed consistently from those who blame contamination on bad luck.
The good news is that this kind of skill genuinely builds with every grow. Even failed batches teach you something specific if you log what happened and look at it honestly. Starting with well-made equipment and reliable substrates also removes variables, which is why a quality mushroom growing kit is such a useful reference point when you are still calibrating your own setup.
Ready to grow? Find reliable spores, equipment and support
With the essential workflow and mindset in place, you are ready to put these skills into practice. At Spore Buddies, we supply everything UK home growers need at every stage of the cultivation process. Browse our range of spore syringes UK for reliable, clearly labelled spore material suited to research and home growing, or explore our full selection of mycology equipment including pressure cookers, bags, and sterilisation accessories. Every product we stock is chosen with consistency and contamination prevention in mind, and our blog continues to build out guides for every step of the process as your skills grow.
Frequently asked questions
Do I really need a pressure cooker, or will a standard pot work?
A pressure cooker is the only reliable way to reach 15 PSI and achieve the temperatures needed for true sterilisation; a standard pot simply cannot get hot enough to kill bacterial endospores in grain or enriched substrates.
How do I tell if my jars or bags are properly sterilised before I use them?
Allow jars to cool for 12 to 24 hours inside the sealed cooker, then inspect for any discolouration, unusual smell, or clumping that might indicate contamination before you inoculate.
What’s the main difference between sterilisation and pasteurisation for substrates?
Sterilisation kills all life and is essential for high-nutrient substrates such as grain; pasteurisation only reduces competing organisms and is sufficient for oyster mushrooms cultivated on low-nutrient materials like straw.
Why is it important to let jars cool naturally instead of opening the cooker quickly?
Quick pressure release creates a vacuum that can draw contaminants past jar seals; natural cooling over 12 to 24 hours allows pressure to equalise safely without risking your sterile substrate.